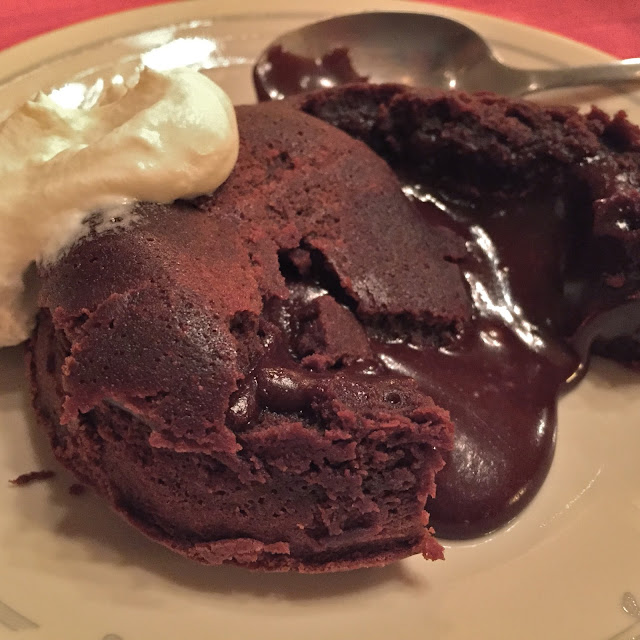
Well, I think I've rubbed off a bit on my brother, Arthur. He is quickly becoming the King of Desserts in our family. Want to know how to make a gourmet s'more? Macarons? Lemon meringue pie? Ask him. He'll try anything if he's got the tools. I personally think he should go to a baking school and open up the best damn bakery in Berkeley... While we were home together, he made the best lava cake I have ever eaten in my entire life. I tried to replicate it when I got home and failed. I think I cut the recipe in half and forgot to do something in relation to that. Anyway. His lava cakes? OMG.
One dessert he had recently made with his friend, Luna, was Baked Alaska, and he was dying to make it for us. Nobody was about to say 'no,' so one night he whipped together a batch and recruited me to help. I had never even eaten it before, so I was pretty excited to see what this famous dessert was all about. And, wow, was I shocked at how simple it was! It is made with just three things: pound or sponge cake and ice cream (both of which we bought) and meringue (egg whites beaten with sugar and a wee bit of cream of tartar).
Here are some photos to show a bit of the process. I think it is simple enough that some of you might want to try it for your sweetums (or your own awesome self!) for Valentine's Day.
First, the pound cake is cut into rounds using a biscuit cutter (or a water glass, if you don't have a cutter) and laid out onto a sheet pan:
Next, the ice cream is packed into a standard muffin tin lined with foil and refrozen. (I think you could probably pack the tin without the foil and just flip the ice cream mounds out onto a cookie sheet after laying a hot towel across the bottom to loosen them.) When the ice cream was hardened, he removed the ice cream discs, placed them on top of the pound cake rounds, then topped each mound of ice cream with another piece of pound cake:
These stacks then got stuck in the freezer again. While they were freezing, he made the meringue (I believe it was an Italian meringue, which comes out more marshmallow-y and yummy than the kind of meringue you make for a lemon meringue pie. Sarah over at CraftyBaking shares some good info about meringue here):
(Please forgive my mother's horrid mixer. I almost took my KitchenAid with me and then didn't because it weighs a ton. I then got mad at myself that I didn't... No offense, Mom. ;) I think the meringue would have come out stiffer if we had had my KA. A tip from me to you, dear reader: a KitchenAid mixer is SO WORTH EVERY PENNY. There is nothing like it, I promise you. I just have the basic Artisan model. I don't know what I ever did without it. Check out Reviews.com's post on how KitchenAid stands up to other mixers, as well as their post on how the different KitchenAid models stand up to each other. I think you will find the information incredibly detailed and useful.)
Anyway. After the meringue was finished, Arthur and I had fun (clearly) coating the frozen cake and ice cream stacks with big, swoopy plops.
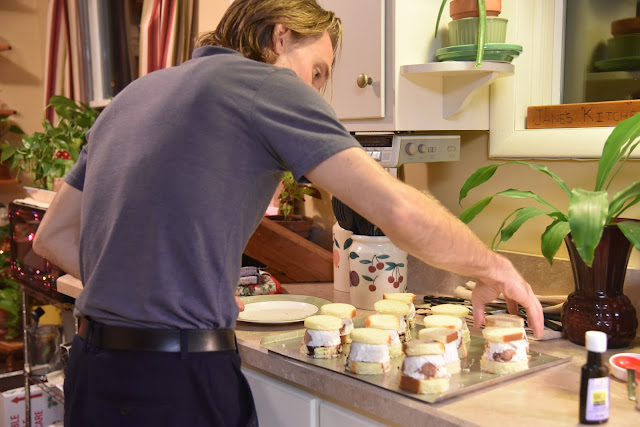
If I remember correctly, Arthur froze these again until after dinner. He then broiled the whole sheet on high for a couple minutes to toast the meringue. Here's what they looked like as he was plating them:
A gorgeous mess, yes? Again, I think they would have held their shape better if we had used a better mixer and gotten that meringue a little bit stiffer. But you should have tasted them. Holy cow! We even froze the leftovers and ate them the next night, and they still were delish!
So—THAT is Baked Alaska! It's pretty damn easy! I had no idea. And impressive. It takes some time, but nothing is difficult.
I'm sorry I don't have a recipe, but if I come across a good one, I'll come back and post it here. Unless Arthur shoots me his...
And if you make some, post some pics in the comments below! I would love to see what you did!


No comments :
Post a Comment
Let's all learn together! Tell us your thoughts or about your own experience: