Friday, December 16, 2016

The Spritz Cookie: A Marvel of Speed-Baking

Yesterday I decided that we needed more Christmas cookies.

[laughter and applause]

No, but really. I was having memories of all the dear, little, old ladies at my church who used to make this amazing smorgasbord of cookies unlike anything I'd ever seen in my life. The cookies were for a gathering after our church's annual Christmas talent show, a show where Mrs. Wilson always read the "12 Days of Christmas" love-letter series (HYSTERICAL; it was largely her reading of them that made them so). I always attempted to pound out a song on the piano, usually becoming so shy that I just went back to my pew and didn't play; and Mr. Hammaker, I think it was, would always play a song or two on his harmonica. It was an event that I looked forward to every year as a child, and the cookies—the cookies were a huge part of why. Screw dreams of sugar plums. My little head was full of my old ladies' cookies.

I cannot even begin to recall the names of the creations that covered those tables in my church basement, but I can still envision them: snowy meringues that shattered then dissolved into magical, sweet nothingness in your mouth. Mini wreaths, gooey-yet-crispity, dyed brilliantly green then dotted with cinnamon candies. Buttery sugar cookies with little dollops of ruby jam. Chocolate pinwheels. Tiny logs rolled in nuts. And then there were the spritz cookies.

These little guys were oddly my favorite. Small, unassuming but ADORBS. They were made from a simple butter and sugar dough that was pressed through a disc of a particular design and then baked. Christmas trees. Hearts. Snowflakes. Stars. They were so simple. Naked, without any glitz or glamor. They were dyed some delightfully obnoxious colors, though—a thrill that only kids can understand. I loved them.

Fast forward to about five years ago when I found an old cookie press at Goodwill...

And now fast forward to yesterday, with me digging out the old press, the gel food dye, and the KitchenAid. I was on a mission.

Not only are spritz cookies delish, they are so fast and so easy. Seriously. You can crank out a good five dozen cookies in no time flat. In the middle of my making them, I was inspired to share them with you, so I snapped a few pictures and took a few iPhone videos. Don't laugh. They aren't the best quality; but I think you will get a picture of why they are just so awesome. Need tons of Christmas cookies for school or church? Here you go!

The press itself has changed over time. I now see them in the form of a gun. I don't have that one nor have I ever used one. I'm assuming that it perfectly portions out the dough, which would be nice, but I have to assume that the angle would be quite uncomfortable after a single batch of squeezing out dough.

The old press, as you can (kind-of, not really) see in the picture below, is simply a tube fitted with a pressing plate which is attached to a threaded rod which is attached to a knob. It has a detachable cap that holds an exchangeable design plate. Here I've obviously used the tree plate:

The Spritz Cookie: A Marvel of Speed-Baking

To fill the tube, you remove the cap; "unscrew" the pressing plate so that it backs out of and "opens" the tube; fill the tube with dough; then screw the cap (with the design plate attached) back onto the tube. You give a few twists to the knob to get the plate to start pushing the dough—and you are ready to twist out your cookies.

Here's a picture of the tube filled with dough:


Here I have attached the desired design plate inside the cap (drop it in and twist it to lock it into place) and screwed the cap onto the tube.


Here is a short video showing how I twist the knob to get the dough press started, then how the cookies squeeze out as I turn the knob. I only turn mine about a quarter turn for each cookie.


You can see how easy it is! The cookie sheets are ungreased, so the sticky dough just glues itself to the metal. For the rare time when it does want to lift off and doesn't stick, you can see that I just placed the press back on the sheet, gave another tiny turn of the knob, and it stuck!

Ready for some massive quantities of Christmas baking? The spritz is it! Speed bake away! The recipe is easily found online. I got mine from the old Wisconsin Electric Company Christmas Cooky Cookbook. You can find their 2016 copy as a PDF file here. The Christmas Wreath cookie recipe listed uses a similar base dough that I used; however, I (obviously) did not make or use the pecan filling or the candied cherries, though. I just did plain and simple.


Have a wonderful time in the kitchen, folks, and Merry Christmas to you all!

Tuesday, December 13, 2016

The Ulu Factory's Ulu Knife: The Tiny-Chopping Love of My Life!

It's Christmas season, folks! A lot of you readers have been getting pounded with snow. So far, not out here in Boston. Just a dusting here or there. Still, it's been enough to get one in the Christmas-y mood, and so Chef Reiton and I dug out the old, "secret," family Christmas cookie recipes this weekend and baked up a storm.

The house smelled like browned butter and chocolate as we cranked out batch after batch of fudge ripples, pinwheels, palmiers, peppermint kisses. Chef Reiton's favorite? Pecan dainties.

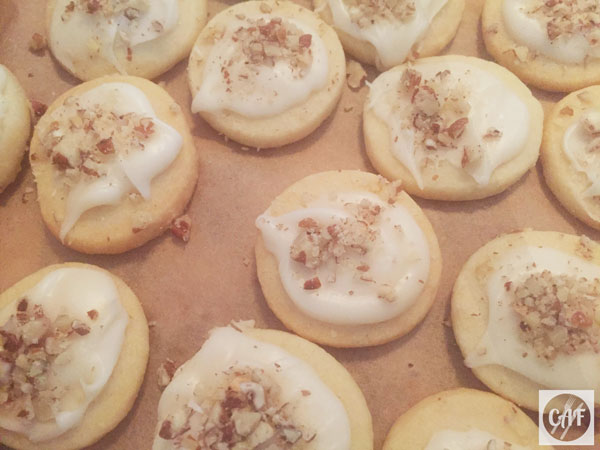
(Insert a moaning sigh HERE)...pecan dainties. I had never even heard of them until Chef Reiton sent me a Christmas cookie tin eight Christmases ago, a token act that definitely caught my attention—and a piece of my heart (okay, and my stomach. My two friends and I ate almost the entire tinful in one sitting...). Nestled among an insane variety of cookie types were these tiny shortbread rounds, perfectly smeared with brown butter icing and sprinkled with a dusting of tinily chopped pecans. They literally melted in my mouth.

Pecan Dainties, the Christmas cookie of your dreams

Now, eight Christmases later, I was standing in our kitchen (happy sigh), preparing the pecans to be sprinkled so daintily atop the brown butter icing Chef Reiton was preparing at the stove.

I have to admit, chopping nuts is NOT something I have ever enjoyed doing. The results are always just so--unsatisfactory. Yes, I have a "chopper" (the hand-powered Pampered Chef contraption), but it is hard to get even chopping sometimes with it. A food processor either blasts nuts to powdery bits or leaves unusable, large chunks. And as for chopping nuts on a cutting board with a chef's knife? You might as well just grab a handful of nuts and throw them across the kitchen. Not much else happens in such an exercise.

As I stood staring at the bag of pecans, determining which undesirable chopping method I preferred, I suddenly thought, "The ulu knife!!!" (Two seconds later I heard Chef Reiton say, "You know, the blade might be good for chopping the pecans..." We tend to do that a LOT.)

So, what the hell are we talking about?

A number of years ago, my mother-in-law traveled to Alaska and returned with a gift that, since, I don't know how I ever lived without in my kitchen. It's called an ulu knife. It is an ancient Alaskan tool, essentially a curved blade with a handle. The Alaskans once used it for everything, from scraping seal hides to cutting meat.

While I have never used mine to scrape hides, I have used it to chop a LOT, especially herbs. Mom Reiton also gave us a bowl that is specially designed to be used with an ulu. It holds your ingredient in place while you rock the blade back and forth over the food, meaning you don't have to touch the herbs or garlic or whatever as you are chopping them (avoiding getting "little green things" all over your hands, as Chef Reiton once said in regards to chopping cilantro).

Now I could use it to avoid shooting nuts across my kitchen! Hallelujah!

I wish you could have seen it; it was a nut-chopping experience that was mind-blowing, truly. Not only did the nuts happily stay in place, but the rocking motion of the blade in the bowl created the ideal ratio of minced nuts to micro-minced nuts, giving the pecan dainties the perfect balance of pecan flavor and toothsome crunch.

The Ulu Factory's ulu knife and chopping board set

Glory be, now my nut-chopping days are forever changed, thanks to The Ulu Factory! If you want to order the set that Mom Reiton got us, click the image below. We have the 7 1/4" bowl with the 6" blade, but they have other sets, too.

The Ulu Factory's bowl and 6" blade set

Can you believe it? Your unhappy nut-shooting days are over! It will be the best $32 purchase you have ever made. Promise! And don't forget Christmas is right around the corner...the ulu set could make a kitchen-changing gift for your favorite person.

Many happy Christmas cookie-baking days to you all!

XOXO,
Rachael

Tuesday, December 6, 2016

The Corpse Reviver #4: A Suze-Q of a Cocktail

It's amusing to me that the food world, like the fashion world, seems to follow trends. If you are at all with the times, rose gold is the color to be wearing, and bourbon is the liquor to be drinking.

I've always been one who says, "Screw the fads!" and goes with what I like, fad or not. (And, therefore, I am not one to trust when it comes to fashion sense. Like, at all.)

But when it comes to cocktails, I do pay attention to what is rising on the trend horizon. And one liqueur that I am starting to see more and more is a delightful, golden concoction called Suze.

Suze is a bitter liqueur made from gentian root. It is highlighter-yellow in color and has been made by the Swiss since 1889. Suze has a sharp, earthy aroma. A sip of this pungent beverage starts sweetly but ends with a dry, tongue-tingling, bitter finish. Meant to be drunk as an apertif (sipped before dinner to stimulate the appetite), it is also used in the crafting of cocktails.

Upon tasting it the first time, Chef Reiton declared, "This reminds me of Campari!" And then I saw the wheels start turning...

What those wheels cranked out was a riff on the Corpse Reviver #3, with Suze replacing the Campari and tequila going in for the brandy—a delightfully bitter but somehow light and refreshing cocktail.

The Corpse Reviver #4: A Suze-Q of a Cocktail by Derrick Reiton

So here she is for you, folks: the Corpse Reviver #4, crafted by Chef Derrick Reiton:

In a cocktail shaker, combine equal parts Suze, Cointreau (or other clear orange-based liqueur), and reposado tequila with a half part freshly squeeze lemon juice (we tend to go larger with 1 ounce of each liqueur and 1/2 ounce of lemon juice, but you can go smaller, if you wish).

Fill the shaker at least halfway with ice, then shake like mad until the outside of the shaker is frosty and your hand is going numb, about 30 seconds. Strain through a fine-mesh strainer into a (preferably chilled) cocktail glass (this is called "double straining"). No garnish needed.

ENJOY.

Related Posts Plugin for WordPress, Blogger...

Visit Me on Pinterest!