Showing posts with label smoked. Show all posts

Saturday, August 17, 2013

The Transubstantiation....of Eggplant: Learning to Coal-Roast

I may get struck down by lighting with that post title, but I cannot think of another way to describe what I just ate.  Like, JUST.  The table isn't even cleared yet.  And I'm so in awe that I cannot help but ignore the dirty dishes on my dining room table, pull out my laptop, and write.  If you knew me, that's a BIG deal.

To reference, once again, the Grilling Issue of Bon Appétit's July 2013 issue: GOD BLESS MELISSA HAMILTON AND CHRISTOPHER HIRSHEIMER.  Their article, "Into the Fire," in which they describe fire-roasting eggplants--it's just changed my life.

This is one of those food experiences where I just want to go on and on and on, etc., etc., etc.  But I'm not going to.  I'm just going to tell you--no, order you--to go witness and partake of this unbelievable transformation of the world's most disgusting vegetable, and you will be a believer of being YOUR OWN PERSONAL CHEF, I promise.

Here is my experience, including recipes (gasp!), of my dinner, this evening, for one--that is me.  Here are the ingredients you will need for ONE PERSON, and then the directions.  And they are mildly adapted--just an FYI.

For the eggplant:
1 small purple eggplant
2 plum tomatoes
2 anchovy fillets, drained of oil and chopped finely
1 small garlic clove, chopped finely
1 tsp. red wine vinegar
2 Tblsp. olive oil
kosher salt to taste
fresh cracked paper to taste
1 tsp. torn cilantro leaves

For a very yummy side dish:
1/2 Tblsp. butter
1 tsp. olive oil
2 ears of sweet corn, kernels sliced from cobs
1 small cayenne pepper, seeded and minced
1 small zucchini, quartered and sliced
1 small garlic clove, minced
kosher salt to taste
fresh cracked pepper to taste
1 Tblsp. torn cilantro leaves

1) Make a hot, smoldering bed of coals (no real fire, here; too much heat).   DO NOT USE BRIQUETTES.  Use real, natural hardwood charcoal.  It's chunks of wood that have been carbonized, not pressed with glue and chemicals that you ingest and get cancer from.  I buy it in the grill section of Menards.  Anyway, you want the coals glowing red, covered in ash.  I did mine in the fire box of our smoker, but I don't see why you couldn't do this on a bed of coals in your firepit.  (Kind of romantic, in a foodie kind of way... Make yourself a nice cocktail while you are waiting for your coals to get perfectly hot.  I made a new beer/booze cocktail.  Will blog about it later...)

2) Take your average, everyday firm purple eggplant from the grocery store and throw it on the bed of coals.  (I didn't even rinse it.  Why bother? It's going on a frickin' bed of coals.)

3) Set your phone timer to 4 minutes.  Have a conversation with your dog while you are waiting.


When it goes off, flip the eggplant with a big ol' pair of tongs 1/4 turn.  Do this 2 more times.  Here's my progression of flips:

Straight on the coals:


After Flip 1:


After Flip 2:


After Flip 3:


4) After the second flip of the eggplant, put a piece of heavy duty aluminum foil directly on a patch of  coals not taken up by the eggplant and drop 2 plum/Roma tomatoes on the foil.  Flip them every once in awhile until the skins are split, and they are sizzingly hot and squishy.


Here's what the eggplant looks like when it is done:


5) When everything is roasted to death, put the veggies on a platter and let them all cool slightly so you don't burn yourself when you skin everything about 5 minutes later.  When you skin the eggplant, you are going to feel like you are peeling off too much, but the skin is really thick, and only the soft juicy center is what is left.  Here's a pic of the eggplant skinned:


6) After you skin the veggies, put the eggplant on a cooling rack over a plate (to drain more water--see pic above).  Put the tomatoes into a fine mesh sieve over a bowl.  Let the eggplant cool while you smash the tomatoes through the sieve.  There will be a lot of gunk left in the sieve, with a pool of fine delicious tomato juice in the bowl.

7) Add the garlic, anchovies, olive oil, salt, pepper, and vinegar to the tomato juice.  Stir/whisk well.

8) Pour half of the tomato sauce into a platter.  Cut the eggplant in half lengthwise and lay the pieces side by side in the juice. (The top just kind-of came off while I was slicing it.  If it doesn't, pull it off.  You don't want to eat charred eggplant skin/stem.)  Sprinkle the flesh with a pinch of kosher salt.  Pour the rest of the sauce on top and let it all soak for a good 20 minutes.

9)  While the eggplant is transubstantiating, prep the veggies for the side dish.  When ready, heat the  olive oil and butter in a skillet over medium-high heat until hot.

10) Add the zucchini, corn kernels, cayenne, garlic, salt, and pepper all at once to the pan, tossing with  the butter and oil mixture until coated.  Shake the skillet to create an even layer of veggies, then let it sit for 2 minutes.

11)  Toss, shake, and let the veggies sit for another 2 minutes.

12)  Add the torn cilantro, then toss, shake, and let the veggies sit for another 2 minutes, then plate the veggie mixture.  (I like my veggies with a bite--California style, as my mom says.  If you like yours squishy, let them go a minute or two longer.)


13)  Now back to the eggplant.  Add another fine sprinkling of kosher salt, garnish with the torn cilantro, then SERVE.


My thoughts on dinner? Sooo amazing.  Smoky, yet fresh from the tomato.  And the cilantro opens up the flavors in a way that I've never experienced before.  And the corn dish with its sweetness...  I am becoming a believer in vegetarianism.

Disregard that it looks like fish.  You have to taste!  GO.  And cook as you deserve!

Friday, July 26, 2013

Summer Food Fabulousness—and Tips on Making Granita

A few months ago, my sister bought Chef Reiton and I a subscription to Bon Appétit magazine.  I started getting it near the end of the school year, and I have to admit that the first few issues lay rather neglected on the bedside table (albeit with covers longingly looked at briefly every night as I fell into bed).  I was just too busy and too tired to find the time to read them.  (You all knew that already, though--hence my long periods of silence in which you all wait with baited breath for the next post...ha ha ha.)

Gratefully, the school year ended.

The day before I left to go on yet another trip this summer, the July issue, the Grilling Issue, arrived in my mailbox.  One of my musts when I fly anywhere is to buy myself a magazine to read on the flight.  Normally I do this in the airport.  It's a fun little ritual of mine to search among the wall of magazines and find one that I have wanted to subscribe to but am too cheap to spend the $25 a year to do so.  

But as I pulled BA-July out of the mailbox, I immediately knew that my ritual was going to hell.  The magazine I wanted to read was right here in my hands.  The glossy paper of the cover added a juicy effect to the extreme close-up shot of red hot chicken skewers laid across the page, delicately sprinkled with lacy cilantro leaves and torn bits of basil.  My mouth watered.  I didn't even have to open the magazine to know that that delightful little entree was going to be mine as soon as I could possibly make it.

I continued flipping.  And drooling.  An article on frozen desserts flashed past my eyes: sherbert, popsicles, semifreddo.  And there were those chicken kebabs again, surrounded by other grilled chicken recipes: beer canned.  Smoked.  Spatchcocked?  Dear God... Is this what this magazine would do to me? Why had I waited so long???

So.  Upon return from my travels, I immediately made the Sambal Chicken Skewers for Michael and I (minus the fish sauce--I didn't have any, and have never cooked well with it when I have had it, so I just substituted soy sauce, much to the chagrin of many out there, I am sure.  Sorry.  Still want to make it? Click on the recipe name to link to BA's online recipe.)


Shortly thereafter we had Chef Reiton's family over for dinner, and so we made them some smoked spatchcocked chicken,


baby potato salad (using tarragon as our herb of choice, instead of chives),


avocado and tangerine salad with jalapeno vinaigrette (thank you, Jack Johnson. Can I come out to visit and cook with you?), 


The process for making a granita is amazingly simple.  So simple that I'm embarrassed it took me so many years to actually make one, despite the fact that I had wanted to for so long.  There are only two steps, really.

Step 1) Puree your fruit of choice, sugar, liqueur, lemon juice, and salt in a blender, then pour the puree into a mesh strainer held over a 9x13" pan.  Smash and stir the puree through the strainer with a big rubber spatula and into the pan; soon all you will have left in the strainer are seeds and/or fiber.  

(BA used 4 cups of fruit, 1/2 cup of sugar, 1 Tblsp. of liqueur, and 1 Tblsp. of lemon juice.  I'm not sure if those rations are going to work equally with all fruits, but that's what I'm going to try the next time. Keep in mind, as well, that the liqueur used here was creme de cassis (about 40 proof).  My guess is that you wouldn't want to go with anything much higher in alcohol content or you might mess with the freezing temperature too much.  No vodka, okay (which usually starts at about 80 proof)?

To help, below is a shot of the actual blackberries getting sieved, but the picture below that shows what it looks like after (I had done the same process with some raspberries).  And for a vocab lesson: this is the technique discussed when you read that you are to be "pressing on the solids."  (I always wondered what the hell that meant until I poured the puree into the strainer and it just sat there, dripping drop by drop into the pan, and I thought, "This is going to take all night!")


Step 2) Smooth the top of the fruit mixture in the pan so that it is evenly distributed (you want the mixture to freeze evenly), then put the pan in the freezer at a level position for 30 minutes.  After half an hour, take it out, scrape all the frozen parts with a fork to break up the ice, then put it back in the freezer for another 30 minutes.  Do this about 4 times (depending on the temperature of your freezer).

 Just so you can have an idea of what to expect things to look like, here's what the granita looked like after scraping #1:


scraping #2:


scraping #3:


and scraping #4, the final one with the granita being all flaky and frosty, ready to be covered and put back in the freezer until it was ready to serve.  YUM.


With that rash of cooking done, all from the BA-July edition, and with all of it being simple and delicious, we decided to make a few more items from it for our month-belated anniversary party (can you believe it? Time flies when you are having fun!)

 First was the snap pea and cabbage slaw, which multiple people asked for the recipe for:


and next was the plum semifreddo, which I did not get pictures of because it was served in the middle of the party, but here is a picture of the gorgeous plums, simmering away before being pureed, pressed through the seive, then folded into a heavenly blend of glossy meringue and whipped cream before being frozen: 


 Oh, divinely, heavenly food.  Ben Franklin was wrong: it is beer AND food that lets us know God loves us.  And God bless Bon Appetit for tempting us to make it!

Saturday, July 28, 2012

The Marriage of Foodies

I promised last post that I would write about Chef Reiton's and my wedding, so here it is for your amusement: a post about love and food.

Chef Reiton and I met at an interesting point in both of our lives: both of us had been separated for about 6 months and were in the midst of divorces.  Both of us were rediscovering ourselves (as all of you out there who have been divorced well know)—and one of the ways we both were finding freedom and consolation was through the education about and creation of food.  In fact, the first post I wrote for this blog was written the night after the third time we met—the first time where our meeting was actually planned.

Anyway, we obviously fell fantastically in love with each other—and each other's food—and this past winter we decided that we wanted to get married.  It being the second wedding for both of us, however, our priorities on what the wedding should be like were a far cry from the first time.  We agreed from the start that it would be 1) small, 2) DIY, 3) reminiscent of us and 4) home-cooked.

Now, Chef Reiton and I met on a plane—twice.  Due to the bizarre nature of meeting and then re-meeting each other in such a manner, we decided to embrace our serendipitous history and apply it to our wedding.  We made the invitations ourselves, designing them to be boarding passes, complete with a ticket folder from "Serendipity Airlines."

Our "airline ticket/boarding pass" wedding invitation

The setting for our day was to be the beginning of summer.  The ceremony would be held on a deck overlooking a large wetland lake at a local county park where we love to walk the dog, and the reception, both pre- and post-ceremony portions, was to be held in our backyard.  No renting of any buildings was required. The guests we limited to immediate family, as well as local family members and friends who are like immediate family.

The planning and preparations continued.  Chef Reiton ordered his clothes from L.L. Bean and looked dashing when he tried them on.  I bought a dress on a rush, hated it on me when it came in, so made myself a new one with the guiding hands and advice of my awesome neighbor, Heather, and the dear Mare at Nimble Thimble in Cambridge, WI.  It didn't look so bad, either! Definitely homemade, but the girls in the factory in China didn't do so great on the $100 dress I bought, so I didn't feel so bad about it.  And I LOVED my dress.  I should have followed my DIY gut in the first place.  It would have saved me sewing two weeks before the wedding.


Because our numbers were small, we were able to stick with renting just six round tables for the adult guests and two rectangular tables for the food.  We rented old wooden ballroom chairs from a church for $1 apiece.  For kids' seating, we set up the massive picnic table Chef Reiton built with brightly colored treat bags stuffed with candy, glow bracelets, bubbles, and water guns; the teenagers sat at a high top on the patio.  The adults were arranged on the driveway under a 30'x30' white tarp stretched tent-like between the garage and the house (an engineering feat by Chef Reiton).


For decorations, we kept it simple and classy but held to the theme (and all the dishes, linens, votives, and favors were bought online after scouting for hours and hours for the most inexpensive but quality supplies; I may be cheap, but I am anal).  The tables were covered in white linen tablecloths and set with square placemats (my eldest sister created them out of Chef Reiton's old runway maps and a variety of blue papers), white china plates, navy blue linen napkins, silverware from our own drawer and borrowed from family members, and glass "polka dot" tumblers.  The seating cards, also made by my eldest sister, were die-cut paper airplanes printed with guest names and their table number, strung on fishing line. Table numbers were "seat numbers," made from 8-inch kraft numbers and letters from Hobby Lobby, painted silver and hot-glued to a white-painted base.  A random mix of orange and white flowers (bought at Walmart) in small bud vases (bought at Goodwill) and blue votive candleholders were scattered across the tables.  Laying on each plate were the wedding favors: an individual bag of Terra Blue chips. Draped overhead were strings of white bistro lights, and hanging at the peak of the garage was a large 3'x4' navy blue sign with white letters that read "GATE C28"—the gate where we met the second time and knew it was Destiny.

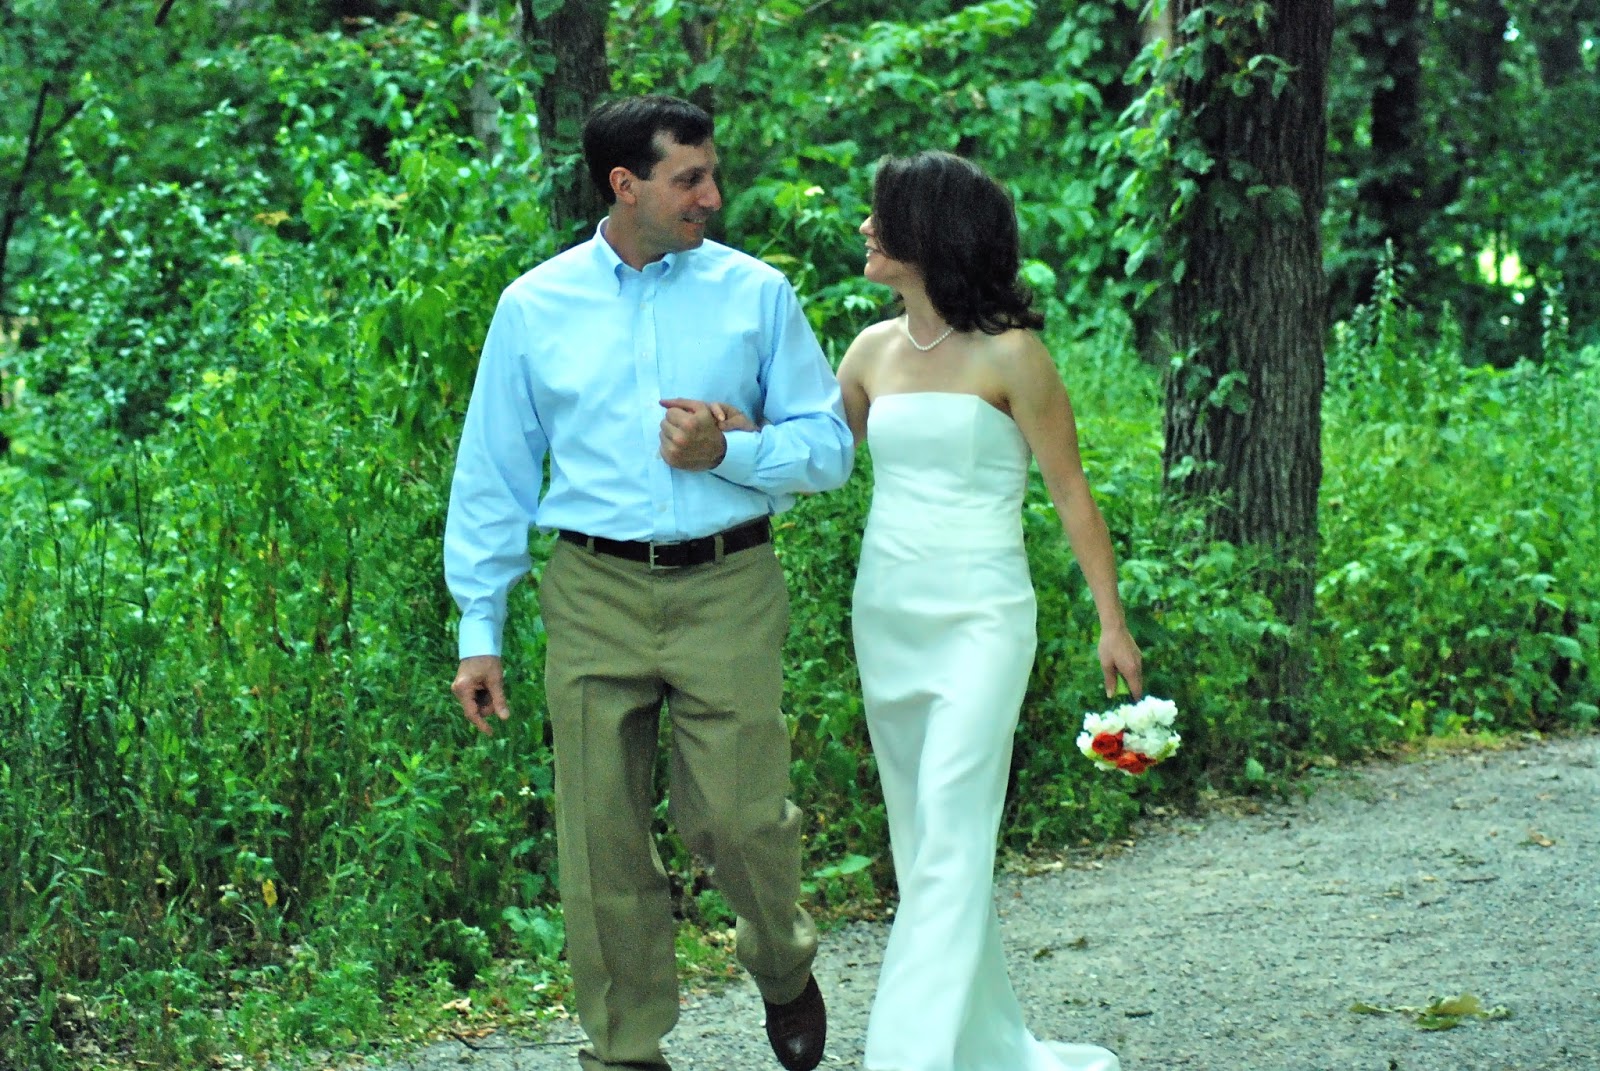
My middle sister made my beautiful bouquet, which I allowed her complete artistic freedom.  I simply bought a bunch of flowers at the grocery store that I loved, handed them to her, and said, "Do whatever! Just keep it small."  She designed a small nosegay out of baby white carnations, orange tea roses, and tiny chartreuse pin cushion mums—a simple, modern and perfect bouquet for me.

My homemade grocery-store bridal bouquet, made with baby white carnations, orange tea roses, and chartreuse baby mums

And now for the food.  The kegerator was brought outside to the garage and the top set with a fun runner, a "borrowed" orange tray from the N.A., and an assortment of beer mugs and pint glasses. Nestled inside were a variety of home-brewed beers (several brewed just for the wedding, including my Old Fort IPA and Chef Reiton's Belgian wit).  The wine was set out on a navy blue spray-painted wood changing table that I found a few weeks before the wedding; it made a lovely wine bar.  Wine glasses from IKEA were stacked on the top shelf, each stem wrapped with a circular paper-and-metal hangtag on which guests wrote their name; a sign stood next to a cup of pens that read: "Label your glass! It's the only one you are getting!"  The bottom two shelves of the "bar" were loaded with red wines, and a round tub filled with ice water and white wines sat to the side.

Appetizers during the pre-ceremony reception were kept simple: I wanted yummy finger foods but with minimal prep work or time.  A variety of good cheeses from Sam's Club, as well as an assortment of nice crackers, were laid out on cheese slates and vintage pressed tin trays.  Snipped clusters of green and red grapes, strawberries, and blackberries were mounded on a platter.  Bacon-wrapped dates were piled onto a tiered plate stand.  Small clear plastic plates and fun cocktail napkins were provided for mingling purposes.

Dinner foods were prepared largely the days beforehand.  Pork shoulder and brisket were smoked by Chef Reiton and his brother, then shredded and sliced after they were rewarmed a few hours before the wedding.  Spicy barbecue sauce, baked beans, and cornbread muffins were all made ahead and either refrigerated or frozen.  Hebrew National hot dogs, our homemade kobas, and fresh zucchini, portobello caps, whole sweet peppers, and asparagus were all grilled during the ceremony (a friend of mine came and helped with the putting out of food and manning the last minute details while we got ready, mingled, and got married!).  Chef Reiton's youngest sister brought a huge green salad (she makes the best) to help pitch in, and purchased rolls were placed in a basket.  All the food was set out to form a buffet.

Then, there was dessert.  What an assortment we had! To keep with tradition and to give our reception at least one ceremonious act, my eldest sister made our wedding cake: a beautiful two-tiered creation with cloud-like buttercream swirls, topped with a JetBlue jet plane.  To commemorate Chef Reiton's and my first cooking experience together, the day before the wedding my two best friends and I made four tiramisus. To honor Chef Reiton's father who had passed, my new mother-in-law made a blueberry pie, as well as loads of yummy Mexican wedding cookies and pecan dainties. For the kids (and the rest of us!), two of my girlfriends made mass quantities of two amazing flavors of cupcakes: lemon-berry with pureed berry in the frosting and sunken brownie with bright blue and orange frostings (JetBlue's colors).

The night went on with a bonfire, giant sparklers, music, and lots and lots of laughter and fun.  We intentionally steered clear of all the wedding "traditions" (i.e. toasting, tossing, dancing, etc.).  We simply wanted everyone to be relaxed and just hang.

And eat.

And drink.

And that we did.

Saturday, April 30, 2011

A Menu for an Indoor Picnic

We had a first anniversary dinner celebration with the family today, and boy, was it a feast! Check out the spread!
You ain't got nothing on us, rain, with family and food like this!

Thursday, October 14, 2010

A Lesson in Smoking (and Learning!)

I am proud to announce that as of last night, Chef Reiton has become a graduate of Low & Slow: Master the Art of Barbecue in 5 Easy Lessons, Gary Wiviott's cookbook "course" on smoking a rather fantastic array of meats.


Wiviott has, in a rather tongue-in-cheek manner, created a cookbook that, in "boot-camp" style, teaches a cook to become a master smoker.  Last night (or shall I say, all day yesterday) was the graduate course: 20 pounds of pork butt to make pulled pork.  And, man, was that the kicker... Even Marley the dog enjoyed it.  He ate one of the shoulder bones in ten minutes flat.


I have to say: I am so proud of my partner.  The hours that it takes to properly smoke a piece of meat is daunting to me.  As much as I love smoked food, I never would have smoked anything if he hadn't wanted to learn how to do it (and I honestly haven't done anything except watch him at the smoker as we drink beer, and then eat his amazing food).  It's been a little lesson to me, watching him do this whole "boot-camp" process and tasting the flavor that I fantasize about every time I think of "grilling:" if you want to learn something, DO IT.  Don't be daunted by the steps or the time or the expense.  You can always find a way to make it work for you and still learn the lessons that need to be learned.

Gosh, don't you love it? Food really does teach you so much about Life.  It's a fantastic teacher.  And you get to eat it.

Related Posts Plugin for WordPress, Blogger...

Visit Me on Pinterest!