Showing posts with label cooking with family. Show all posts

Wednesday, April 13, 2016

A Kitchen Flashback—and Some Thoughts

Last week here in Boston, it was pretty crappy. Weather-wise, that is.

When it came to the Reiton household, however, we were great! My parents were here! Woohoo! It's always so fun to have my mom and my dad here: they appreciate everything, they love to eat, and my dad grew up here, so it's like he is coming home. It's just awesome.

What was like coming home for me, this week, was cooking with my mom.  Actually, I specifically mean baking with my mom.

Until this weekend, dear readers, this was a sight I had not seen in 25 years:

Learning to knead dough from my mom

The only difference 25 years ago was that my mom's bowl was much bigger because she was most likely making a double batch. And maybe she wasn't so vein-y 25 years ago. That's about it. What I do remember being exactly the same: she was always on the floor with the bowl between her knees. Her sleeves were rolled up. And she was madly kneading dough for the week's bread.

That bread dough is something that I have dreamt about for years.  I've tried to make it, but it just doesn't come out the same as Mom's.  I think she has done it for so long, she's just got that thing where she just knows when it is right. Which only comes with practice. And failures. And lots of French toast and croutons.

But you know what? That's what makes cooking worth it. Things never come out perfectly the first time. 

And you know what? Who the hell cares??? It's food for YOU. You aren't cooking in the Queen's kitchen, for God's sake. And if it all really comes out crappy, it still fills your belly AND is a cooking lesson, to boot.  So if you just can't get your fill because it's just too God-damn-AWFUL, go eat a bowl of cereal, for crying out loud! Quit complaining! There are people who will have eaten nothing for a week in this world, so get over it. Seriously. 

Those whiny words: "I can't..." ??? 

Pffffft.

If you keep practicing, one day it will come out great. No doubt about it. Pay attention and keep trying.

And that's my cooking lesson for you for today. Straight from my mom. Who has no idea that she's influenced this sailor-mouthed, gin-and-tonic-influenced blog post about trying and failing in the kitchen.

And learning. Always, always learning.

Friday, February 12, 2016

A Valentine Treat: Baked Alaska

When I go home for Christmas, I become a bit of a kitchen hog—as in, I totally take over.  Thank God my siblings and parents get my obsession.  You know how when you really love something you want to share it with everyone? (Hello, DUH, Rachael...you write a FOOD BLOG.)

Well, I think I've rubbed off a bit on my brother, Arthur.  He is quickly becoming the King of Desserts in our family. Want to know how to make a gourmet s'more? Macarons? Lemon meringue pie? Ask him. He'll try anything if he's got the tools.  I personally think he should go to a baking school and open up the best damn bakery in Berkeley... While we were home together, he made the best lava cake I have ever eaten in my entire life.  I tried to replicate it when I got home and failed.  I think I cut the recipe in half and forgot to do something in relation to that.  Anyway.  His lava cakes? OMG.

chocolate lava cake

One dessert he had recently made with his friend, Luna, was Baked Alaska, and he was dying to make it for us.  Nobody was about to say 'no,' so one night he whipped together a batch and recruited me to help. I had never even eaten it before, so I was pretty excited to see what this famous dessert was all about. And, wow, was I shocked at how simple it was! It is made with just three things: pound or sponge cake and ice cream (both of which we bought) and meringue (egg whites beaten with sugar and a wee bit of cream of tartar).

Here are some photos to show a bit of the process.  I think it is simple enough that some of you might want to try it for your sweetums (or your own awesome self!) for Valentine's Day.

First, the pound cake is cut into rounds using a biscuit cutter (or a water glass, if you don't have a cutter) and laid out onto a sheet pan:

Baked Alaska cake rounds

Next, the ice cream is packed into a standard muffin tin lined with foil and refrozen.  (I think you could probably pack the tin without the foil and just flip the ice cream mounds out onto a cookie sheet after laying a hot towel across the bottom to loosen them.) When the ice cream was hardened, he removed the ice cream discs, placed them on top of the pound cake rounds, then topped each mound of ice cream with another piece of pound cake:

The foundation of Baked Alaska


These stacks then got stuck in the freezer again.  While they were freezing, he made the meringue (I believe it was an Italian meringue, which comes out more marshmallow-y and yummy than the kind of meringue you make for a lemon meringue pie.  Sarah over at CraftyBaking shares some good info about meringue here):

Making the meringue for Baked Alaska

Adding the meringue to Baked Alaska

(Please forgive my mother's horrid mixer.  I almost took my KitchenAid with me and then didn't because it weighs a ton.  I then got mad at myself that I didn't... No offense, Mom. ;)  I think the meringue would have come out stiffer if we had had my KA.  A tip from me to you, dear reader: a KitchenAid mixer is SO WORTH EVERY PENNY.  There is nothing like it, I promise you.  I just have the basic Artisan model. I don't know what I ever did without it. Check out Reviews.com's post on how KitchenAid stands up to other mixers, as well as their post on how the different KitchenAid models stand up to each other. I think you will find the information incredibly detailed and useful.)

Anyway.  After the meringue was finished, Arthur and I had fun (clearly) coating the frozen cake and ice cream stacks with big, swoopy plops.  


If I remember correctly, Arthur froze these again until after dinner.  He then broiled the whole sheet on high for a couple minutes to toast the meringue.  Here's what they looked like as he was plating them:

Serving up Baked Alaska!

A gorgeous mess, yes? Again, I think they would have held their shape better if we had used a better mixer and gotten that meringue a little bit stiffer.  But you should have tasted them.  Holy cow! We even froze the leftovers and ate them the next night, and they still were delish!

So—THAT is Baked Alaska! It's pretty damn easy! I had no idea. And impressive.  It takes some time, but nothing is difficult.  

I'm sorry I don't have a recipe, but if I come across a good one, I'll come back and post it here.  Unless Arthur shoots me his... 

And if you make some, post some pics in the comments below! I would love to see what you did!

Friday, August 14, 2015

Fungi Flashbacks: Uncle Fred's Sautéed Mushrooms

My schnozz did it to me again this morning.

I was frying up some baby bellas and yellow onion in butter for a couple of omelettes.


I got a little distracted by the bacon sticking to the cast iron skillet and mometarily forgot about the 'shrooms, when suddenly—

I am standing in Uncle Fred's kitchen.  I am six or seven years old, and my cousins and sisters and I have just run numerous laps around the house in a game of tag.  Uncle Fred, dressed in an apron with a spatula in hand, is hovering over the kitchen stove.  On the counter beside him is a stack of Dixie cups, and in his skillet are sliced mushrooms, sautéing slowly in melted butter.  The kitchen is warm and smells of sweet earth and salt.  When the mushrooms are a glorious golden brown, he scoops a spoonful into a Dixie cup and hands it to the next child in line: a kid-friendly finger food for his kids on the go.

Ahhhhh.  My nose.  My dear U.F.  My memories.

Thank you, dear God, for all three.

Saturday, July 28, 2012

The Marriage of Foodies

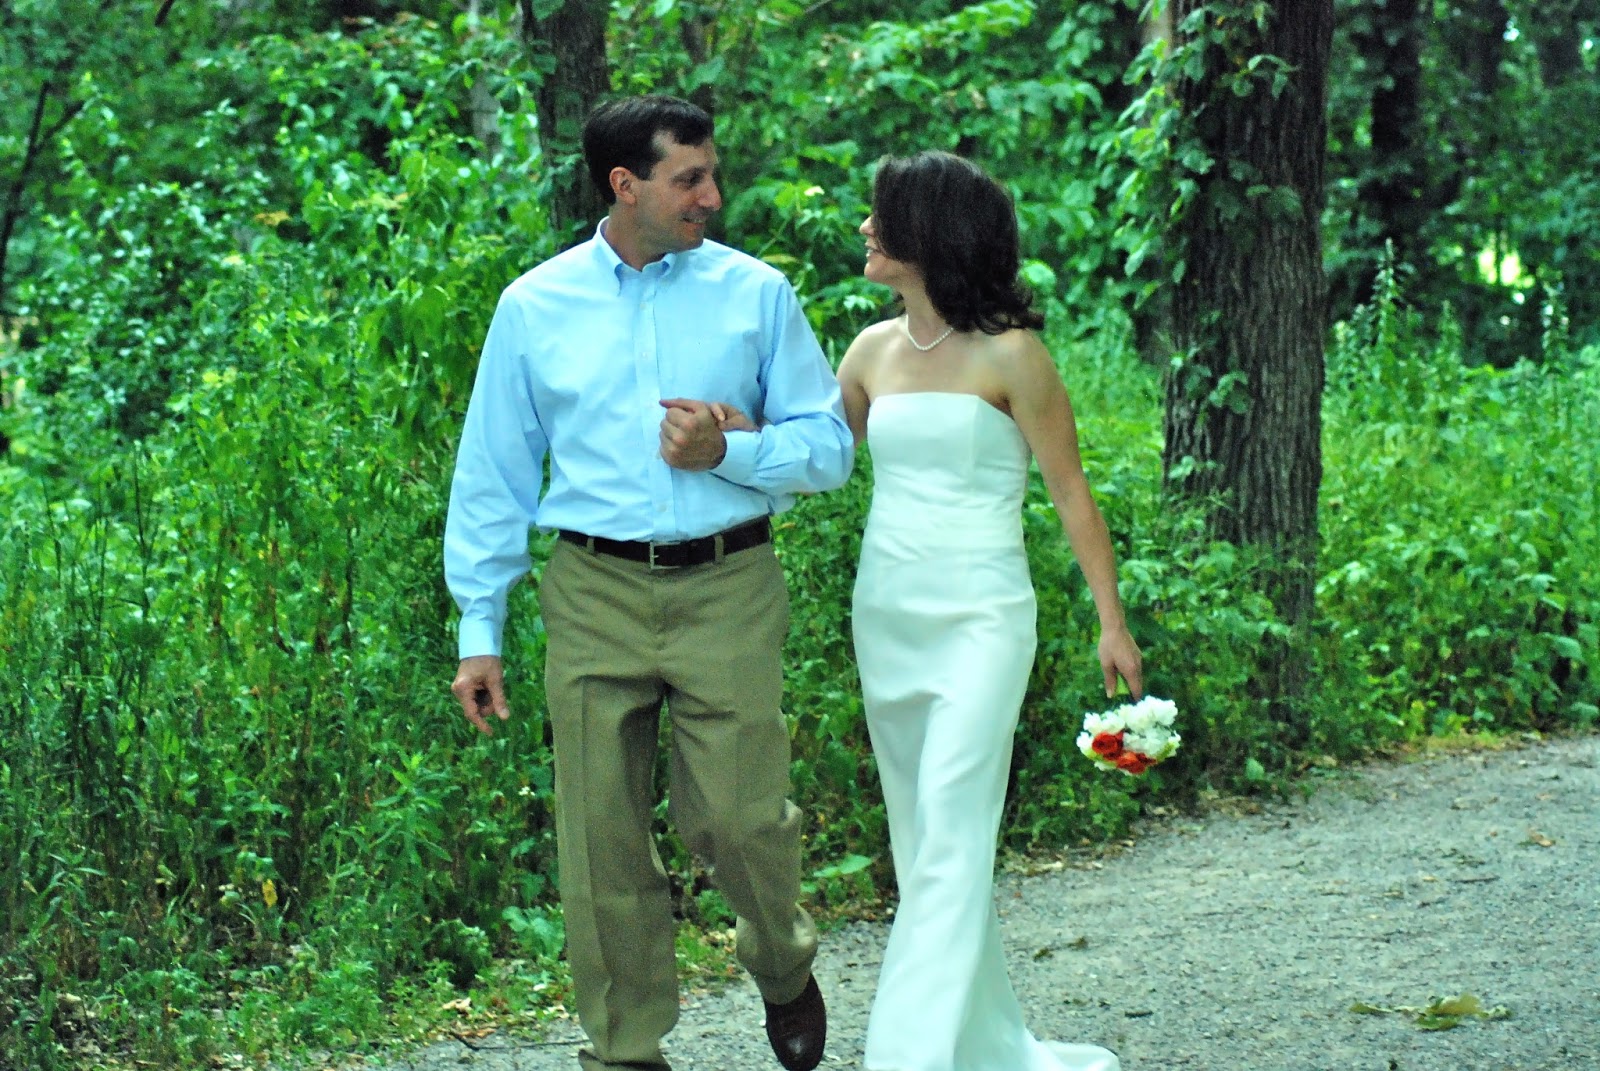
I promised last post that I would write about Chef Reiton's and my wedding, so here it is for your amusement: a post about love and food.

Chef Reiton and I met at an interesting point in both of our lives: both of us had been separated for about 6 months and were in the midst of divorces.  Both of us were rediscovering ourselves (as all of you out there who have been divorced well know)—and one of the ways we both were finding freedom and consolation was through the education about and creation of food.  In fact, the first post I wrote for this blog was written the night after the third time we met—the first time where our meeting was actually planned.

Anyway, we obviously fell fantastically in love with each other—and each other's food—and this past winter we decided that we wanted to get married.  It being the second wedding for both of us, however, our priorities on what the wedding should be like were a far cry from the first time.  We agreed from the start that it would be 1) small, 2) DIY, 3) reminiscent of us and 4) home-cooked.

Now, Chef Reiton and I met on a plane—twice.  Due to the bizarre nature of meeting and then re-meeting each other in such a manner, we decided to embrace our serendipitous history and apply it to our wedding.  We made the invitations ourselves, designing them to be boarding passes, complete with a ticket folder from "Serendipity Airlines."

Our "airline ticket/boarding pass" wedding invitation

The setting for our day was to be the beginning of summer.  The ceremony would be held on a deck overlooking a large wetland lake at a local county park where we love to walk the dog, and the reception, both pre- and post-ceremony portions, was to be held in our backyard.  No renting of any buildings was required. The guests we limited to immediate family, as well as local family members and friends who are like immediate family.

The planning and preparations continued.  Chef Reiton ordered his clothes from L.L. Bean and looked dashing when he tried them on.  I bought a dress on a rush, hated it on me when it came in, so made myself a new one with the guiding hands and advice of my awesome neighbor, Heather, and the dear Mare at Nimble Thimble in Cambridge, WI.  It didn't look so bad, either! Definitely homemade, but the girls in the factory in China didn't do so great on the $100 dress I bought, so I didn't feel so bad about it.  And I LOVED my dress.  I should have followed my DIY gut in the first place.  It would have saved me sewing two weeks before the wedding.


Because our numbers were small, we were able to stick with renting just six round tables for the adult guests and two rectangular tables for the food.  We rented old wooden ballroom chairs from a church for $1 apiece.  For kids' seating, we set up the massive picnic table Chef Reiton built with brightly colored treat bags stuffed with candy, glow bracelets, bubbles, and water guns; the teenagers sat at a high top on the patio.  The adults were arranged on the driveway under a 30'x30' white tarp stretched tent-like between the garage and the house (an engineering feat by Chef Reiton).


For decorations, we kept it simple and classy but held to the theme (and all the dishes, linens, votives, and favors were bought online after scouting for hours and hours for the most inexpensive but quality supplies; I may be cheap, but I am anal).  The tables were covered in white linen tablecloths and set with square placemats (my eldest sister created them out of Chef Reiton's old runway maps and a variety of blue papers), white china plates, navy blue linen napkins, silverware from our own drawer and borrowed from family members, and glass "polka dot" tumblers.  The seating cards, also made by my eldest sister, were die-cut paper airplanes printed with guest names and their table number, strung on fishing line. Table numbers were "seat numbers," made from 8-inch kraft numbers and letters from Hobby Lobby, painted silver and hot-glued to a white-painted base.  A random mix of orange and white flowers (bought at Walmart) in small bud vases (bought at Goodwill) and blue votive candleholders were scattered across the tables.  Laying on each plate were the wedding favors: an individual bag of Terra Blue chips. Draped overhead were strings of white bistro lights, and hanging at the peak of the garage was a large 3'x4' navy blue sign with white letters that read "GATE C28"—the gate where we met the second time and knew it was Destiny.

My middle sister made my beautiful bouquet, which I allowed her complete artistic freedom.  I simply bought a bunch of flowers at the grocery store that I loved, handed them to her, and said, "Do whatever! Just keep it small."  She designed a small nosegay out of baby white carnations, orange tea roses, and tiny chartreuse pin cushion mums—a simple, modern and perfect bouquet for me.

My homemade grocery-store bridal bouquet, made with baby white carnations, orange tea roses, and chartreuse baby mums

And now for the food.  The kegerator was brought outside to the garage and the top set with a fun runner, a "borrowed" orange tray from the N.A., and an assortment of beer mugs and pint glasses. Nestled inside were a variety of home-brewed beers (several brewed just for the wedding, including my Old Fort IPA and Chef Reiton's Belgian wit).  The wine was set out on a navy blue spray-painted wood changing table that I found a few weeks before the wedding; it made a lovely wine bar.  Wine glasses from IKEA were stacked on the top shelf, each stem wrapped with a circular paper-and-metal hangtag on which guests wrote their name; a sign stood next to a cup of pens that read: "Label your glass! It's the only one you are getting!"  The bottom two shelves of the "bar" were loaded with red wines, and a round tub filled with ice water and white wines sat to the side.

Appetizers during the pre-ceremony reception were kept simple: I wanted yummy finger foods but with minimal prep work or time.  A variety of good cheeses from Sam's Club, as well as an assortment of nice crackers, were laid out on cheese slates and vintage pressed tin trays.  Snipped clusters of green and red grapes, strawberries, and blackberries were mounded on a platter.  Bacon-wrapped dates were piled onto a tiered plate stand.  Small clear plastic plates and fun cocktail napkins were provided for mingling purposes.

Dinner foods were prepared largely the days beforehand.  Pork shoulder and brisket were smoked by Chef Reiton and his brother, then shredded and sliced after they were rewarmed a few hours before the wedding.  Spicy barbecue sauce, baked beans, and cornbread muffins were all made ahead and either refrigerated or frozen.  Hebrew National hot dogs, our homemade kobas, and fresh zucchini, portobello caps, whole sweet peppers, and asparagus were all grilled during the ceremony (a friend of mine came and helped with the putting out of food and manning the last minute details while we got ready, mingled, and got married!).  Chef Reiton's youngest sister brought a huge green salad (she makes the best) to help pitch in, and purchased rolls were placed in a basket.  All the food was set out to form a buffet.

Then, there was dessert.  What an assortment we had! To keep with tradition and to give our reception at least one ceremonious act, my eldest sister made our wedding cake: a beautiful two-tiered creation with cloud-like buttercream swirls, topped with a JetBlue jet plane.  To commemorate Chef Reiton's and my first cooking experience together, the day before the wedding my two best friends and I made four tiramisus. To honor Chef Reiton's father who had passed, my new mother-in-law made a blueberry pie, as well as loads of yummy Mexican wedding cookies and pecan dainties. For the kids (and the rest of us!), two of my girlfriends made mass quantities of two amazing flavors of cupcakes: lemon-berry with pureed berry in the frosting and sunken brownie with bright blue and orange frostings (JetBlue's colors).

The night went on with a bonfire, giant sparklers, music, and lots and lots of laughter and fun.  We intentionally steered clear of all the wedding "traditions" (i.e. toasting, tossing, dancing, etc.).  We simply wanted everyone to be relaxed and just hang.

And eat.

And drink.

And that we did.

Saturday, September 24, 2011

Teaching Teenagers to Cook: Michael's First Pizza

The other night Michael requested pizza for dinner.  I made the dough, put it out in the sun to rise for a few hours, and soon it was time to make the pizzas.

We usually make a pepperoni pizza for Michael, and then some kind of supreme or margherita pizza for Chef Reiton and I.  I started working the pepperoni pizza dough first when I looked at the time.  It was getting late, and I needed help.  I called for Michael.

"Would you please make the other pizza for me while I do this one?" I asked.

He shook his head.  "But I don't know how to do it.  I can't make a round circle!"

I laughed.  "You should have seen my first pizzas.  They looked like Wisconsin." (Remember those, dear reader?) "Don't worry, I'll show you how."

I picked up the lump of dough in front of him and showed him how to work it into a ball first, and then how to gently push it into a wider and wider circle.  I told him how to let it rest a few minutes when it didn't seem that it would stretch anymore, and then come back to it and watch it grow even more.

He watched me as I did mine, and then picked up the lump and started working.  In the middle of his dough work he said, "I think we should make each other's pizzas.  You make mine, and I'll make yours."  It was a deal.  As I made his pepperoni pizza with sauce and shredded mozzarella cheese, I told him how to make my margherita pizza: how to dice and salt the tomatoes; how to oil and gently salt the crust; how to layer on the tomatoes, the fresh mozzarella, and the fresh basil.

I wish I would have taken a before and after shot of the pizza he made, but I only took the after.  Look at this first attempt at making a pizza.  I didn't touch it once.


Not only was it beautiful, but it tasted awesome.  Perfectly salted (whereas mine I can sometimes overdo).  And it is ROUND.

Saturday, February 5, 2011

Learning the Joy of Cooking: A Child's Discovery

A discovery has been made in this household.  A discovery that has, not surprisingly, been made in the kitchen.  And it's a discovery that I could not be happier about: Michael is learning and liking to cook.

It began with that ice cream.  We made a couple batches together: Winter Wonderland (which we really freakily both named individually in our heads and then realized later that we both had thought of the same name for it) we made with Marshmallow Fluff and crushed candy canes and dyed it blue. A few weeks later we made Luther Love, which was basically the same, but it was dyed hot pink and had white chocolate chips, too.

Recently I did something that I don't do anymore: I bought a carton of ice cream.  Michael was so excited, but in the tasting of it (and it has been months since we've had store-bought ice cream in this house), Michael said, "Ours is better."

So the next time he said he wanted ice cream, I told him that he could make it while I made dinner.  I told him what to do, but I let him do the entire thing himself.  And, with my fingers crossed, I told him that since he was in charge, he could put in what he wanted.  He decided to go with a chocolate base, so I talked him through how to make a chocolate mixture to blend into the cream and milk mixture.  Then he asked what else he could put in.  I told him, whatever he wanted.  What he created was chocolate ice cream with bits of Twix and Milky Way and a handful of chopped peanuts blended in, and he colored it with food dye until it looked like mixed concrete. Seriously.  But it was GOOD.

ANYWAY.  Within the past week, Michael has suddenly gotten really into helping with dinner.  And not stirring-the-pot helping.  I'm talking, I-want-to-do-everything-myself helping.  And it has been a joy teaching him how to cook: how to cut potatoes; how to prepare chicken; how to fry food; how to prepare a salad; how to create a sauce; and how to make ice cream.  What is most wonderful is to see him sit down to dinner and look at the food he has helped make, and watch him eat it, and hear him say, "Everything is really good!"

A love is being born.  A love that is good and right in every way.


Tuesday, April 13, 2010

A (Graphic) Experience with Kobas

Over spring break Chef Reiton and I went to his Uncle Larry's house for an event that I am so grateful to have been a part of.  Every year Uncle Larry makes kobas, a Hungarian sausage made from pork.  Most years Chef Reiton helps him make it.  This year, I got to make it! Okay--I got to help.

Uncle Larry had us bring 10 lbs. of coarsely ground pork shoulder with 25% fat (straight from the butcher that morning), garlic water (half a quart of water with an entire head of sliced garlic soaking in it), coarse ground black pepper, coarse salt, and paprika.  Typically, Uncle Larry makes his kobas with sweet paprika, but Chef Reiton and I tend to like to spice things up a bit, so for this batch we decided to try 3 parts Hungarian sweet paprika to 1 part Hungarian sharp paprika.

The only other ingredient that we needed were the casings.  While at the butcher we picked up a package for $4, wondering why Uncle Larry was saying they were so expensive. When we got to his house, Uncle Larry had a few casings left from the previous year that he had saved, so we decided to use those first.

The preparation of kobas was very, very simple.  We dumped the meat and spices into a very large bowl, and I started kneading with my hands.  After the spices were very well blended, Chef Reiton slowly poured in the garlic water while straining out the garlic, and I continued to knead the liquid into the meat.  We continued to add water and knead until the meat mixture looked full and very moist but not wet. There was no water in the bottom of the bowl when we were ready to press.

Next came the fun part: making the sausages themselves.  Uncle Larry went into a back room and came out with a sausage press that had been in the family, he guessed, for about 60 years.  His grandfather had been the first to work the press, and now here it sat, still beautifully black, waiting for the family to press yet another batch of delicious kobas.  Chef Reiton raised the plate, swung open the bucket, and we dumped in all 10 lbs. of meat.

An old sausage press full of ground pork

To keep the casings from sticking to the stuffing nozzle, it is important to give the nozzle a good greasing, so Chef Reiton showed me how to grab a small handful of meat and smear it all over the nozzle.  You can see the bowl of soaked and rinsed casings in the bowl, waiting to be stuffed, in the picture below.

lubricating the nozzle with ground pork

After the nozzle was carefully greased, it was time to feed the first casing. Chef Reiton squeezed an inch of sausage out of the nozzle to prevent the casing from tearing on the nozzle edge

 preparing the nozzle for the casing

 then I gingerly slid the beginning of a casing onto the nozzle.

inserting the nozzle into the casing

carefully gathering the casing on the nozzle

Chef Reiton then showed me how to carefully feed the casing the entire way up the nozzle, squinching it up like a sock, until there was only about an inch or so of casing left hanging off the nozzle.

fully inserting the nozzle into the casing

Once the casing was entirely fed onto the nozzle, I twisted the end to "knot" the casing, then Chef Reiton began to turn the press handle and a new sausage was on its way.

With an entire casing filled, it was time to make the actual links.  I laughed to myself as I watched Chef Reiton measure out the links with his hands, squeeze the filling at a stopping point, then twist the sausage to "knot" it off.  I was remembering pictures in storybooks from my childhood, pictures of salamis and links of sausages hanging from the ceiling at a deli.  As a kid, I never actually saw sausages like that in the store, and the pictures of them fascinated me.  Now here I was, making them.

creating kobas sausage links

We continued to stuff the casings that Uncle Larry had leftover, slowly filling the pan with link after link of deliciously fat kobas sausages.

a tray of kobas sausage links

We soon ran out of Uncle Larry's casings and turned to the casings that Chef Reiton and I had brought.  We pulled the casings out of the salted soaking water, rinsed them--then frowned.  If such statements can be made of animal intestines, Uncle Larry's were much more attractive than ours.  Ours were clean, but they had nodules that the more expensive ones didn't.  Chef Reiton and I decided right then and there: next year, we pay the extra cash, no matter what.

Before I knew it, my kobas experience was over.  Uncle Larry made a request to do it again in a few months, and Chef Reiton and I jumped at the offer.  While Uncle Larry went upstairs for a minute to rest, we carefully cleaned the family press, dried it, put it back together, then placed it back on its shelf where it would silently sit and wait, ready to create more memories another day.

Related Posts Plugin for WordPress, Blogger...

Visit Me on Pinterest!