Showing posts with label salad. Show all posts

Friday, March 9, 2018

A Paleo Puerto Rican Dinner Menu

What a week. In our second snow bomb storm of the season, the power in our block where "the power never goes out"—went out. Not for thirty minutes. Or an hour. Or the evening.

No, it went out for 24 hours.

Thank goodness it went out after I had pulled the steak tips we were having for dinner from the fridge. AND our stove is gas, so we could light her up and keep cooking. By candlelight.

So, despite the awkwardness of cooking without really being able to clearly see our food, Chef Reiton and I still forged ahead to start our month of going paleo to get these two bodies back on track.

So, here you go, folks: a paleo Puerto Rican dinner, prepared and eaten by candlelight:

  • Pan-Seared Cumin-Lime Steak Tips
  • Simple Avocado Salad
  • Tostones

Recipes:

For the steak tips:

  1. Rinse and pat dry the steak. Sprinkle generously with kosher salt, ground cumin, garlic powder, freshly squeezed lime juice and freshly ground black pepper. Rub it all in. Let meat rest for 15 minutes (while you prep the rest of the dinner).
  2. Cut off the top and bottom of one onion, halve it lengthwise, remove the peel, then slice the onion halves lengthwise into slivers.
  3. Sear meat in a tablespoon or so of coconut oil in a skillet until starting to char. Add onion slivers, and continue cooking steak, turning tips to sear all sides. Toss the onions occasionally.
  4. You want medium-rare to medium in doneness on the steak. Rest under foil on a plate for 10 minutes with the onions. Garnish with cilantro and serve.
For the avocado salad:
  1. Wash and halve avocado(s). Whack into the seed with a chef's knife blade, then twist the blade gently to pop out the seed.
  2. Hold a half in your palm. With a paring knife, CAREFULLY slice through the avocado flesh but NOT the skin, cutting it into cubes.
  3. Take a silverware tablespoon and, sliding the edge of it between the avocado skin and the flesh, scoop the chunks out into a bowl.
  4. Repeat as necessary on additional avocados.
  5. Salt and pepper the avocado chunks, squirt with some fresh lime juice, and toss gently. Garnish with chopped cilantro and serve.
For the tostones:
  1. Heat coconut oil in a small skillet or saucepan to a depth of about 1/2-inch. You can save and reuse this oil several times for this.
  2. Meanwhile, with a paring knife, cut the top and bottom tips off a very green plantain.
  3. Score through the skin of the plantain, following along the natural ridges of the skin.
  4. Take your thumbnail and wedge it under one of the skin strips. Pop up the skin, then slide your thumb up the plantain, peeling off the strip. Repeat the whole way around. Repeat on additional plantains as necessary.
  5. Slice the plantains into 1- to 1 1/2-inch chunks.
  6. Fry the plantain slices in batches to a golden brown, turning once to get both sides. Drain on paper towels.
  7. Smash the fried plantain chunks to about 1/4-inch thick with a plate, tostone smasher, or what have you.
  8. Refry the smashed chunks (tostones) in the hot oil. Remove to a paper towel to drain and immediately sprinkle with adobo seasoning (you can readily find this in your grocery store in the ethnic aisle). Serve.
Paleo Puerto Rican dinner of steak tips, tostones and avocado salad

And there you have it, folks. A paleo Puerto Rican dinner—by candlelight.

Wednesday, July 12, 2017

The Delicate Nasturtium Flower...and How to Eat It (and Other Lovely Blooms)

This...

A nasturtium flower

is a nasturtium flower.

A sweet, delicate specimen, it grows from long and leggy stems, protected by lily pad-like leaves.

A yellow nasturtium flower

Orange nasturtium flowers in a garden

Loved by bees but hated by garden pests, I plant them amongst my veggies in my garden boxes in order to deter bugs that will destroy my tomatoes, zucchini and cucumbers.

But I have to admit: I also plant them because I like to EAT THEM.

There is nothing more beautiful on a summer dinner table than the bright splash of flowers on your cool, green salad.

Nasturtium flowers on a green salad for eating

And there is nothing more delicious than the peppery bite of a nasturtium flower crunching between your teeth.

Okay, well, maybe this garlicky, paprika-y, finger-sucking-good chicken we experimented with last night:

Garlic-and-Paprika-Rubbed Spatchcocked Grilled Chicken

Chef Reiton and I intend to experiment further on wings, instead. (We'll get back to you.)

The next flower we intend to devour? These babies:

Squash blossoms for stuffing, frying and eating

Squash (or zucchini) blossoms. When I can't take eating one more damn zucchini this summer, I will be plucking these gorgeous blooms then stuffing and frying them in an attempt to mimic one of the jewels of our Besh Restaurant Honeymoon. (This, too, we will keep you informed on.)

Also waiting to be eaten in my garden? Violas.

Purple and yellow violas in my garden

Orange violas in my garden

Time for a crash-course in sugaring flowers for a cake? I think so! (Aaaaaaand, I'll keep you posted on that, too.)

God bless summer, right?!?!? 

Saturday, July 1, 2017

A Latin American Dinner Menu—and a Few Reminders of Why I Cook (and You Should, Too)

I woke this morning to dreams of last night's dinner—the dinner I emergency-posted last night in a fit of delirious food love. Our kitchen still held the faintest smell of smoky chipotle as I came downstairs for our morning coffee. If we had been hungry, I would have pulled out a bit of the barbacoa, heated it up in the skillet and cracked an egg on top for Chef Reiton.

But we weren't hungry at four in the morning, so instead I uploaded our dinner photos from last night and dorkily reminisced over how fantastic it was.

A Latin American dinner of sorts with barbacoa on homemade corn tortillas, tostones and cucumber and mango chow

Our menu? It was an eclectic compilation of Latin American foods:
  • Puerto Rican tostones with mayo-ketchup
  • Mexican barbacoa served on homemade corn tortillas
  • Caribbean cucumber and mango chow
I definitely can't say the dishes we served were all 100% authentic, but I can say that, holy cow, I didn't want to stop eating!

This dinner, believe it or not, was actually super simple and quick. The barbacoa is made in the crockpot; the tostones fry up (twice!) in about 5 minutes total once the oil is hot; and the chow takes about 10 minutes to assemble before it chills in the fridge. The longest part is the tortilla preparation, but that—that I will get to. Save the best for last...

First, the chow. I may have already mentioned this salad-of-sorts in a previous post. I've certainly made it several times already since it was published by Bon Appétit in their April 2017 issue. The recipe is from Miss Ollie of Miss Ollie's in Oakland, CA. It has an easy-to-find list of ingredients and can be made in about ten minutes. The best part is that it can be made a few hours ahead and chilled in the fridge while you are making the rest of your dinner. I love it for its sweet but peppery mango, the heat of chiles, the coolness of cucumber, and the tang of lime. The cilantro allows you to serve it with a variety of ethnic foods that love cilantro: Thai, Mexican, Caribbean. It's simply fantastic.

Next, the tostones. Tostones are thick slices of green plantain that have been fried, flattened, fried again, then sprinkled with adobo seasoning and served with garlicky mayo-ketchup. We learned how to make these babies when we recently had our friend Chaz (JetBlue's BEST flight attendant!) over to cook a Puerto Rican dinner (yes, I will blog on that soon!). 

Green plantain slices after their first fry for tostones

A fried slice of green plantain waiting to be pressed in a tostonera

Pressing a fried slice of green plantain for a tostone

Smashing a fried slice of green plantain for a tostone

A smashed slice of fried green plantain ready to be fried again for a tostone

Not only are these just flat-out fun to make (no pun intended, really!), they are absolutely delicious and healthy, with about 2 grams of dietary fiber for half a green plantain and a low glycemic index. And as for the frying, if you still think fried food is horribly unhealthy, that's because—sorry—you are doing it wrong. Food properly fried barely absorbs any fat; the water in the food immediately starts to steam when the food is dropped into the screaming hot oil, pushing water out of the food so that the fat can't soak in. Don't believe me? Read the transcript of a Good Eats episode by Alton Brown, one of my favorite food scientists, who explains it in a more entertaining way. You can also do a bit of research on this. You'll find that science is right. Thank you, science. 

Now for the barbacoa. I have no idea who Queen To Y'All is, but I want to thank her for posting this recipe on Recipezaar.com years ago and making me and my friends extremely happy. It was a required party staple during my years in Chicago. Now you can find the recipe under "Chipotle Roast for Tacos and Sandwiches" on Food.com. It's awesomely simple. Dump all the ingredients into the Crockpot in the morning, set her on low, and walk away until it's time to prep the rest of dinner. It will sit and simmer happily, silently taunting you, wafting smells of cumin and spice all day long. When it's time to eat, stir it all up with a slotted spoon and put it on the table. That's it. 

We are now left with the best for last... 

I've never in my life eaten a fresh corn tortilla. Even the Mexican restaurants that I've visited use prepackaged. You can tell: they are rubbery, pretty darn tasteless, and absolutely perfectly round. It's actually kind-of too bad I made these (in a good way) because after eating them, I don't know that I'm ever going to be able to eat another commercially made tortilla again.

Corn tortillas may somehow look complicated (like anything does when you've never made one) but in reality are super simple to make. They are made with a fine corn flour called "masa harina" (I used Bob's Red Mill—totally gluten-free, by the way, and you can find it in most grocery stores), salt and water. I used my stand mixer to blend the ingredients into a smooth paste, then Chef Reiton formed them into little balls.

Shaping the masa dough into little balls

We experimented with different ways to roll them out. Chef Reiton started by rolling them on a sheet of parchment

Experimenting rolling out masa dough for homemade corn tortillas

but we decided that they tore less and came out rounder if they were flattened with my palm between two sheets of parchment and then rolled gently.

Rolling out a homemade corn tortilla between two sheets of parchment paper

Homemade corn tortillas made with masa harina

We also learned that the little balls need to be kept under a damp towel while the tortillas are being rolled out. They started to dry out rather quickly, making them break and tear when they were rolled. Because of this learning curve, I ended up actually dipping the last several balls of dough into a bowl of water twice then rekneading them to soften them back up again.

With our cast iron skillet smoking hot, we cooked up the tortillas, one minute a side, finishing with a final thirty seconds after the second flip. Later we realized we should have had two skillets going at a time. Duh. It would have gone faster.

Cooking a homemade corn tortilla in a cast iron skillet on the stove

The recipe for these tortillas came from a wonderful cookbook by Marilyn and Luis Peinado called Bienvenidos to Our Kitchen: Authentic Mexican Cooking. The book is loaded with every single authentic Mexican dish you've ever eaten plus some. 

A cookbook by Luis and Marilyn Peinado called Bienvenidos to Our Kitchen: Authentic Mexican Cooking

You are in luck, too! New copies are still available on Amazon.com as well as used copies on BarnesandNoble.com and eBay.

As Chef Reiton and I sat sipping our rioja at the end of the meal, we couldn't stop oohing and ahhhing over our empty plates. I do not mean this as a boast, but how could we have made probably the best Latin meal I have ever had in our North American kitchen?

The answers are simple:
  1. We are willing to experiment making new foods.
  2. We are willing to mess up and learn from our mistakes for the next time we try it.
  3. We are into saving money while eating food that is usually better than a restaurant's.
Do you want to know how much our dinner for two last night cost us? Actually it's probably closer to three dinners for two, thanks to the leftovers. Let's assume that going out for an average Mexican dinner costs $60 for two people. Sound reasonable? Maybe even a little cheap if you throw a few margaritas into the bill? 

Well, here's what I spent at Market Basket on the ingredients that make three full meals for two (and I'm even going to assume you don't have staples like cumin, garlic, chile powder or oil). I'll even throw in the bottle of wine we had with dinner:
  • 2 lb. chuck roast from Walden Local Meats, my pasture-raised meat share: $20.00
  • can of green chiles: $.99
  • can of chipotle peppers: $2.69
  • onion: $.43
  • can of salsa verde (even though mine was free because I used my own): $1.29
  • beef consumme (used my own, again, so technically free): $1.89
  • garlic head: $.40
  • cumin: $1.59
  • chile powder: $1.29
  • adobo seasoning: $2.79
  • green plantain: $.33
  • corn oil: $3.09
  • masa harina: $2.99
  • hothouse cucumber: $.99
  • mango: $.99
  • cilantro: $.99
  • shallot: $.25
  • bottle of wine: $18.00
TOTAL: $60.99

So, for a more expensive, pasture-raised roast, a good bottle of wine and ALL the ingredients for the meal, I spent the same as the cost of a Mexican dinner out—and I'll actually get THREE dinners for two out of last night, not just the one. AND my homemade dinner was SO MUCH BETTER than the food you get at a restaurant.

And it's not ME who is awesome! It's the FOOD!!!

Sigh.

I'll calm down. But, folks...this is why I cook. And it's why you should, too. It's cheaper. It's healthier. It's waaaaaaay deliciouser. (I know.)

So. Think about what foods you love. Find the recipes. Buy the ingredients. Make the meal. Even if you "screw up," it's going to be good.

Promise.

Thursday, February 2, 2017

Fast, Fake-o Caesar Salad Dressing

If you've read my blog over the years, you know that I am in chef-love with two people: John Besh (our honeymoon of foodies) and Mark Bittman. Either one of them I would fly five thousand miles to cook with and welcome into my kitchen any time. I imagine that sharing a kitchen with these guys would be relaxed, full of laughs and, yes, a major learning experience. But a good one.

Just this past week I made (yet again) Besh's chicken and sausage gumbo from his latest cookbook, Besh Big Easy. Even Marley, our dog, loves it. And Bittman? Bittman is the most popular reference book in our house. We crack open (and have given away) How to Cook Everything more times than I can count.

One of our go-to recipes of Bittman's is his Caesar salad. It's the real deal, with anchovies and lemon, coddled egg and big, fat croutons. The problem: it does take, like, 10 minutes of forethought to make it (coddling the egg, not to mention the croutons), and the other night, I didn't have an extra 10 minutes. I needed to throw everything in a jar, shake it up, and be done. Company was coming.

So I cheated—big time. Yes, I used romaine lettuce and lots of finely grated (with a pinhole grater) Parmesan cheese, but no croutons. And the dressing? This is what I threw together:
  • 1/2 tsp. oil from an anchovy tin (if I had time, I would have minced up an anchovy, but I didn't)
  • 2 tsp. Dijon mustard
  • 1/4 tsp. each of kosher salt and freshly ground black pepper
  • juice from 1/2 a large lemon
  • 2 Tblsp. champagne vinegar
  • 1/4 cup olive oil
I shook that like crazy in a jar, and voila! Fake-o and fast Caesar dressing—liked so much by my guest that I was asked for the recipe, so here you are!

Things I think I would try next time, continuing in super-fast, cheater fashion: add a bit of garlic powder to get a bit of that garlicky flavor in there. And maybe a couple drops of Worcestershire sauce to add a little depth. Bittman puts that in his Caesar dressing, and I think that's why. 

Speaking of salad dressings, if you want to nix another item from your shopping list because 1) it's full of crap and 2) it's a total waste of money, make it salad dressing. Spend the money, instead, on a variety of different vinegars (balsamic, red wine, white wine, champagne, rice wine, apple cider) and some Californian olive oil (don't buy Italian unless from a trusted source; you aren't guaranteed to be actually getting what you think you are buying) and make your own at home. Dressings are generally about 3 parts oil to 1 part acid plus a little bit of an emulsifier, like Dijon mustard, egg, honey, mayo...then seasonings. Even drizzling your salad with olive oil, tossing, then drizzling with a little vinegar, and tossing again is shockingly good. My Grandma Paola taught me that.

And something else I have learned to do that really makes a difference with salad: salt it, don't just pepper it. I actually take a pinch of kosher salt and give my salad a decent sprinkle before I toss it. It's amazing how it really brings out the flavors of the dressing and whatever you've got in the salad. Give it a try. I think you'll like it. 

So! Screw bottled salad dressing! Print the recipe below, and the next pizza or lasagna night you have where you find yourself suddenly scrambling for a green salad, chop up some romaine, grate or shave on some Parmesan cheese and throw this dressing together for a last-minute Caesar; I think you will find it's a pleaser!

(Sorry.)

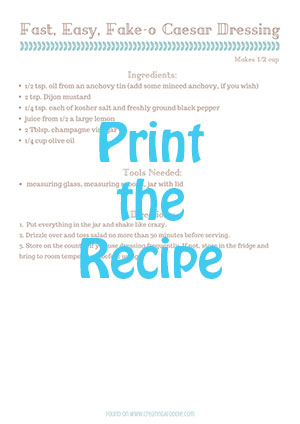
Easy, Fast, Fake-o Caesar Salad Dressing

 Recipe card for Fast, Fake-o Caesar Salad Dressing


Thursday, June 30, 2016

How to Make Homemade Croutons

I will be the first to declare you a big, fat liar if you say this has never happened to you: you buy (or bake!) a delicious loaf of Italian/French/rye/whatever bread to top off your yummy homemade dinner—only to be left with a hunk of quickly staling bread the next day...

If you are like me, the thought of throwing it away makes you partially wither inside. Bread, considering it is basically flour and water, is SO HARD to throw away. Those memories of last night's dinner, when it was warm and soft...

And now? Huh. You could make French toast, but it's the middle of the week, and who has time for that except on weekends? You could freeze it, but frozen bread always gets weird.

Soooooo.... What do you do?

Make homemade croutons, baby! It takes five minutes to prep while the oven is warming, and in 45 minutes you can have toasty, crispity, delicious croutons for FREE. Who wants croutons out of a box when you can have these???

How to make homemade croutons from stale bread

I know, right???

And they are ridiculously easy to make. Here's how I do it, BUT (everyone say it with me) you can do it however the hell you want. It's not going to make a life-changing difference. Swears.

Ingredients:

  • hunk or slices of bread of any sort
  • olive oil
  • kosher salt
  • dried herbs, fresh ground black pepper, spices (optional)

Tools You Will Need:
  • a large-ish bowl, a large cookie sheet, a serrated (the one with teeth) knife, a cutting board, a metal spatula

Steps to Make:

1.  Preheat your oven to 275° F.

2.  As your oven is heating up, cut your bread into slices. I do mine about an inch thick. If you like smaller croutons, slice thinner. Then take each piece, lay it flat, and slice lengthwise and then across so that you now have bread cubes. Try to make them all relatively the same size.

3.  Dump the bread cubes in the bowl. Pour several really good glugs of olive oil into the bowl over the bread cubes. Sprinkle on the kosher salt and any additional flavors you want to add, then get in there with your hands and toss, toss, toss! You really want to make sure that all the cubes are really well-coated.

(NOTE: The amount of oil used is going to depend on the amount of bread cubes you have and how much you personally want to coat your cubes. I like to really coat mine well. I find the flavor to be better if the cubes have a good soaking of oil. You may feel differently. Try it out and see what you think. No matter what you do, they are going to taste great.)

4.  Pour the cubes out onto the baking sheet, and spread them out into an even layer with some space between them. Pop them in the oven and set the timer for 20 minutes (for smaller croutons, set it for 10). When the timer goes off, give them a toss with the metal spatula to flip them over. Shake them back into an even layer, then toast them for another 20 minutes. Larger croutons are probably going to be done at this point. If you are doing smaller croutons in 10-minute intervals, you are probably going to want to do three (3) 10-minute intervals. Just test them with a good ol' bite-test to see if they are as crispy as you desire.

Let them cool on the baking sheet on a wire rack, then seal them up in a Ziploc bag with the air squeezed out. They will remain nice and crunchy for quite awhile...

Hope you enjoy them! Store-bought ones don't even compare...

Saturday, May 7, 2016

The Beet Salad Recipe of Your Dreams

I don't know about you, but when dealing with vegetables, rarely does the word 'gorgeous' come to mind. Vegetables tend to look a bit—well, not the most attractive. Stand in the produce section, and take a look around. Fruit definitely wins out in the looks category. Veggies tend to remind you of gawky, bad-skinned, knob-kneed teenagers with consistently bad hair-days.

That is, until you look inside.

Suddenly, some veggies become positively striking. Like the beet I couldn't help but share in my old post Talk About Random.  Take a look at that beauty!

Maybe their gorgeousness is part of the reason why I've become addicted, but beets have suddenly turned into my go-to veggie for an easy lunch salad. Chef Reiton hates beets, no matter how hard he tries to like them, so my only way of eating them is when he isn't here. Lunchtime has become perfect for that.

"So—a beet salad???" you say (I can see that lip tweaking...).

Believe me, yes, and it's delish and incredibly easy. That is, after you roast the beets. Which is also easy. I'll even show you how tomorrow because I'm going to roast some tonight (please note: TONIGHT is key in my easy roasting and peeling method).

Alright, so back to the salad. In Real Simple's November 2015 issue there was an article on easy side dishes to create for the holidays. Modestly introducing their beet salad recipe was a small notation that their beet salad is so good, the RS crew make it all the time for their gatherings.  Intrigued, I made it for our Christmas dinner, and the entire family gave a resounding 'YES!' to it's deliciousness—despite it being made with beets.

Since then I have tweaked the recipe to fit with ingredients that I tend to have at home and that I can quickly toss together for lunch. Almost all of the ingredient amounts are to what I'm in the mood for that day. So, here you go: a beet salad that is remarkably good for you, gorgeous, and incredibly delicious.

beet salad with ricotta salata, parsley and toasted pecans

Ingredients:

  • 1 roasted beet, cooled, skinned and cut into wedges
  • a small (1-in. x 1 in.-ish) hunk of ricotta salata, a firm ricotta cheese, sold in wedges in the "nice cheese" section
  • a small pinch of the tops of some fresh Italian, flat-leaf parsley sprigs, roughly chopped 
  • chopped pecans, toasted (toss in a small skillet over medium heat until they smell nutty)
  • kosher salt and freshly ground black pepper
  • olive oil
  • red wine vinegar

Directions:
  1. Place beet wedges on a plate or in a bowl.
  2. Crumble ricotta salata over the beet wedges.
  3. Sprinkle with chopped parsley.
  4. Sprinkle with chopped, toasted pecans.
  5. Drizzle with olive oil and red wine vinegar.
  6. Sprinkle with salt and pepper.
  7. EAT!
If you want to print the recipe, click "Print this recipe" below for a download and/or a print option.

beet salad printable recipe card

Come back tomorrow for a quick how-to video on roasting and peeling beets–something I used to hate doing because the damn peel never came off easily. No more! I'll show you how.

Until then, here's to those of us who may be knob-kneed with lots of bad hair-days but strive to be beautiful on the inside! Yeah, beets!

Tuesday, February 9, 2016

Put Some Blueberries On It!: Learning to Make Green Salads with Fruit

I have always been a fan of blueberries, ever since I was a kid.  Even after I threw up blueberry pancakes in the back of our Volkswagon Beetle when I was four years old, my love for those little suckers didn't fade.  When we moved to Pennsylvania and settled into a home right smack in some woods full of blueberry bushes, I thought I had died and gone to heaven.  It might have taken an hour to fill a measly cup with those tiny berries, but I didn't care.  I had blueberries in my backyard.

As an adult, they are still my go-to berry. I use the dried wild ones in my scones. Frozen blueberries  get tossed into my random smoothie.  And I buy a package every week to top off my plain Greek yogurt.

But you want to know what I've gotten really into lately?

Blueberries go great on salad!

You got it! Salads. SO yummy.  Their little bursts of sweet, and sometimes tart, flavor add such wonderful contrast to the pungent flavors of shallots or red onion and a sprinkle of gorgonzola or feta cheese.  And the juice they release blends wonderfully with a simple olive oil and vinegar dressing.  Simply drizzle your salad with olive oil first and toss the greens to coat them, then sprinkle on a bit of good balsamic vinegar, a pinch of kosher salt, and a few grinds of fresh cracked black pepper.  Toss again, and you've got an absolutely delicious salad that is super healthy, thanks to blueberry's super antioxidant powers.  

Give it a shot and let me know what you think! Have another weird salad topping of choice? Send us a comment and let us all know!

Tuesday, October 6, 2015

How to Compose Yourself (and Your Salad)!: A Composed Salad Recipe with Baby Arugula, Red Pear and Shallot

I used to laugh at that term—a composed salad—when I was a kid.  Personification would kick in, and all I could think of was a salad sitting up straight and tall, eyes downcast, hands in her lap, waiting with great grace for her turn to be eaten.

Salads are not my favorite thing to make.  I like to eat them, but I struggle with being too impatient to put one together at the end of meal prep; I just want to eat.

Thank God for those little boxes of organic lettuces and leaves.  I know they are more expensive, but 1) they are organic, 2) I don't have to rinse any damn leaves, and 3) I don't have to chop any damn leaves.  The only thing I'm left to do is cut up some tomato and cucumber, and I can call it a day.

And the-e-e-e-en there's my husband.  Salad creation is his specialty.  He reminds me of Jonathan in the old '80s movie, Splash, who gets fired for being too artistic with his pizza-making.  That's Chef Reiton.  His salads are gorgeous.  And he looks so relaxed making them.  I bang away at the cutting board to hurry up and get it done, and he stands and meditavely slices and minces and slivers and chops.  It makes me jealous.

So the other night I determined: I was going to make a killer salad.  Not the tossed green salads I always make.  No.  I was going to make a composed salad.  A little work of art on a salad plate.

I took three ingredients:

  • a red pear with the flower blossom end sliced off and discarded
  • baby arugula
  • a small shallot, peeled, with the root end trimmed

With my mandoline on the thinnest setting, I sliced the red pear crosswise into circles until I started to hit the seeds (about half the pear).  Next I sliced the shallot into circles.

Now came the composing: 
  1. I lay the pear slices in a ring on the salad plate, overlapping the edges a bit.
  2. I placed a nice little mound of baby arugula in the center of the ring.
  3. I sprinkled the little shaved rings of shallot on top of the arugula mound. 
That was it.  To dress it I sprinkled it with a little bit of olive oil, a little bit of balsamic vinegar, a few grinds of fresh black pepper, and a teensy bit of kosher salt.

The result? GOR-GEOUS!!!!

And it took, like, 2 minutes to make! AND it was delicious! 

a composed salad with red pear, arugula and shallots

I think I may have found my new favorite thing to create! Folks, get ready for some serious salad composure! 

Tuesday, July 28, 2015

1,000 Chicken Salads: Yet Another (Summery!) Chicken Salad Recipe

Chicken salad recipes are like... well, you can look up the proverbial quote of Simone Elkeles to get my comparison.  To keep the title of this blog kosher, let's just leave it at: everybody's got one.

So I know that the recipe I am sharing with you tonight is not going to necessarily be a recipe that you've been gagging for, nor is it one that you will find yourself passing on to your children's children.

But I will tell you this: it is good.  It is different.  It is summery.  You should try it.

Here are the ingredients before they were blended with the dressing:


The chicken was leftover from my spatchcocking last night, as any good chicken salad chicken is (leftover, not necessarily spatchcocked...). And I ate the salad plain.  No bread.  You get the real taste of it that way (and you aren't eating any grain).

Here's the recipe for 2 servings:

You will need: a medium bowl; a small bowl; a small whisk; a fork

Put the salad ingredients into the medium bowl:
  • 2 chicken thighs, meat diced
  • 2 chicken legs, meat diced
  • 1/2 chicken breast, meat diced
  • cut into 1/4-in. cubes:
    • 1/2 small cucumber, seeded
    • 1 large radish
  • 1 green onion, sliced thinly
  • 3 large basil leaves, slivered
  • 1/4 cup blueberries
  • 1/4-in. piece of jalapeno, minced
Put the dressing ingredients into the small bowl:
  • juice of half a lemon
  • 2 Tblsp. sour cream
  • dash of nutmeg
  • kosher salt and fresh ground pepper to taste

Whisk the dressing ingredients until completely blended.  Pour over the salad ingredients and toss until everything is coated evenly.  Chill if making ahead, then plate, garnish with baby basil leaves and blueberries, and serve.


Enjoy!

Sunday, July 26, 2015

What to Do with All Those Cucumbers?: A Quick and Easy Cucumber Salad Recipe

They kill me, cucumber plants.  

Every day I go out and inspect my garden to see what the new day brings.  I love the suspense and surprise of finding what 24 hours of sun can do to a plant.  Inches seem to be added to a lettuce tower.  That cherry tomato is finally the right shade of red.  The basil has sprouted some new flowers.

But none of those babies can beat the cucumber plant.  I swear to God, fruit just magically appears on those suckers.  Every morning I go out and turn over every leaf, looking for some pickings and finding just babies, and the next morning I lift a leaf, and I'm like, "WHOA!!! Nice cucumber!" Full grown, fat deliciousness just hanging and waiting for me...

I love suspense, so I'm cool with these games.  I'm also cool with what I've been doing to them at dinner time:


The quantities below made enough for me eating solo; double or triple as needed.  And remember, this is a salad, so you can adjust quantities of ingredients to taste however you like.  As David Rocco says, "QB!"

Tools Needed: 1 small bowl, a fork, a juicer of some sort

Ingredients:
  • 1 small cucumber (about 6" long), halved lengthwise and sliced thickly
  • 1/2 a small shallot, very thinly sliced
  • juice of 1/2 a small lemon (you can go lighter but don't go over; it's too much)
  • 2-3 large basil leaves, rolled up then thinly sliced
  • kosher salt to taste
  • freshly ground black pepper
  • a tiny dash of cayenne peper
  • a few shaved slices of jalapeno (optional)

Steps to Make: 

1.  Squeeze the lemon juice into a small bowl.

2.  Add the cucumber slices and the kosher salt.  Toss well.

3.  Add the rest of the ingredients to the bowl and toss well.  Let the flavors meld in the fridge while you make the rest of dinner, tossing the salad once in awhile until ready to serve.

And that's it.  A summer salad that is light, zingy, and clean.  Perfect match for a burger, some ribs, or a grilled chicken.

Spatchcocking, anyone?

Friday, July 26, 2013

Summer Food Fabulousness—and Tips on Making Granita

A few months ago, my sister bought Chef Reiton and I a subscription to Bon Appétit magazine.  I started getting it near the end of the school year, and I have to admit that the first few issues lay rather neglected on the bedside table (albeit with covers longingly looked at briefly every night as I fell into bed).  I was just too busy and too tired to find the time to read them.  (You all knew that already, though--hence my long periods of silence in which you all wait with baited breath for the next post...ha ha ha.)

Gratefully, the school year ended.

The day before I left to go on yet another trip this summer, the July issue, the Grilling Issue, arrived in my mailbox.  One of my musts when I fly anywhere is to buy myself a magazine to read on the flight.  Normally I do this in the airport.  It's a fun little ritual of mine to search among the wall of magazines and find one that I have wanted to subscribe to but am too cheap to spend the $25 a year to do so.  

But as I pulled BA-July out of the mailbox, I immediately knew that my ritual was going to hell.  The magazine I wanted to read was right here in my hands.  The glossy paper of the cover added a juicy effect to the extreme close-up shot of red hot chicken skewers laid across the page, delicately sprinkled with lacy cilantro leaves and torn bits of basil.  My mouth watered.  I didn't even have to open the magazine to know that that delightful little entree was going to be mine as soon as I could possibly make it.

I continued flipping.  And drooling.  An article on frozen desserts flashed past my eyes: sherbert, popsicles, semifreddo.  And there were those chicken kebabs again, surrounded by other grilled chicken recipes: beer canned.  Smoked.  Spatchcocked?  Dear God... Is this what this magazine would do to me? Why had I waited so long???

So.  Upon return from my travels, I immediately made the Sambal Chicken Skewers for Michael and I (minus the fish sauce--I didn't have any, and have never cooked well with it when I have had it, so I just substituted soy sauce, much to the chagrin of many out there, I am sure.  Sorry.  Still want to make it? Click on the recipe name to link to BA's online recipe.)


Shortly thereafter we had Chef Reiton's family over for dinner, and so we made them some smoked spatchcocked chicken,


baby potato salad (using tarragon as our herb of choice, instead of chives),


avocado and tangerine salad with jalapeno vinaigrette (thank you, Jack Johnson. Can I come out to visit and cook with you?), 


The process for making a granita is amazingly simple.  So simple that I'm embarrassed it took me so many years to actually make one, despite the fact that I had wanted to for so long.  There are only two steps, really.

Step 1) Puree your fruit of choice, sugar, liqueur, lemon juice, and salt in a blender, then pour the puree into a mesh strainer held over a 9x13" pan.  Smash and stir the puree through the strainer with a big rubber spatula and into the pan; soon all you will have left in the strainer are seeds and/or fiber.  

(BA used 4 cups of fruit, 1/2 cup of sugar, 1 Tblsp. of liqueur, and 1 Tblsp. of lemon juice.  I'm not sure if those rations are going to work equally with all fruits, but that's what I'm going to try the next time. Keep in mind, as well, that the liqueur used here was creme de cassis (about 40 proof).  My guess is that you wouldn't want to go with anything much higher in alcohol content or you might mess with the freezing temperature too much.  No vodka, okay (which usually starts at about 80 proof)?

To help, below is a shot of the actual blackberries getting sieved, but the picture below that shows what it looks like after (I had done the same process with some raspberries).  And for a vocab lesson: this is the technique discussed when you read that you are to be "pressing on the solids."  (I always wondered what the hell that meant until I poured the puree into the strainer and it just sat there, dripping drop by drop into the pan, and I thought, "This is going to take all night!")


Step 2) Smooth the top of the fruit mixture in the pan so that it is evenly distributed (you want the mixture to freeze evenly), then put the pan in the freezer at a level position for 30 minutes.  After half an hour, take it out, scrape all the frozen parts with a fork to break up the ice, then put it back in the freezer for another 30 minutes.  Do this about 4 times (depending on the temperature of your freezer).

 Just so you can have an idea of what to expect things to look like, here's what the granita looked like after scraping #1:


scraping #2:


scraping #3:


and scraping #4, the final one with the granita being all flaky and frosty, ready to be covered and put back in the freezer until it was ready to serve.  YUM.


With that rash of cooking done, all from the BA-July edition, and with all of it being simple and delicious, we decided to make a few more items from it for our month-belated anniversary party (can you believe it? Time flies when you are having fun!)

 First was the snap pea and cabbage slaw, which multiple people asked for the recipe for:


and next was the plum semifreddo, which I did not get pictures of because it was served in the middle of the party, but here is a picture of the gorgeous plums, simmering away before being pureed, pressed through the seive, then folded into a heavenly blend of glossy meringue and whipped cream before being frozen: 


 Oh, divinely, heavenly food.  Ben Franklin was wrong: it is beer AND food that lets us know God loves us.  And God bless Bon Appetit for tempting us to make it!
Related Posts Plugin for WordPress, Blogger...

Visit Me on Pinterest!