Oh, dear readers. So much to write about but so little time. This summer has been flying by. It's been a hot one, too, which doesn't seem to jibe. Doesn't heat usually seem to make things drag? Well, not here. Between doing lots of work (I published my second book! Go grab a copy of Reading Toward Success on Amazon!), doing a good bit of travel, and having lots of guests, I feel like I've barely been able to keep up—in a good way. Chef Reiton and I love to entertain, which goes hand-in-hand with having lots of guests. Whether it's for one friend, two friends or 30 friends, we've been cooking up a storm this summer.
One of the things that I've gotten really into making is potato chips. I found a recipe in one of my Alton Brown cookbooks, I believe, and I made them on a whim one night. After our friend Mario's "Dear God!" exclamation after his first bite, I haven't been able to stop making them.
The first time I made them, I cut them with a standard vegetable peeler, per Alton's instructions. These chips were delightfully thin, but they were a pain-in-the-butt to cut. Careful, even pressure needs to be applied to get a whole slice of potato and not a wonky sliver, and for those who know me and my hand-eye coordination, that didn't work so well.
The next time I made them, I hand-sliced them. Using a beautifully sharp chef's knife, this worked out just fine. Except the anal side of me was upset at the lack of perfect uniformity in slice-thickness.
I finally came to a decision: it was time to visit Amazon.
For a long time, I have been wanting to replace my mandoline. No, I do not play a stringed instrument. I'm speaking of a kitchen tool that makes insanely thin slices of just about anything you want. The Norpro version that I have just hasn't held up. The blade has become dull, which means the mandoline has become dangerous to operate, and, frankly, I don't want to be losing any parts of my fingers or hand, no matter how tiny a slice. Bon Appetit magazine has highly recommended the Benriner Old Version Vegetable Slicer, and so that was the one I bought.
Baby, is that thing awesome! When I took my first swipe, the slicing was so smoothly done I had to check to make sure that it had actually sliced (unlike my Norpro that gave my veggie a tug every time I swiped downward. Yikes!). And for about the same price as a Norpro—AND the ability to change blades—I'm never going back.
Another thing I'm not going back on? Duck fat.
Yes, my friends—duck fat. After having a couple jars for a stupidly long time and "being afraid to use them" (MAJOR eye-roll here...), we let our friend, Chef Wilkinson, use them when he came over and made us a French meal the other night that included pomme frites: French fries fried in duck fat.
Potatoes fried in duck fat, once tasted, will change yet another aspect of your kitchen life. Trust me. The taste is full and deep, unlike vegetable fats. It's not a cheap fat, but it is an insanely delicious and healthy one that can be reused over and over again. Just strain it after it cools down and store it in the fridge.
So. Now for another test: I sliced my exquisitely even potato chips using my beautiful Benriner mandoline, gave the slices a good 20-minute soak in some hot water, rinsed them, and patted them dry. Meanwhile I heated about 3 cups of duck fat in a medium saucepan to 355°F. Once the fat was hot, I slipped four or five slices of potato into the fat one at a time, held them under the surface with a spider strainer and flipped them occasionally. When they were a lovely golden brown, I pulled them out, immediately sprinkled them with kosher salt, and drained them in a paper-towel lined bowl.
How did those duck-fat potato chips turn out?
Perfect.
Showing posts with label paleo. Show all posts
Saturday, August 11, 2018
Friday, June 22, 2018
Toast-less Avocado Toast: The Paleo Version
Food fads both fascinate and frustrate me. Being one who loves to learn anything new in the kitchen—whether it be a new taste for something or a new technique—I'm open to most (most, mind you) anything.
And so when I hear that such-and-such is so flipping good, and I see blog posts and magazine articles singing its praises, and menu after menu offering said food, I usually will give it a try. See my post on grain bowls as an example...
What frustrates me, on the other hand, is when something in the food world just gets OVERDONE. Like, there is nothing else. I see this with ingredients, flavors, techniques.
Take the word "umami," for instance. The word "umami" was first used by Kikunae Ikeda in 1908. 1908!!! But it is used now as if it is the newest and most insanely incredible taste that has ever been discovered. If I hear or read the word "umami" one more time, I'm going to take my bottle of coconut aminos and throw it out the window! (Although I do encourage you to read the "Umami" Wikipedia article for a rather fascinating explanation of its meaning.)
So when I keep reading articles about entire restaurants being dedicated to this whole avocado toast craze??? I admit, I've been rolling my eyes. Really? All you serve is toast with avocado schmeared on top and sprinkled with random crap? I mean, come on.
And then, one day last week I had nothing to eat in the kitchen except a perfectly ripe avocado...
So, this is what happened:
And so when I hear that such-and-such is so flipping good, and I see blog posts and magazine articles singing its praises, and menu after menu offering said food, I usually will give it a try. See my post on grain bowls as an example...
What frustrates me, on the other hand, is when something in the food world just gets OVERDONE. Like, there is nothing else. I see this with ingredients, flavors, techniques.
Take the word "umami," for instance. The word "umami" was first used by Kikunae Ikeda in 1908. 1908!!! But it is used now as if it is the newest and most insanely incredible taste that has ever been discovered. If I hear or read the word "umami" one more time, I'm going to take my bottle of coconut aminos and throw it out the window! (Although I do encourage you to read the "Umami" Wikipedia article for a rather fascinating explanation of its meaning.)
So when I keep reading articles about entire restaurants being dedicated to this whole avocado toast craze??? I admit, I've been rolling my eyes. Really? All you serve is toast with avocado schmeared on top and sprinkled with random crap? I mean, come on.
And then, one day last week I had nothing to eat in the kitchen except a perfectly ripe avocado...
So, this is what happened:
Avocado. Fresh squirt of lime juice. Sprinkle of toasted hazelnuts. Drizzle of olive oil. Salt. Pepper.
My brain's response after my first dreamy, creamy bite from my spoon: DEAR GOD, THANK YOU FOR THIS FOOD.
What was I eating? I was eating a toast-less version of avocado toast, and it was divine.
Labels:
dairy-free
,
fruit
,
gluten-free
,
grain-free
,
paleo
,
quick
,
recipe
,
vegetables
,
vegetarian
Thursday, March 15, 2018
Paleo Plantain French Fries
When you are limited on where your starches come from in a paleo diet, you get creative.
NO, they don't taste exactly like a potato french fry. Of course they don't. They are made from a plantain, not a potato, so don't sit and whine that they aren't the same. They aren't gonna be the same, whiner.
But I'd rather have a salty, crispy-tender plantain fry to munch on than NONE at all.
And I'll leave off the six pounds I've lost in the past two weeks, too.
Thank you, meat and veggies.
Want to make them? We used three plantains for two of us.
Ingredients:
Enjoy!
Ladies and Gentleman, the plantain french fry!
NO, they don't taste exactly like a potato french fry. Of course they don't. They are made from a plantain, not a potato, so don't sit and whine that they aren't the same. They aren't gonna be the same, whiner.
But I'd rather have a salty, crispy-tender plantain fry to munch on than NONE at all.
And I'll leave off the six pounds I've lost in the past two weeks, too.
Thank you, meat and veggies.
Want to make them? We used three plantains for two of us.
Ingredients:
- green plantains with no yellowing
- coconut oil
- kosher salt
Special Tools:
- a bowl or colander
- paper towel
- paring knife
- skimmer or slotted metal spatula
Directions:
- Place the paper towel in the bowl or colander. It will absorb some of the oil from the fries.
- Using a paring knife, cut off the tops and bottoms of the plantains. Score through the skin along the natural ridges of the plantain. Slide your thumb under the end of one of the strips and pop the skin up. Slide your thumb up the plantain to remove the strip. Peel all of the plantains completely.
- Start heating the coconut oil in a small saucepan over medium heat. You want a depth that will more than coat the french fry, about 1/2 an inch. (And don't worry about waste. You can reuse this oil to make more fries another time.)
- Meanwhile, cut a plantain in half crosswise. Now cut the halves in half lengthwise. Cut the four pieces in half lengthwise again. Turn those pieces on their sides and cut them in half. You may have a few pieces that need turning and cutting in half one more time, depending on the size of your plantains. You should have square-ish fries. Repeat for all of the plantains.
- Look back to the oil. You want it hot but not smoking. Test it by tossing in a scrap of plantain. If it immediately bubbles rapidly, it's ready.
- Carefully drop in a small handful of fries. Stir gently to move the fries around a bit so they don't stick together. Fry until the plantains are a nice golden brown, stirring occasionally. Remove them from the oil with the skimmer or spatula, tapping the skimmer on the side of the saucepan to allow excess oil to drip back into the saucepan. Dump the fries into the paper towel-lined bowl and immediately sprinkle with kosher salt.
- Repeat until all the fries are done. If you want to keep the fries warm in the oven, you can do so, but I liked snacking while I fried...
Enjoy!
Friday, March 9, 2018
A Paleo Puerto Rican Dinner Menu
What a week. In our second snow bomb storm of the season, the power in our block where "the power never goes out"—went out. Not for thirty minutes. Or an hour. Or the evening.
No, it went out for 24 hours.
Thank goodness it went out after I had pulled the steak tips we were having for dinner from the fridge. AND our stove is gas, so we could light her up and keep cooking. By candlelight.
So, despite the awkwardness of cooking without really being able to clearly see our food, Chef Reiton and I still forged ahead to start our month of going paleo to get these two bodies back on track.
So, here you go, folks: a paleo Puerto Rican dinner, prepared and eaten by candlelight:
Recipes:
For the steak tips:
No, it went out for 24 hours.
Thank goodness it went out after I had pulled the steak tips we were having for dinner from the fridge. AND our stove is gas, so we could light her up and keep cooking. By candlelight.
So, despite the awkwardness of cooking without really being able to clearly see our food, Chef Reiton and I still forged ahead to start our month of going paleo to get these two bodies back on track.
So, here you go, folks: a paleo Puerto Rican dinner, prepared and eaten by candlelight:
- Pan-Seared Cumin-Lime Steak Tips
- Simple Avocado Salad
- Tostones
Recipes:
For the steak tips:
- Rinse and pat dry the steak. Sprinkle generously with kosher salt, ground cumin, garlic powder, freshly squeezed lime juice and freshly ground black pepper. Rub it all in. Let meat rest for 15 minutes (while you prep the rest of the dinner).
- Cut off the top and bottom of one onion, halve it lengthwise, remove the peel, then slice the onion halves lengthwise into slivers.
- Sear meat in a tablespoon or so of coconut oil in a skillet until starting to char. Add onion slivers, and continue cooking steak, turning tips to sear all sides. Toss the onions occasionally.
- You want medium-rare to medium in doneness on the steak. Rest under foil on a plate for 10 minutes with the onions. Garnish with cilantro and serve.
For the avocado salad:
- Wash and halve avocado(s). Whack into the seed with a chef's knife blade, then twist the blade gently to pop out the seed.
- Hold a half in your palm. With a paring knife, CAREFULLY slice through the avocado flesh but NOT the skin, cutting it into cubes.
- Take a silverware tablespoon and, sliding the edge of it between the avocado skin and the flesh, scoop the chunks out into a bowl.
- Repeat as necessary on additional avocados.
- Salt and pepper the avocado chunks, squirt with some fresh lime juice, and toss gently. Garnish with chopped cilantro and serve.
For the tostones:
- Heat coconut oil in a small skillet or saucepan to a depth of about 1/2-inch. You can save and reuse this oil several times for this.
- Meanwhile, with a paring knife, cut the top and bottom tips off a very green plantain.
- Score through the skin of the plantain, following along the natural ridges of the skin.
- Take your thumbnail and wedge it under one of the skin strips. Pop up the skin, then slide your thumb up the plantain, peeling off the strip. Repeat the whole way around. Repeat on additional plantains as necessary.
- Slice the plantains into 1- to 1 1/2-inch chunks.
- Fry the plantain slices in batches to a golden brown, turning once to get both sides. Drain on paper towels.
- Smash the fried plantain chunks to about 1/4-inch thick with a plate, tostone smasher, or what have you.
- Refry the smashed chunks (tostones) in the hot oil. Remove to a paper towel to drain and immediately sprinkle with adobo seasoning (you can readily find this in your grocery store in the ethnic aisle). Serve.
And there you have it, folks. A paleo Puerto Rican dinner—by candlelight.
Tuesday, June 13, 2017
Use Them While They're Hot!: Learning to Grill Ahead
Last night I sat outside at the dinner table, noshing with utter abandon on this glorious baba ghanoush made straight from the grill (thank you once again, Melissa Joulwan!), when I had an epiphany:
It's summer, it's hot, and cooking outside on the grill is really the way to go. Food magically tastes twice as good cooked over smoky charcoal. But I have to be fair to Grillmaster Reiton. Standing over 600° coals in 90° weather night after night probably isn't as much fun as sitting on the deck with a chilled glass of rosé in hand (which is what I do). Sooooo (here comes the epiphany)...
Why not grill several meals' worth of stuff all at once? Use those coals once for a week of food?
It's kind-of like that cooking fad that my mom and aunt got into about ten years ago, where you would do this huge shop and cook like a mad woman for an entire day to make meals that would last you a month.
Except I love to cook. And I love to eat fresh. And, call me impractical or inefficient or what-have-you, I don't really freeze a lot of food. Maybe I'm doing it wrong, but I find that the freezer changes the texture of foods in ways that I don't like, so instead I tend to grocery shop for the week.
So if I shop for the week, why not grill for the week?
For example, my dinner menus for this week call for a number of things that I could have grilled last night and then reheated or eaten cold. Here's a snapshot of my notes for dinner this week:
I think I'll give this a go and see what we think, then I'll get back to you to let you know if it's successful.
I hope it is. I mean, really, I'd rather not be drinking alone...
It's summer, it's hot, and cooking outside on the grill is really the way to go. Food magically tastes twice as good cooked over smoky charcoal. But I have to be fair to Grillmaster Reiton. Standing over 600° coals in 90° weather night after night probably isn't as much fun as sitting on the deck with a chilled glass of rosé in hand (which is what I do). Sooooo (here comes the epiphany)...
Why not grill several meals' worth of stuff all at once? Use those coals once for a week of food?
It's kind-of like that cooking fad that my mom and aunt got into about ten years ago, where you would do this huge shop and cook like a mad woman for an entire day to make meals that would last you a month.
Except I love to cook. And I love to eat fresh. And, call me impractical or inefficient or what-have-you, I don't really freeze a lot of food. Maybe I'm doing it wrong, but I find that the freezer changes the texture of foods in ways that I don't like, so instead I tend to grocery shop for the week.
So if I shop for the week, why not grill for the week?
For example, my dinner menus for this week call for a number of things that I could have grilled last night and then reheated or eaten cold. Here's a snapshot of my notes for dinner this week:
(Yes, I had a dinner party Sunday!)
A more efficient grill could look something like this: before Grillmaster Reiton grilled our chicken and eggplant for last night's dinner, we could have grilled the ribs (later reheated at low heat in a foil packet in the oven), the butternut (finished cooking the mash in the oven), the steak (grilled slightly underdone and reheated it in a cast iron skillet) and the burgers (also slightly underdone and finished in a skillet).
Then Chef Reiton could also be sitting with a chilled glass of rosé, eating this silky, smoky dip with crisp, cool veggies as an appetizer, now that a decent chunk of time was added back to our summer evenings.
I think I'll give this a go and see what we think, then I'll get back to you to let you know if it's successful.
I hope it is. I mean, really, I'd rather not be drinking alone...
Wednesday, May 24, 2017
Grain-free Granola: A Delicious Anomaly
Chef Reiton and I had the pleasure of having one of his sisters visit us for a night on the way home from a business trip a week or so ago. After years of living close to each other, I didn't realize how much I missed her until we sat into the wee hours of the morning, catching up, reminiscing, drinking probably too much really good wine—and thoroughly enjoying every minute of it.
One thing we always talk about when we are together is food. Not only do we all love to eat, but quite a few people in Chef Reiton's family suffer from celiac, and so we are always sharing new meals or snacks or desserts that we have discovered that are gluten-free.
During this visit, Brenda pulled out a bag of grain-free granola that one of her friends had introduced her to. She let us try it, and wow! It was quite good!
Then she let us know how much that little bag of grain-free granola cost.
I believe I may have accidentally snorted a few pecan pieces in response. Why, oh WHY, do health food companies find it necessary to drastically overcharge for a product that they promote as necessary for all? We all know why: fad = $$$. But for many consumers , it's not about a fad. Their diet is based around a serious health condition, and there is NO reason that anyone should have to pay crap-tons of money to avoid going into anaphylactic shock. It's outrageous, and so I decided to give the health food companies the ol' one-two and come up with my own damn grain-free granola recipe.
The "start-up" cost for making this granola may seem high, I understand. But a whole bag of nut parts is going to make a whole lotta granola. And you are ultimately going to be spending a LOT less than the $8 pre-packaged bag of grain-free granola you buy at the store!
This is not a terribly sweet granola. It's got a warm spice and salty flavor, but it's not going to be loading you up with sugar. And I would call this a snacking granola, not a cereal. You aren't going to need much.
If you don't like honey, you may want to try agave syrup, instead. And a few tips on nuts: don't look for nuts in the baking aisle. Look for the "generic" nuts that are sold in the bulk section or in the produce section. They will be cheaper. Also, look for broken pieces, slivers, or slices, instead. Whole nuts tend to be more expensive because they have to be prettier and so take more work to get out of the shell. And feel free to substitute the type of nuts used; go for what you already have. Or add some dried fruit or a teensy bit of brown sugar if you want it sweeter. You regular readers know what I think: you are the one eating it. Make it what you want. There is no one "right" way to make most recipes!
Ingredients and directions:
In a medium bowl, blend with a whisk:
• 1/8 cup coconut oil, melted
• 1/8 cup honey
Add to bowl and blend again:
• 1/8 tsp. almond extract
• 1/2 tsp. vanilla extract
Add to bowl then stir very well to coat:
• 1/4 cup sunflower seeds
• 1/4 cup slivered almonds
• 1/2 cup cashew pieces
• 1/4 cup pecan pieces
• 1/8 cup chia seeds
• 1/2 tsp. kosher salt
• 1 tsp. ground cinnamon
• 1/4 tsp. ground ginger
• 1/8 tsp. ground nutmeg
Add:
• 1/8 cup coconut flour
Blend well with whisk again. Place a piece of parchment paper on a rimmed baking sheet. Pour granola out onto paper and spread evenly. Break up any large clumps into smaller chunks.
Bake at 325° for 10 minutes. Toss. Bake for another 10 minutes until golden. Remove pan from the oven and place on a wire rack. Cool granola completely.

One thing we always talk about when we are together is food. Not only do we all love to eat, but quite a few people in Chef Reiton's family suffer from celiac, and so we are always sharing new meals or snacks or desserts that we have discovered that are gluten-free.
During this visit, Brenda pulled out a bag of grain-free granola that one of her friends had introduced her to. She let us try it, and wow! It was quite good!
Then she let us know how much that little bag of grain-free granola cost.
I believe I may have accidentally snorted a few pecan pieces in response. Why, oh WHY, do health food companies find it necessary to drastically overcharge for a product that they promote as necessary for all? We all know why: fad = $$$. But for many consumers , it's not about a fad. Their diet is based around a serious health condition, and there is NO reason that anyone should have to pay crap-tons of money to avoid going into anaphylactic shock. It's outrageous, and so I decided to give the health food companies the ol' one-two and come up with my own damn grain-free granola recipe.
The "start-up" cost for making this granola may seem high, I understand. But a whole bag of nut parts is going to make a whole lotta granola. And you are ultimately going to be spending a LOT less than the $8 pre-packaged bag of grain-free granola you buy at the store!
This is not a terribly sweet granola. It's got a warm spice and salty flavor, but it's not going to be loading you up with sugar. And I would call this a snacking granola, not a cereal. You aren't going to need much.
If you don't like honey, you may want to try agave syrup, instead. And a few tips on nuts: don't look for nuts in the baking aisle. Look for the "generic" nuts that are sold in the bulk section or in the produce section. They will be cheaper. Also, look for broken pieces, slivers, or slices, instead. Whole nuts tend to be more expensive because they have to be prettier and so take more work to get out of the shell. And feel free to substitute the type of nuts used; go for what you already have. Or add some dried fruit or a teensy bit of brown sugar if you want it sweeter. You regular readers know what I think: you are the one eating it. Make it what you want. There is no one "right" way to make most recipes!
Ingredients and directions:
In a medium bowl, blend with a whisk:
• 1/8 cup coconut oil, melted
• 1/8 cup honey
Add to bowl and blend again:
• 1/8 tsp. almond extract
• 1/2 tsp. vanilla extract
Add to bowl then stir very well to coat:
• 1/4 cup sunflower seeds
• 1/4 cup slivered almonds
• 1/2 cup cashew pieces
• 1/4 cup pecan pieces
• 1/8 cup chia seeds
• 1/2 tsp. kosher salt
• 1 tsp. ground cinnamon
• 1/4 tsp. ground ginger
• 1/8 tsp. ground nutmeg
Add:
• 1/8 cup coconut flour
Blend well with whisk again. Place a piece of parchment paper on a rimmed baking sheet. Pour granola out onto paper and spread evenly. Break up any large clumps into smaller chunks.
Bake at 325° for 10 minutes. Toss. Bake for another 10 minutes until golden. Remove pan from the oven and place on a wire rack. Cool granola completely.

Wednesday, May 3, 2017
Yotam Ottolenghi's Cauliflower Steaks: A Vegetarian Dinner for Meat Lovers
Summer is coming fast. Maybe a bit too fast. My backside is, like, seriously not ready for it. So last night I made steak for dinner.
You heard me. STEAK. But not steak from a cow or a bison or even a pig.
I made steak from a cauliflower.
Ewww, I just heard you say.
Yeah—NO.
My go-to "I-want-to-be-vegetarian-tonight" recipe writer, Yotam Ottolenghi, has a definite place in my kitchen. When I get tired of simply sautéing my veggies, I jazz them up Ottolenghi-style. His wide use of Middle Eastern spices and flavorings add a depth to vegetable dishes you just don't see elsewhere in the veggie world.
Like these cauliflower steaks shared in Bon Appétit (April 2017), for example. Ottolenghi transforms a vegetable that many only tolerate, cutting it into thick slices then alternately pan-frying and oven-roasting it into a deep, dark caramelized hunk of beefy deliciousness. Who would think?
[I can still hear some of you saying "Ewww." Just—shut up and go try it. You and your butt will be thanking me and Ottolenghi. Promise.]
Want some more suggestions of what to try from Ottolenghi? Check out his veggies-only cookbook, Plenty: Vibrant Vegetable Recipes, or his team-up with his buddy, Sami Tamimi, in Jerusalem: A Cookbook. I think you and your behind will be going vegetarian more often, too.
You heard me. STEAK. But not steak from a cow or a bison or even a pig.
I made steak from a cauliflower.
Ewww, I just heard you say.
Yeah—NO.
My go-to "I-want-to-be-vegetarian-tonight" recipe writer, Yotam Ottolenghi, has a definite place in my kitchen. When I get tired of simply sautéing my veggies, I jazz them up Ottolenghi-style. His wide use of Middle Eastern spices and flavorings add a depth to vegetable dishes you just don't see elsewhere in the veggie world.
Like these cauliflower steaks shared in Bon Appétit (April 2017), for example. Ottolenghi transforms a vegetable that many only tolerate, cutting it into thick slices then alternately pan-frying and oven-roasting it into a deep, dark caramelized hunk of beefy deliciousness. Who would think?
Laid on a simple bed of puréed cauliflower laced with lemon and tahini, it is then topped with a "salsa" made from more lemon zest, parsley, olive oil and nuts.
If you want to make this a vegan dinner, simply swap out the tiny bit of butter in the recipe for more olive oil. I think the butter contributes to the beefy taste, but it will still be frickin' fantastic to be sure.
I did make a few adjustments because I didn't have what I thought I had... Ottolenghi suggests using walnuts and a Fresno chile for the salsa. I didn't have either, so I used pine nuts instead and skipped the chile but brushed my cauliflower slices with harissa paste (both very Middle Eastern in origin). Remarkably good, oddly satisfying, and SO being made again the exact same way.
[I can still hear some of you saying "Ewww." Just—shut up and go try it. You and your butt will be thanking me and Ottolenghi. Promise.]
Want some more suggestions of what to try from Ottolenghi? Check out his veggies-only cookbook, Plenty: Vibrant Vegetable Recipes, or his team-up with his buddy, Sami Tamimi, in Jerusalem: A Cookbook. I think you and your behind will be going vegetarian more often, too.
Tuesday, February 7, 2017
Rachel Alabiso's Shrimp Tacos
There is nothing in the world like next-door neighbors who pull you out of a slump...
I recently thought I was going to have to put my Marley boy down all of a sudden (I thought I had jinxed him by finally writing his book), and after all of the loss that we've had with our family and friends this past year, it was the straw that just kind-of did me in. I found myself slipping into a kind of soul-hibernation. That, and I sprained my foot, and Marley was put on major drugs—so I was holed up, anyway.
Well, the other night, our next-door neighbors, Annette and Justin, decided that I needed a break from the house and invited the three of us over for our long overdue Taco Night. They also invited over "the other Rachel" and Mike of our Thursday Night Crew.
To contribute to the dinner, Chef Reiton and I brought over some cookies (I came up with a lemon-pistachio baby that the girls gave a thumbs-up; I'll make them again and do a post later). Rachel and Mike, however, brought over the most delicious shrimp concoction for shrimp tacos that I have ever had. EVER.
I know, right?!??! And you know what I love? Rachel WINGED THE RECIPE. She thought about what flavors would taste great with shrimp—salt and black pepper, of course, with some garlic, ancho chile powder, cumin, paprika, and dried orange peel (she makes her own powder by peeling and drying just the orange part of the peel and then grinding it up).
Next, she peeled a couple pounds of fresh shrimp (fresh really does make a difference, if you can get it near you), sprinkled them with the above seasonings (no measuring, just eyeballing it) and then tossed it all to coat with a bit of frozen corn. She let the shrimp marinate and the corn thaw until we were ready to cook, and then she just sautéd the shrimp for a few minutes until they reached that perfect, just-pink curl, squeezing some lime over the whole thing when they were done and serving them on a banana leaf.
Can you say that a non-French food has je ne c'est quoi? The blend of seasonings was perfect. You couldn't figure out what made them so damn good. All you knew was that you could not stop eating them.
Sigh. Thank God for next-door girlfriends. I'd be turning into a potato by now. And I never would have experienced Rachel's shrimp tacos.
So, remember our lesson for today: DON'T BE AFRAID TO WING IT. If you don't feel like you are good at discerning what tastes good with what, go buy yourself a copy of The Flavor Bible. Believe me, it will change the way you cook. Recipe writing will suddenly be something you can do. Swears.
And now, I'm off. I've got some oranges to peel...
I recently thought I was going to have to put my Marley boy down all of a sudden (I thought I had jinxed him by finally writing his book), and after all of the loss that we've had with our family and friends this past year, it was the straw that just kind-of did me in. I found myself slipping into a kind of soul-hibernation. That, and I sprained my foot, and Marley was put on major drugs—so I was holed up, anyway.
Well, the other night, our next-door neighbors, Annette and Justin, decided that I needed a break from the house and invited the three of us over for our long overdue Taco Night. They also invited over "the other Rachel" and Mike of our Thursday Night Crew.
To contribute to the dinner, Chef Reiton and I brought over some cookies (I came up with a lemon-pistachio baby that the girls gave a thumbs-up; I'll make them again and do a post later). Rachel and Mike, however, brought over the most delicious shrimp concoction for shrimp tacos that I have ever had. EVER.
I know, right?!??! And you know what I love? Rachel WINGED THE RECIPE. She thought about what flavors would taste great with shrimp—salt and black pepper, of course, with some garlic, ancho chile powder, cumin, paprika, and dried orange peel (she makes her own powder by peeling and drying just the orange part of the peel and then grinding it up).
Next, she peeled a couple pounds of fresh shrimp (fresh really does make a difference, if you can get it near you), sprinkled them with the above seasonings (no measuring, just eyeballing it) and then tossed it all to coat with a bit of frozen corn. She let the shrimp marinate and the corn thaw until we were ready to cook, and then she just sautéd the shrimp for a few minutes until they reached that perfect, just-pink curl, squeezing some lime over the whole thing when they were done and serving them on a banana leaf.
Can you say that a non-French food has je ne c'est quoi? The blend of seasonings was perfect. You couldn't figure out what made them so damn good. All you knew was that you could not stop eating them.
Sigh. Thank God for next-door girlfriends. I'd be turning into a potato by now. And I never would have experienced Rachel's shrimp tacos.
So, remember our lesson for today: DON'T BE AFRAID TO WING IT. If you don't feel like you are good at discerning what tastes good with what, go buy yourself a copy of The Flavor Bible. Believe me, it will change the way you cook. Recipe writing will suddenly be something you can do. Swears.
And now, I'm off. I've got some oranges to peel...
Thursday, February 2, 2017
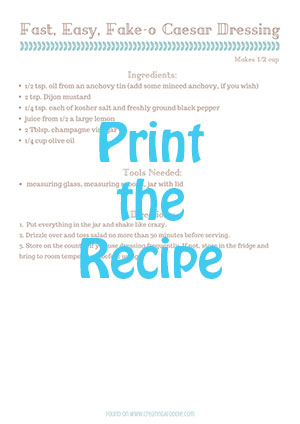
Fast, Fake-o Caesar Salad Dressing
If you've read my blog over the years, you know that I am in chef-love with two people: John Besh (our honeymoon of foodies) and Mark Bittman. Either one of them I would fly five thousand miles to cook with and welcome into my kitchen any time. I imagine that sharing a kitchen with these guys would be relaxed, full of laughs and, yes, a major learning experience. But a good one.
Just this past week I made (yet again) Besh's chicken and sausage gumbo from his latest cookbook, Besh Big Easy. Even Marley, our dog, loves it. And Bittman? Bittman is the most popular reference book in our house. We crack open (and have given away) How to Cook Everything more times than I can count.
One of our go-to recipes of Bittman's is his Caesar salad. It's the real deal, with anchovies and lemon, coddled egg and big, fat croutons. The problem: it does take, like, 10 minutes of forethought to make it (coddling the egg, not to mention the croutons), and the other night, I didn't have an extra 10 minutes. I needed to throw everything in a jar, shake it up, and be done. Company was coming.
So I cheated—big time. Yes, I used romaine lettuce and lots of finely grated (with a pinhole grater) Parmesan cheese, but no croutons. And the dressing? This is what I threw together:
Just this past week I made (yet again) Besh's chicken and sausage gumbo from his latest cookbook, Besh Big Easy. Even Marley, our dog, loves it. And Bittman? Bittman is the most popular reference book in our house. We crack open (and have given away) How to Cook Everything more times than I can count.
One of our go-to recipes of Bittman's is his Caesar salad. It's the real deal, with anchovies and lemon, coddled egg and big, fat croutons. The problem: it does take, like, 10 minutes of forethought to make it (coddling the egg, not to mention the croutons), and the other night, I didn't have an extra 10 minutes. I needed to throw everything in a jar, shake it up, and be done. Company was coming.
So I cheated—big time. Yes, I used romaine lettuce and lots of finely grated (with a pinhole grater) Parmesan cheese, but no croutons. And the dressing? This is what I threw together:
- 1/2 tsp. oil from an anchovy tin (if I had time, I would have minced up an anchovy, but I didn't)
- 2 tsp. Dijon mustard
- 1/4 tsp. each of kosher salt and freshly ground black pepper
- juice from 1/2 a large lemon
- 2 Tblsp. champagne vinegar
- 1/4 cup olive oil
I shook that like crazy in a jar, and voila! Fake-o and fast Caesar dressing—liked so much by my guest that I was asked for the recipe, so here you are!
Things I think I would try next time, continuing in super-fast, cheater fashion: add a bit of garlic powder to get a bit of that garlicky flavor in there. And maybe a couple drops of Worcestershire sauce to add a little depth. Bittman puts that in his Caesar dressing, and I think that's why.
Speaking of salad dressings, if you want to nix another item from your shopping list because 1) it's full of crap and 2) it's a total waste of money, make it salad dressing. Spend the money, instead, on a variety of different vinegars (balsamic, red wine, white wine, champagne, rice wine, apple cider) and some Californian olive oil (don't buy Italian unless from a trusted source; you aren't guaranteed to be actually getting what you think you are buying) and make your own at home. Dressings are generally about 3 parts oil to 1 part acid plus a little bit of an emulsifier, like Dijon mustard, egg, honey, mayo...then seasonings. Even drizzling your salad with olive oil, tossing, then drizzling with a little vinegar, and tossing again is shockingly good. My Grandma Paola taught me that.
And something else I have learned to do that really makes a difference with salad: salt it, don't just pepper it. I actually take a pinch of kosher salt and give my salad a decent sprinkle before I toss it. It's amazing how it really brings out the flavors of the dressing and whatever you've got in the salad. Give it a try. I think you'll like it.
So! Screw bottled salad dressing! Print the recipe below, and the next pizza or lasagna night you have where you find yourself suddenly scrambling for a green salad, chop up some romaine, grate or shave on some Parmesan cheese and throw this dressing together for a last-minute Caesar; I think you will find it's a pleaser!
Monday, November 21, 2016
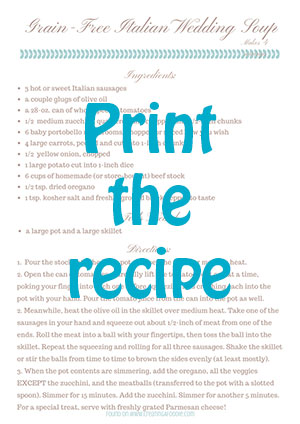
Grain-Free Italian Wedding Soup: A Simple Winter Meal
I find it funny that I recently posted about how much I love to grocery shop, and the post I'm writing today came about because we were so short on food the other night! It was cold, windy, dark (I am NOT used to this dark-at-4:30 crap...), and we had NO food in the house. Like, I-feel-like-a-TOTAL-slacker kind of no-food-in-the-house. Ugh.
But desperation is the mother of creativity, right?
Right.
Wide open the pantry, fridge and freezer doors were flung, followed by some shuffling and grunting, and out came:
But desperation is the mother of creativity, right?
Right.
Wide open the pantry, fridge and freezer doors were flung, followed by some shuffling and grunting, and out came:
- 3 hot Italian sausages
- 1 28-oz. can of whole, peeled tomatoes
- 1/2 a zucchini
- 6 baby bella mushrooms
- 4 large carrots
- 1/2 a yellow onion
- 1 large potato
- 6 cups of homemade beef stock (check out how to make your own here!)
Right then Chef Reiton walked into the kitchen. "Italian wedding soup?" he asked.
BINGO.
You will not believe the tastiness created by throwing these ingredients together. Not to mention, it was super easy and quick. I had it done from pulling out the ingredients to sitting down to dinner in an hour, tops.
Don't forget: you are allowed to play. Change up the veggies to use what you have. Add pasta, if you insist (you will want to thin out the stock with some additional water, if you do). And if you want to jazz it up to another level, grate some fresh Parmesan into your bowl as a topper.
Oh, dear. Wedding or no, get ready for your diners to ask for a second bowlful!
Click the recipe card below to download or print! And remember, when you've been a total slacker, don't lose faith! Just get creative!
Labels:
gluten-free
,
grain-free
,
Italian
,
paleo
,
quick
,
recipe
,
sausage
Wednesday, November 16, 2016
When a Potato Isn't a Potato: The Best Mashed "Fauxtatoes" Recipe for a Paleo (or Diabetic) Thanksgiving
Many of you out there have heard of the Paleo diet, a way of eating that eliminates foods that are "new" in the agricultural evolutionary scheme of things which supposedly freak out our bodies and make a lot of weird, unhealthy crap-ola happen: potentially things like lupus, Crohn's, rheumatoid arthritis, cancer... It's been getting a lot of research, and while both sides vehemently argue its validity, I have to personally say that I have felt much, MUCH better by drastically cutting back on two of the big "no-nos" of the Paleo menu: grains of any sort and dried legumes (that includes peanuts).
Also included on some Paleo-ers "do-not-eat" list are white potatoes. I believe the argument is that the glycemic index of a white potato is quite high. With that being said, I still eat white potatoes; I just eat them a LOT less often. What I do instead is what a lot of Paleo-ers (and a lot of diabetics!) do: I make "fauxtatoes."
What the hell, you ask?
I know. It's hokey. But here's what it is: it's cauliflower, generally steamed and then puréed to a smooth consistency to resemble mashed potatoes.
I've been making it for several years now, and I like it. I do. But I've always been a bit annoyed with one thing (which if you've tried it, you probably know what I'm about to say): the "fauxtatoes" always come out looking a bit watery and loose. They don't have that oomph that mashed potatoes do. And I WANT that oomph. I like when they plop onto my plate, not ooze.
SO. Last night I was making fauxtatoes to accompany some chicken scallopini and sautéed Swiss chard when it suddenly hit me: why don't I try drying out my cauliflower before I purée it???
DUH.
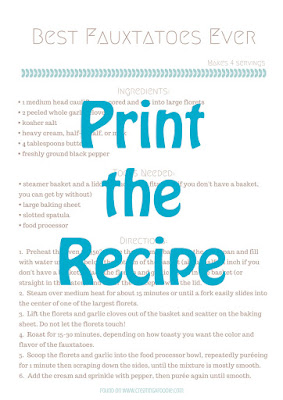
So, here's what I did: I placed my cauliflower florets (a medium-sized head, cored and cut into large florets) plus two peeled garlic cloves into a steamer basket, sprinkled them with a bit of kosher salt, and steamed them for about 15 minutes (or until I could easily slide a fork into the center of the largest piece).
I then spread out the florets on a baking sheet, making sure to have room around each piece so that they weren't steaming each other. I sprinkled them again with a little bit of kosher salt.
I roasted the florets in a 350° oven for 30 minutes without tossing them until they were golden on the tops and nicely browned on the bottoms.
Then I scooped the florets and the garlic cloves into my food processor, dropped in half a stick of butter (true Paleo-ers would not use any dairy), ground in some freshly ground black pepper, and puréed for about a minute. I scraped down the sides and puréed for another minute. I kept repeating this until the mixture was almost completely smooth. I then added a tablespoon-ish splash of cream and puréed until the fauxtatoes were perfectly smooth.
Here's a glamour shot with lots of Irish butter:
When we sat down to dinner, I asked Chef Reiton if he noticed anything different. The first thing out of his mouth: "The consistency! These are like potatoes!"
YAHOOOOO! My experiment worked! But we still brainstormed things we will try next time. What if I didn't roast the florets so long? The browning definitely affected the color of the fauxtatoes, not to mention the taste. While the taste was good, we were interested in seeing what it would be like to roast them just long enough to drive off that excess water, maybe when the tops were just beginning to become brown in spots.
We also thought about eliminating the garlic. Or maybe adding a bit of sour cream instead of cream? How about some herbs? So many things to try! All will taste good, I know, but it will be fun to experiment.
SO. If you've got some diabetics coming to Thanksgiving dinner, or some Paleo eaters, give these fauxtatoes a try. They may just be the best non-potato potato you've been dreaming of! Print the recipe below, and, please, feel free to share what you think in the comments!
Happy Thanksgiving, all!
Wednesday, February 10, 2016
The Cooking and Eating of Vegetables: The Simple Truth
When I was growing up, my mother was a huge proponent of "Eat your veggies." Like, HUGE. Not in a disturbing "Here's a cupcake (i.e. bran muffin)!" kind of way but an I-will-serve-salad-with-dinner- EVERY-night-alongside-another-vegetable-on-the-plate kind of way. I cannot remember sitting down for dinner once without there being vegetables in a variety of forms on the table.
This is the vegetable that always gets a lot of questions, the most common one being, "What IS this?"
On the far, far opposite side of my Favorite Ways to Cook Vegetables spectrum is cooking vegetables in water. In any kind of water. If you come across a recipe that tells you to boil a vegetable, RUN—hard and fast. Boiling is a technique that leaches the vitamins out of your veggies so fast and reduces their deliciousness to a murky-tasting pile of mush.
Don't even let the French talk you into it. They may call it something fancy: braising. It sounds nice, doesn't it? So nice that I tried it the other night. Julia talked me into it. So I took these gorgeous leeks:
Equipment needed:
Directions:
Bonus Tip! If I feel like jazzing my veggies up a bit, I'll toss them with a little something extra when I add the salt and pepper. Something like:
By the time I had entered this world, frozen vegetables had kicked canned veggies out of the kitchen for good (thank GOD), so, yes, my veggies tended to be "zapped" in that monstrous new-fangled machine that took up almost the entire counter in our kitchen called a "microwave." But no matter—we were getting our veggies. My mother even figured out how to microwave frozen vegetables to be "California-style."
Needless to say, because of my childhood home dining experiences, as an adult, eating dinner without two vegetables on my plate seems like half-assed meal planning and flat-out vaguely scary. Like, "Now I may not be able to poop tomorrow" scary. And "Maybe I should go take that multi-vitamin..." So I buy and cook a lot of veggies. A LOT. To the point I get comments at the checkout in the grocery store. The other day the teenage bagger was trying to guess what I was going to use each vegetable for. Then he picked up this one (pardon the stock photo):
![]() |
| https://pixabay.com/static/uploads/photo/2016/01/11/10/04/fennel-1133309_960_720.jpg |
This is the vegetable that always gets a lot of questions, the most common one being, "What IS this?"
This delightful root vegetable can be found under two different names in the produce section: fennel or anise. It can be eaten raw or cooked, and it has become one of my all-time favorite veggies. It's seeds are what give Italian sausage that distinctive peppery, pungent, almost licorice-y flavor and are what most people think of when you say "fennel."
I use the seeds in my pasta sauce and in my meatballs, but I have mostly learned that I love the fennel bulb the most. I love it straight up, unadulterated, sliced and then roasted.
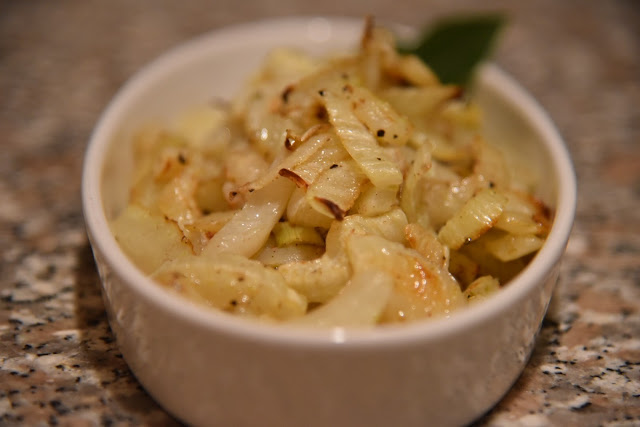
You heard me, people. ROASTED. The prime way, and easiest way, may I add, to cook vegetables. Roast them in your oven or toaster oven, or even pan-roast them in a skillet. I don't care which way. But roasting vegetables does two things that I just absolutely love: 1) it changes the flavor of the vegetable completely because it essentially is slowly caramelizing all the sugar in the veggie. The flavors become deeper, more mellow. And 2) because your veggie is slowly being cooked in a single layer by hot air or a hot surface, you have more control of how cooked it gets. You can fork several pieces every 10 minutes or so and see how "done" they are. Some veggies I like with a bit of bite left, like zucchini or carrots or cauliflower. Others I like until they are just soft enough to bit straight through, like potatoes or the hard squashes or this fennel, here. There is just not a simpler, more delicious way to cook vegetables. Not to mention the prep time is, like, two minutes. Look how gorgeous...:
Don't even let the French talk you into it. They may call it something fancy: braising. It sounds nice, doesn't it? So nice that I tried it the other night. Julia talked me into it. So I took these gorgeous leeks:
and put them in a pot of water. I stupidly thought the butter would make a difference... She told me to simmer them for some God-awful amount of time, which I convinced myself was because they were leeks and that somehow would make them better.
And then when MOST of the water had simmered off, I put it all (including the water that was left) into a roasting pan and roasted them for another quarter of an hour. Here's what ended up on my plate:
I know. I know. I mean, LOOK AT THEM. They scream "overcooked," "mushy," "slimy," and "I-won't-need-teeth-to-eat-this" right from the plate! But, being the experimenter that I am, I tried them, anyway, with a very timid bite...
I almost titled this post, "Mastering the Gag of French Cooking," but I decided to come at it from a more positive angle. And to not offend the devoutest of Julia Child's fans.
So. Learn from me. Roast your veggies. Roast them. It's the easiest. The yummiest. The best.
Here's how:
Ingredients:
- your veggie or veggies of choice, cut up however you want; just try to make the pieces all the same size
- (NOTE: if using multiple types of veggies, roast similar "hardnesses" together so that they can be done in the same amount of cooking time OR add veggies that are softer/will cook faster to the pan a bit later after the longer-cooking ones)
- olive oil or your favorite type of oil (I like the flavor of olive oil best)
- kosher salt
- fresh ground black pepper
Equipment needed:
- a medium bowl
- a sheet pan or a casserole dish or skillet to lay your veggies out in a single layer
- (NOTE: the more wiggle room the veggies have where they aren't doing a whole lot of touching, the better the browning will be. Too much contact makes them steam more than brown).
- aluminum foil or parchment paper to line the pan (easier clean up; skip if you don't have any)
- a flat metal or plastic flipping spatula
Directions:
- Preheat your oven to 425°. If using a toaster oven, do 375° to 400°, depending if it is tiny or big. If you are using a skillet on the stove top, heat it over medium heat.
- Line your pan with foil or parchment for easy clean up. If using a skillet, just leave it alone.
- Place your veggies in the bowl.
- Drizzle the veggies with olive oil. Toss the veggies with the oil really well with your hands. If the veggies don't all look coated, drizzle with more oil and keep tossing. You want the veggies coated well but not swimming in oil.
- Sprinkle the veggies with salt and pepper and give them one last good toss to coat.
- Dump the veggies in the pan and spread them out in a single layer. If you are using a skillet, use a spoon or spatula to spread them out; you don't want to burn your fingertips on the hot skillet...
- Place the pan in the hot oven and roast for 10 minutes. Take the pan out of the oven, toss the veggies to recoat and flip, then put them back in the oven for another 10 minutes. If you are using a skillet, toss them a bit more frequently. You want browning, but the smaller surface area can make them cook faster.
- After the second 10 minutes, you are going to be making a judgement call on how well done you want your veggies. Spear a couple pieces with a fork to test how crunchy they are. When they feel good to you, remove them from the oven and dump them in a serving dish. Garnish however you want.
- Eat with abandon.
Bonus Tip! If I feel like jazzing my veggies up a bit, I'll toss them with a little something extra when I add the salt and pepper. Something like:
- lemon zest from the peel of one lemon
- a few smashed garlic cloves (don't even peel them!)
- a couple shallots quartered lengthwise right through the root
- a sprinkle of a favorite spice or spice blend
- a few good shakes of my Regan's orange bitters
Get creative! I bet you it will taste delish. And if it doesn't? Well, you don't know until you try, right?
So go get roasting! Comment below and share what you've tried! And if you have any questions, please ask below. I am happy to help!
Labels:
disaster
,
French
,
paleo
,
pointers
,
primal
,
recipe
,
vegetables
,
vegetarian
Tuesday, February 9, 2016
Put Some Blueberries On It!: Learning to Make Green Salads with Fruit
I have always been a fan of blueberries, ever since I was a kid. Even after I threw up blueberry pancakes in the back of our Volkswagon Beetle when I was four years old, my love for those little suckers didn't fade. When we moved to Pennsylvania and settled into a home right smack in some woods full of blueberry bushes, I thought I had died and gone to heaven. It might have taken an hour to fill a measly cup with those tiny berries, but I didn't care. I had blueberries in my backyard.
As an adult, they are still my go-to berry. I use the dried wild ones in my scones. Frozen blueberries get tossed into my random smoothie. And I buy a package every week to top off my plain Greek yogurt.
But you want to know what I've gotten really into lately?
You got it! Salads. SO yummy. Their little bursts of sweet, and sometimes tart, flavor add such wonderful contrast to the pungent flavors of shallots or red onion and a sprinkle of gorgonzola or feta cheese. And the juice they release blends wonderfully with a simple olive oil and vinegar dressing. Simply drizzle your salad with olive oil first and toss the greens to coat them, then sprinkle on a bit of good balsamic vinegar, a pinch of kosher salt, and a few grinds of fresh cracked black pepper. Toss again, and you've got an absolutely delicious salad that is super healthy, thanks to blueberry's super antioxidant powers.
Give it a shot and let me know what you think! Have another weird salad topping of choice? Send us a comment and let us all know!
Labels:
fruit
,
paleo
,
pointers
,
primal
,
quick
,
salad
,
vegetables
,
vegetarian
Sunday, February 7, 2016
Defrosting Your Fridge: Ideas for What to Do with That Food!
Happy belated New Year, all! I can't believe we are well into 2016 already. Where does the time go?
I haven't written a word to you all for over a month! It appears that the holidays were busy and then some! It feels good to be back. In between all the traveling and company, I've been slowly hashing out my New Year's resolution to create a daily routine (as routine as a pilot's wife can get). Getting back to you all will be part of my writing goal (but I've got some other projects in the works, so I'm going to need you to share).
One of my other New Year's goals is to get better at experimenting in the kitchen. There are so many foods that I buy at the store that I can make at home (yogurt, ricotta, kombucha, etc. Notice the fermentation theme, here). I've just been lazy and haven't taken the time to read up on it and to try it.
Well, Fate decided to lend a hand and throw us a broken fridge to help me get that ball rolling...
A few weeks ago, Chef Reiton and I noticed that we were getting random pools of water appearing from beneath our fridge. After a bit of inspection and research, we learned that the little hose in the back of the fridge that allows the defrost water to drain can get clogged, causing the water to leak out onto the floor and into the bottom of the freezer drawer (we wondered where that huge sheet of ice was coming from...). Thanks to Google and those who share their knowledge on home refrigerator repair, we discovered how to solve the problem ourselves instead of having to call our friendly but expensive Whirlpool repairman.
The down side? We had to defrost the fridge.
Crap.
Thankfully, 1) the winter storm that hit Boston on Friday was bigger than was expected, so the 7 inches of snow piled on our back deck could serve nicely as a natural cooler. 2) We tend to shop twice a week for food, so we didn't shop for the second half; the dinners just became compilations of random scavenged foods as we tried to use up what was in the fridge and freezer, just in case repairs didn't go as quickly or smoothly as we wanted.
Well, despite our interesting meal combos, we were still left with:
- a bunch of cheese (we have a good-cheese fetish, admittedly)
- lots of pickled items in jars
- butter
- half-n-half
- a frozen leg of lamb
- a few random vegetables
- some chicken wings and a carcass
The cheese, jars, and lamb leg got stuck out in the snow in a plastic storage tub. But those veggies and the chicken?
Well, my New Year's resolution of experimenting started halloo-ing from the back of my brain, and so I pulled out a wonderful little book, The Essential Book of Fermentation by Jeff Cox, given to me for my birthday by our dear friends, Joe (now my boss—I'm officially a copy editor!) and Marie.
What was I going to ferment? That gorgeous purple cabbage that had been sitting all lonely and forlorn in my fridge, that's what. In five minutes flat, that baby was slivered into shreds and sprinkled with sea salt and caraway seeds:
All I had to do was completely man-handle that pile of shreds for 10 minutes, scrunching and crushing and squeezing and mixing, until I got it to be a juicy, purple, tender mess:
I covered the surface with some plastic wrap, put a plate facedown on top so that all the cabbage was covered up, then I pressed the plate down hard, pushing all the shreds down underneath their own purple juices. Now the cabbage was ready to ferment, slowly developing into that amazingly health food: sauerkraut. If you've never had it homemade, you are missing out. It is entirely different from the sweet, vinegary kind you get at the store. And homemade fermented sauerkraut contains bacteria GALORE that will make your gut incredibly happy. Like, really insanely happy. In fact, a lot of nutritionists say that eating sauerkraut every day does wonders for your body. Some food for thought...
As for the other vegetables and chicken parts that sat on the counter—you regular readers guessed it...
CHICKEN STOCK.
Chicken wings and a carcass and a bit of leftover roasted chicken got dumped in the Crock-Pot and covered with a quartered onion, old celery, leftover herbs, a hunk of carrot, sliced up shrivel-y ginger root and turmeric root, a wrinkled serrano chile pepper, and the frozen scraps left from making spiralized zucchini noodles. I filled the pot with water, put it on high until it all came to a boil, then turned it down to low. That was yesterday afternoon, and she's still going strong. I topped it off with a bit more water this morning, and I'll probably let it go until tomorrow afternoon. The more nutrients I can suck out of those bones, the better. And if you could just smell my house right now... Man.
I'm happy to say that the fridge fixing went ridiculously smoothly. It took me longer to take advantage of the empty fridge and give it a good scrub down than it did for the repair. Here she stands, all clean and shiny, ready and waiting for that homemade sauerkraut and chicken stock.
The only question is, what do I experiment on making next???
Labels:
chicken
,
cookbook
,
crockpot
,
paleo
,
pointers
,
primal
,
quick
,
vegetables
,
vegetarian
Thursday, October 22, 2015
Learning to Make Your Own (Gluten-Free!) Stock
After watching the leaves out here on the East Coast go through a wardrobe change that I have never witnessed before (and I cannot believe I am going to be able to witness it year after year), I am officially getting ready to hunker down for winter. With the flip flops put away, the toasty knee socks pulled up, and the fireplace popping comes the cold weather longings of soups and stews and all things warm and slow. And that means replenishing the stock stockpile.
No, I just didn't stutter (although I do do that on occasion. Wait. No, seriously. I just didn't do it again to be funny...). Stock is the incredibly practical and insanely delicious kitchen staple made from—wait for it... SCRAPS.
Mmmmmmm.... Sounds delish, right? Let's take all our nasty peels and bones and pieces of veggie that we just trimmed off because we don't want to eat it and turn it all into food!
Well, that's not quite true. You do take all your nasty peels and bones and trimmed veggie bits, but you simmer them for a really long time to extract all of their flavors, then discard them when you are finished.
For example, this is what I found in my fridge one morning last week:
- half a rotisserie chicken
- a bag of kale that I hadn't liked the texture of (not trimmed well)
- 3 old, rubbery carrots with their tops
- 2 old onion halves with the skin and roots still attached
- half a lemon
- some mushrooms that were all leathery but still smelled okay...
If I wanted to, I could have let it go much, MUCH longer. I've let stocks go for days. Like, almost a week. I just keep adding water until the stock is almost smelling burnt. In this case, I needed the stock for a meal I was making that night, so I just strained it through a colander into a big Pyrex measuring cup, and this is what I got: 8 cups of amber brown chicken stock.
None of this pale yellow wussy crap you buy at the store that tastes like—um—NOTHING and costs at least $2.00 a quart. This stuff? It's basically FREE since you were going to be wasteful and throw that shit out, anyway. And NOW look what you've made!
Just wait until you taste it! Your grandma would be proud. Really.
For shits and giggles, let's look to see what's left in the colander after I strained all that gorgeousness away:
Now THAT you can throw away!
If you don't use all your stock in one recipe, you can freeze it in smaller containers or you can can it (no stuttering). Just remember (as Chef Reiton had to remind me once), this is a product made from meat, so you want to pressure can it to make sure that any residual bacteria is dead dead dead (although the chances of there being any after 24+ hours of simmering are very slim. But still. Better safe than hugging a toilet bowl.).
You can also use any kind of bones you want. Sometimes I buy those creepy soup bones at the grocery store that you know are cow legs and use those to make beef stock. I have used leftover rib bones from rib night and made pork stock. You can use all veggies if you want and no meat. Again, remember the true rules of a real kitchen: DO WHATEVER THE HELL YOU WANT. Your food is yours to play with, test out, and sometimes never be able to duplicate again. You are the boss.
So. Bring that Crock-Pot up from the basement. Go dig through the fridge. Dump whatever you find in there into the pot and add some water. Then come back tomorrow and comment to me how awesome you and your stock are.
Labels:
beef
,
chicken
,
gluten-free
,
paleo
,
pork
,
primal
,
quick
,
recipe
,
vegetables
Tuesday, October 13, 2015
Clarified Butter: The Truth of Ghee Matter
I know I've blogged about ghee before in Thank Ghee for Reading, but I just finished making another batch this very minute, and I thought I'd post again to encourage some ghee making out there.
Ghee is a cooking fat made from heating unsalted butter reeeeeeeeeeeeally slowly and NOT TOUCHING IT. While the butter is melting, the butterfat (the clear stuff) separates from the milk solids (the stuff that looks like tiny cheese curds). If you stop the process after the milk solids separate from the fat, the leftover yellow oil is clarified butter. It's the stuff that you seafood lovers love to dunk your lobster and crab into.
If you keep the process going, however, the water in the butter will begin to evaporate off (you will hear and see it simmering off, sputtering and popping away), and the milk solids will begin to brown and settle to the bottom of the pot, leaving a clear brownish oil that is ghee. This cooking fat is highly heat tolerant as well as rich in flavor, but it also wonderfully rid of the things that make some of our bellies not feel so great (the milk stuff such as casein and lactose).
To strain the ghee from the solids, simply pour the liquid in the pot through a cheesecloth-lined sieve into a bowl, then let the oil cool. Voila! You've got your ghee!
The quantity of ghee you get will depend on the quality of the butter you use. European butters with a higher butterfat content will yield more ghee than the cheaper butters that contain a bit more water. They are more expensive, but they are worth it—not just for the amount of ghee produced but also for the flavor. This is an area where cheap ass me doesn't skimp.
Once your ghee has cooled, you can store it in a jar on the counter or in the fridge. It will become harder in the fridge, but it will last longer (about 12 months vs. 6 months on the counter). If you are like me, it doesn't last 6 weeks much less 6 months, but you do what works for you.
For more info about ghee, check out What's Cooking, America's page all about it.
And give a shout if you make a batch! I'd love to hear your thoughts and how you are using it!
Ghee is a cooking fat made from heating unsalted butter reeeeeeeeeeeeally slowly and NOT TOUCHING IT. While the butter is melting, the butterfat (the clear stuff) separates from the milk solids (the stuff that looks like tiny cheese curds). If you stop the process after the milk solids separate from the fat, the leftover yellow oil is clarified butter. It's the stuff that you seafood lovers love to dunk your lobster and crab into.
If you keep the process going, however, the water in the butter will begin to evaporate off (you will hear and see it simmering off, sputtering and popping away), and the milk solids will begin to brown and settle to the bottom of the pot, leaving a clear brownish oil that is ghee. This cooking fat is highly heat tolerant as well as rich in flavor, but it also wonderfully rid of the things that make some of our bellies not feel so great (the milk stuff such as casein and lactose).
To strain the ghee from the solids, simply pour the liquid in the pot through a cheesecloth-lined sieve into a bowl, then let the oil cool. Voila! You've got your ghee!
The quantity of ghee you get will depend on the quality of the butter you use. European butters with a higher butterfat content will yield more ghee than the cheaper butters that contain a bit more water. They are more expensive, but they are worth it—not just for the amount of ghee produced but also for the flavor. This is an area where cheap ass me doesn't skimp.
Once your ghee has cooled, you can store it in a jar on the counter or in the fridge. It will become harder in the fridge, but it will last longer (about 12 months vs. 6 months on the counter). If you are like me, it doesn't last 6 weeks much less 6 months, but you do what works for you.
For more info about ghee, check out What's Cooking, America's page all about it.
And give a shout if you make a batch! I'd love to hear your thoughts and how you are using it!
Tuesday, October 6, 2015
How to Compose Yourself (and Your Salad)!: A Composed Salad Recipe with Baby Arugula, Red Pear and Shallot
I used to laugh at that term—a composed salad—when I was a kid. Personification would kick in, and all I could think of was a salad sitting up straight and tall, eyes downcast, hands in her lap, waiting with great grace for her turn to be eaten.
Salads are not my favorite thing to make. I like to eat them, but I struggle with being too impatient to put one together at the end of meal prep; I just want to eat.
Thank God for those little boxes of organic lettuces and leaves. I know they are more expensive, but 1) they are organic, 2) I don't have to rinse any damn leaves, and 3) I don't have to chop any damn leaves. The only thing I'm left to do is cut up some tomato and cucumber, and I can call it a day.
And the-e-e-e-en there's my husband. Salad creation is his specialty. He reminds me of Jonathan in the old '80s movie, Splash, who gets fired for being too artistic with his pizza-making. That's Chef Reiton. His salads are gorgeous. And he looks so relaxed making them. I bang away at the cutting board to hurry up and get it done, and he stands and meditavely slices and minces and slivers and chops. It makes me jealous.
So the other night I determined: I was going to make a killer salad. Not the tossed green salads I always make. No. I was going to make a composed salad. A little work of art on a salad plate.
I took three ingredients:
Salads are not my favorite thing to make. I like to eat them, but I struggle with being too impatient to put one together at the end of meal prep; I just want to eat.
Thank God for those little boxes of organic lettuces and leaves. I know they are more expensive, but 1) they are organic, 2) I don't have to rinse any damn leaves, and 3) I don't have to chop any damn leaves. The only thing I'm left to do is cut up some tomato and cucumber, and I can call it a day.
And the-e-e-e-en there's my husband. Salad creation is his specialty. He reminds me of Jonathan in the old '80s movie, Splash, who gets fired for being too artistic with his pizza-making. That's Chef Reiton. His salads are gorgeous. And he looks so relaxed making them. I bang away at the cutting board to hurry up and get it done, and he stands and meditavely slices and minces and slivers and chops. It makes me jealous.
So the other night I determined: I was going to make a killer salad. Not the tossed green salads I always make. No. I was going to make a composed salad. A little work of art on a salad plate.
I took three ingredients:
- a red pear with the flower blossom end sliced off and discarded
- baby arugula
- a small shallot, peeled, with the root end trimmed
With my mandoline on the thinnest setting, I sliced the red pear crosswise into circles until I started to hit the seeds (about half the pear). Next I sliced the shallot into circles.
Now came the composing:
- I lay the pear slices in a ring on the salad plate, overlapping the edges a bit.
- I placed a nice little mound of baby arugula in the center of the ring.
- I sprinkled the little shaved rings of shallot on top of the arugula mound.
That was it. To dress it I sprinkled it with a little bit of olive oil, a little bit of balsamic vinegar, a few grinds of fresh black pepper, and a teensy bit of kosher salt.
The result? GOR-GEOUS!!!!
And it took, like, 2 minutes to make! AND it was delicious!
I think I may have found my new favorite thing to create! Folks, get ready for some serious salad composure!
Labels:
dairy-free
,
fruit
,
grain-free
,
paleo
,
quick
,
recipe
,
salad
,
vegetables
,
vegetarian
Wednesday, September 30, 2015
The Power of Pot Roast: The Recipe That Needs No Recipe
So I've decided: if there were to be a king of the slow cooking world, it would be Pot Roast.
Pot Roast comes from humble beginnings, and so he understands the ways of those who don't have much. He was born, after all, in the home of a peasant. True, his fame is known world over (with varying degrees of acceptance), but despite his frequent appearance in magazines and television, he has remained true to his roots and the belief that simple and slow is best.
Yesterday, Pot Roast ruled in my kitchen.
Before I headed out to run errands all day, out came my trusty old Crock-Pot and in went the following:
I placed all my ingredients in layers in the Crock-Pot (tomatoes on the bottom to burst first and create a pool of juice), then sprinkled it all with kosher salt, freshly ground pepper, and a bit of Italian seasoning (and a random quarter of a lemon I had leftover from last night's Sidecars), turned the C-P on to low, and walked out of the house for the rest of the day.
Now. Here's what I love about Pot Roast. The next time I make this? The meat will be a totally different cut. I might not even sear it because I don't have the time. I might decide to add in some mushrooms. Or use real potatoes in the pot instead of making a bed of fauxtatoes. Or nix the tomatoes and use more garlic instead. Or use a bunch of fresh herbs instead of the dried mix. I might even skip the Crock-Pot and decide to dump everything in a Dutch oven and put it in my oven instead at 250°.
POT ROAST DOESN'T CARE. Whatever you feel like throwing in there, throw in there! Use the cooking method you like the most (or have available). The miracle of pot roast is that it all promises to taste goooooooooood no matter what you use or how you do it. Just remember: low heat, a bit of salt, and a long period of time are powers in the kitchen that can't be denied.
Hail to the king!
Pot Roast comes from humble beginnings, and so he understands the ways of those who don't have much. He was born, after all, in the home of a peasant. True, his fame is known world over (with varying degrees of acceptance), but despite his frequent appearance in magazines and television, he has remained true to his roots and the belief that simple and slow is best.
Yesterday, Pot Roast ruled in my kitchen.
Before I headed out to run errands all day, out came my trusty old Crock-Pot and in went the following:
- random beef cuts (I will blog about that later...) to feed 2 people, seared on both sides with a bit of olive oil and kosher salt
- 2 giant carrots from the farmers market, halved lengthwise and chunked
- 1/2 a large yellow onion, sliced
- 2 garlic cloves, smashed
- about 15 small cherry tomatoes
I placed all my ingredients in layers in the Crock-Pot (tomatoes on the bottom to burst first and create a pool of juice), then sprinkled it all with kosher salt, freshly ground pepper, and a bit of Italian seasoning (and a random quarter of a lemon I had leftover from last night's Sidecars), turned the C-P on to low, and walked out of the house for the rest of the day.
When I walked back in the door after picking up Captain Reiton from the airport, I took several deep whiffs of deliciousness before making a quick batch of "fauxtatoes."
To do this, I cut large florets from half a head of cauliflower, placed them in a pot filled with about 1 inch of water, added a garlic clove and some kosher salt, then covered the pot and set it on the stove over medium-high heat to steam for about 10 minutes. When I could easily stab through the largest floret with a knife, I strained the florets and garlic clove and dumped it all in the food processor with half a stick of butter and some salt and pepper and pureed away until everything was super smooth. These "fauxtatoes" (they taste better than potatoes, I swear) became the bed for King Pot Roast.
(I didn't have any parsley to garnish. Sorry.)
Now. Here's what I love about Pot Roast. The next time I make this? The meat will be a totally different cut. I might not even sear it because I don't have the time. I might decide to add in some mushrooms. Or use real potatoes in the pot instead of making a bed of fauxtatoes. Or nix the tomatoes and use more garlic instead. Or use a bunch of fresh herbs instead of the dried mix. I might even skip the Crock-Pot and decide to dump everything in a Dutch oven and put it in my oven instead at 250°.
POT ROAST DOESN'T CARE. Whatever you feel like throwing in there, throw in there! Use the cooking method you like the most (or have available). The miracle of pot roast is that it all promises to taste goooooooooood no matter what you use or how you do it. Just remember: low heat, a bit of salt, and a long period of time are powers in the kitchen that can't be denied.
Hail to the king!
Labels:
American
,
beef
,
crockpot
,
dairy-free
,
gluten-free
,
grain-free
,
paleo
,
primal
,
quick
,
recipe
,
vegetables
Subscribe to:
Posts
(
Atom
)