Showing posts with label quick. Show all posts

Friday, June 22, 2018

Toast-less Avocado Toast: The Paleo Version

Food fads both fascinate and frustrate me. Being one who loves to learn anything new in the kitchen—whether it be a new taste for something or a new technique—I'm open to most (most, mind you) anything.

And so when I hear that such-and-such is so flipping good, and I see blog posts and magazine articles singing its praises, and menu after menu offering said food, I usually will give it a try. See my post on grain bowls as an example...

What frustrates me, on the other hand, is when something in the food world just gets OVERDONE. Like, there is nothing else. I see this with ingredients, flavors, techniques.

Take the word "umami," for instance. The word "umami" was first used by Kikunae Ikeda in 1908. 1908!!! But it is used now as if it is the newest and most insanely incredible taste that has ever been discovered. If I hear or read the word "umami" one more time, I'm going to take my bottle of coconut aminos and throw it out the window! (Although I do encourage you to read the "Umami" Wikipedia article for a rather fascinating explanation of its meaning.)

So when I keep reading articles about entire restaurants being dedicated to this whole avocado toast craze??? I admit, I've been rolling my eyes. Really? All you serve is toast with avocado schmeared on top and sprinkled with random crap? I mean, come on.

And then, one day last week I had nothing to eat in the kitchen except a perfectly ripe avocado...

So, this is what happened:

Avocado sprinkled with lime juice, toasted hazelnuts, olive oil, salt and pepper

Avocado. Fresh squirt of lime juice. Sprinkle of toasted hazelnuts. Drizzle of olive oil. Salt. Pepper.

My brain's response after my first dreamy, creamy bite from my spoon: DEAR GOD, THANK YOU FOR THIS FOOD.

What was I eating? I was eating a toast-less version of avocado toast, and it was divine

Tuesday, August 22, 2017

Open-Faced Tomato Sandwich on Griddled Sourdough Bread

The high point of my summer is finally here: my tomatoes are starting to come in in earnest. And you know how I CAN'T STOP eating them???

How to eat all those tomatoes: open-faced tomato sandwich on griddled sourdough bread recipe

Alright, everybody, follow me:
  • Get yourself a slice of good, hearty bread. I like using Pigs Can Fly Sourdough.
  • Place 2 Tblsp. of good butter in a small skillet and melt over medium heat until it just starts to bubble and sizzle.
  • Place the slice of bread in the pool of melted butter, kind-of mopping up the butter as you do so. Move the bread to the center of the skillet and just let it sit for about 3-4 minutes.
  • Flip the bread over, mopping up any browned butter still in the skillet, and let it sit for another 2-3 minutes.
  • Remove your griddled bread from the pan and place it on a plate. 
  • Slice a thick slice (or two) of beefsteak tomato and lay it on the toast.
  • Sprinkle the tomato with a bit of kosher salt and freshly ground black pepper.
  • EAT. 
Right???? OMG.

And you are welcome.

Wednesday, May 3, 2017

Yotam Ottolenghi's Cauliflower Steaks: A Vegetarian Dinner for Meat Lovers

Summer is coming fast. Maybe a bit too fast. My backside is, like, seriously not ready for it. So last night I made steak for dinner.

You heard me. STEAK. But not steak from a cow or a bison or even a pig.

I made steak from a cauliflower.

Ewww, I just heard you say.

Yeah—NO.

My go-to "I-want-to-be-vegetarian-tonight" recipe writer, Yotam Ottolenghi, has a definite place in my kitchen. When I get tired of simply sautéing my veggies, I jazz them up Ottolenghi-style. His wide use of Middle Eastern spices and flavorings add a depth to vegetable dishes you just don't see elsewhere in the veggie world.

Like these cauliflower steaks shared in Bon Appétit (April 2017), for example. Ottolenghi transforms a vegetable that many only tolerate, cutting it into thick slices then alternately pan-frying and oven-roasting it into a deep, dark caramelized hunk of beefy deliciousness. Who would think?

Ottolenghi's Cauliflower Steaks: A Vegetarian Dinner for Meat Lovers

Laid on a simple bed of puréed cauliflower laced with lemon and tahini, it is then topped with a "salsa" made from more lemon zest, parsley, olive oil and nuts.

If you want to make this a vegan dinner, simply swap out the tiny bit of butter in the recipe for more olive oil. I think the butter contributes to the beefy taste, but it will still be frickin' fantastic to be sure. 

I did make a few adjustments because I didn't have what I thought I had... Ottolenghi suggests using walnuts and a Fresno chile for the salsa. I didn't have either, so I used pine nuts instead and skipped the chile but brushed my cauliflower slices with harissa paste (both very Middle Eastern in origin). Remarkably good, oddly satisfying, and SO being made again the exact same way.

[I can still hear some of you saying "Ewww." Just—shut up and go try it. You and your butt will be thanking me and Ottolenghi. Promise.]

Want some more suggestions of what to try from Ottolenghi? Check out his veggies-only cookbook, Plenty: Vibrant Vegetable Recipes, or his team-up with his buddy, Sami Tamimi, in Jerusalem: A Cookbook. I think you and your behind will be going vegetarian more often, too.

Tuesday, February 7, 2017

Rachel Alabiso's Shrimp Tacos

There is nothing in the world like next-door neighbors who pull you out of a slump...

I recently thought I was going to have to put my Marley boy down all of a sudden (I thought I had jinxed him by finally writing his book), and after all of the loss that we've had with our family and friends this past year, it was the straw that just kind-of did me in. I found myself slipping into a kind of soul-hibernation. That, and I sprained my foot, and Marley was put on major drugs—so I was holed up, anyway.

Well, the other night, our next-door neighbors, Annette and Justin, decided that I needed a break from the house and invited the three of us over for our long overdue Taco Night. They also invited over "the other Rachel" and Mike of our Thursday Night Crew.

To contribute to the dinner, Chef Reiton and I brought over some cookies (I came up with a lemon-pistachio baby that the girls gave a thumbs-up; I'll make them again and do a post later). Rachel and Mike, however, brought over the most delicious shrimp concoction for shrimp tacos that I have ever had. EVER.


Rachel Alabiso's amazing shrimp tacos recipe

I know, right?!??! And you know what I love? Rachel WINGED THE RECIPE. She thought about what flavors would taste great with shrimp—salt and black pepper, of course, with some garlic, ancho chile powder, cumin, paprika, and dried orange peel (she makes her own powder by peeling and drying just the orange part of the peel and then grinding it up).

Next, she peeled a couple pounds of fresh shrimp (fresh really does make a difference, if you can get it near you), sprinkled them with the above seasonings (no measuring, just eyeballing it) and then tossed it all to coat with a bit of frozen corn. She let the shrimp marinate and the corn thaw until we were ready to cook, and then she just sautéd the shrimp for a few minutes until they reached that perfect, just-pink curl, squeezing some lime over the whole thing when they were done and serving them on a banana leaf.

Can you say that a non-French food has je ne c'est quoi? The blend of seasonings was perfect. You couldn't figure out what made them so damn good. All you knew was that you could not stop eating them.

Sigh. Thank God for next-door girlfriends. I'd be turning into a potato by now. And I never would have experienced Rachel's shrimp tacos.

Cooking up Rachel Alabiso's shrimp tacos recipe

So, remember our lesson for today: DON'T BE AFRAID TO WING IT. If you don't feel like you are good at discerning what tastes good with what, go buy yourself a copy of The Flavor Bible. Believe me, it will change the way you cook. Recipe writing will suddenly be something you can do. Swears.

And now, I'm off. I've got some oranges to peel...

Thursday, February 2, 2017

Fast, Fake-o Caesar Salad Dressing

If you've read my blog over the years, you know that I am in chef-love with two people: John Besh (our honeymoon of foodies) and Mark Bittman. Either one of them I would fly five thousand miles to cook with and welcome into my kitchen any time. I imagine that sharing a kitchen with these guys would be relaxed, full of laughs and, yes, a major learning experience. But a good one.

Just this past week I made (yet again) Besh's chicken and sausage gumbo from his latest cookbook, Besh Big Easy. Even Marley, our dog, loves it. And Bittman? Bittman is the most popular reference book in our house. We crack open (and have given away) How to Cook Everything more times than I can count.

One of our go-to recipes of Bittman's is his Caesar salad. It's the real deal, with anchovies and lemon, coddled egg and big, fat croutons. The problem: it does take, like, 10 minutes of forethought to make it (coddling the egg, not to mention the croutons), and the other night, I didn't have an extra 10 minutes. I needed to throw everything in a jar, shake it up, and be done. Company was coming.

So I cheated—big time. Yes, I used romaine lettuce and lots of finely grated (with a pinhole grater) Parmesan cheese, but no croutons. And the dressing? This is what I threw together:
  • 1/2 tsp. oil from an anchovy tin (if I had time, I would have minced up an anchovy, but I didn't)
  • 2 tsp. Dijon mustard
  • 1/4 tsp. each of kosher salt and freshly ground black pepper
  • juice from 1/2 a large lemon
  • 2 Tblsp. champagne vinegar
  • 1/4 cup olive oil
I shook that like crazy in a jar, and voila! Fake-o and fast Caesar dressing—liked so much by my guest that I was asked for the recipe, so here you are!

Things I think I would try next time, continuing in super-fast, cheater fashion: add a bit of garlic powder to get a bit of that garlicky flavor in there. And maybe a couple drops of Worcestershire sauce to add a little depth. Bittman puts that in his Caesar dressing, and I think that's why. 

Speaking of salad dressings, if you want to nix another item from your shopping list because 1) it's full of crap and 2) it's a total waste of money, make it salad dressing. Spend the money, instead, on a variety of different vinegars (balsamic, red wine, white wine, champagne, rice wine, apple cider) and some Californian olive oil (don't buy Italian unless from a trusted source; you aren't guaranteed to be actually getting what you think you are buying) and make your own at home. Dressings are generally about 3 parts oil to 1 part acid plus a little bit of an emulsifier, like Dijon mustard, egg, honey, mayo...then seasonings. Even drizzling your salad with olive oil, tossing, then drizzling with a little vinegar, and tossing again is shockingly good. My Grandma Paola taught me that.

And something else I have learned to do that really makes a difference with salad: salt it, don't just pepper it. I actually take a pinch of kosher salt and give my salad a decent sprinkle before I toss it. It's amazing how it really brings out the flavors of the dressing and whatever you've got in the salad. Give it a try. I think you'll like it. 

So! Screw bottled salad dressing! Print the recipe below, and the next pizza or lasagna night you have where you find yourself suddenly scrambling for a green salad, chop up some romaine, grate or shave on some Parmesan cheese and throw this dressing together for a last-minute Caesar; I think you will find it's a pleaser!

(Sorry.)

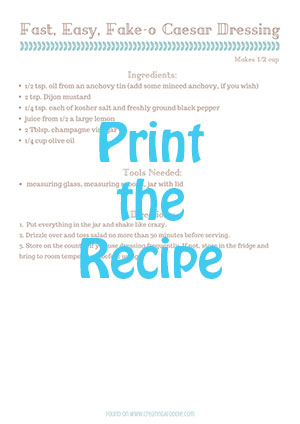
Easy, Fast, Fake-o Caesar Salad Dressing

 Recipe card for Fast, Fake-o Caesar Salad Dressing


Friday, December 16, 2016

The Spritz Cookie: A Marvel of Speed-Baking

Yesterday I decided that we needed more Christmas cookies.

[laughter and applause]

No, but really. I was having memories of all the dear, little, old ladies at my church who used to make this amazing smorgasbord of cookies unlike anything I'd ever seen in my life. The cookies were for a gathering after our church's annual Christmas talent show, a show where Mrs. Wilson always read the "12 Days of Christmas" love-letter series (HYSTERICAL; it was largely her reading of them that made them so). I always attempted to pound out a song on the piano, usually becoming so shy that I just went back to my pew and didn't play; and Mr. Hammaker, I think it was, would always play a song or two on his harmonica. It was an event that I looked forward to every year as a child, and the cookies—the cookies were a huge part of why. Screw dreams of sugar plums. My little head was full of my old ladies' cookies.

I cannot even begin to recall the names of the creations that covered those tables in my church basement, but I can still envision them: snowy meringues that shattered then dissolved into magical, sweet nothingness in your mouth. Mini wreaths, gooey-yet-crispity, dyed brilliantly green then dotted with cinnamon candies. Buttery sugar cookies with little dollops of ruby jam. Chocolate pinwheels. Tiny logs rolled in nuts. And then there were the spritz cookies.

These little guys were oddly my favorite. Small, unassuming but ADORBS. They were made from a simple butter and sugar dough that was pressed through a disc of a particular design and then baked. Christmas trees. Hearts. Snowflakes. Stars. They were so simple. Naked, without any glitz or glamor. They were dyed some delightfully obnoxious colors, though—a thrill that only kids can understand. I loved them.

Fast forward to about five years ago when I found an old cookie press at Goodwill...

And now fast forward to yesterday, with me digging out the old press, the gel food dye, and the KitchenAid. I was on a mission.

Not only are spritz cookies delish, they are so fast and so easy. Seriously. You can crank out a good five dozen cookies in no time flat. In the middle of my making them, I was inspired to share them with you, so I snapped a few pictures and took a few iPhone videos. Don't laugh. They aren't the best quality; but I think you will get a picture of why they are just so awesome. Need tons of Christmas cookies for school or church? Here you go!

The press itself has changed over time. I now see them in the form of a gun. I don't have that one nor have I ever used one. I'm assuming that it perfectly portions out the dough, which would be nice, but I have to assume that the angle would be quite uncomfortable after a single batch of squeezing out dough.

The old press, as you can (kind-of, not really) see in the picture below, is simply a tube fitted with a pressing plate which is attached to a threaded rod which is attached to a knob. It has a detachable cap that holds an exchangeable design plate. Here I've obviously used the tree plate:

The Spritz Cookie: A Marvel of Speed-Baking

To fill the tube, you remove the cap; "unscrew" the pressing plate so that it backs out of and "opens" the tube; fill the tube with dough; then screw the cap (with the design plate attached) back onto the tube. You give a few twists to the knob to get the plate to start pushing the dough—and you are ready to twist out your cookies.

Here's a picture of the tube filled with dough:


Here I have attached the desired design plate inside the cap (drop it in and twist it to lock it into place) and screwed the cap onto the tube.


Here is a short video showing how I twist the knob to get the dough press started, then how the cookies squeeze out as I turn the knob. I only turn mine about a quarter turn for each cookie.


You can see how easy it is! The cookie sheets are ungreased, so the sticky dough just glues itself to the metal. For the rare time when it does want to lift off and doesn't stick, you can see that I just placed the press back on the sheet, gave another tiny turn of the knob, and it stuck!

Ready for some massive quantities of Christmas baking? The spritz is it! Speed bake away! The recipe is easily found online. I got mine from the old Wisconsin Electric Company Christmas Cooky Cookbook. You can find their 2016 copy as a PDF file here. The Christmas Wreath cookie recipe listed uses a similar base dough that I used; however, I (obviously) did not make or use the pecan filling or the candied cherries, though. I just did plain and simple.


Have a wonderful time in the kitchen, folks, and Merry Christmas to you all!

Monday, November 21, 2016

Grain-Free Italian Wedding Soup: A Simple Winter Meal

I find it funny that I recently posted about how much I love to grocery shop, and the post I'm writing today came about because we were so short on food the other night! It was cold, windy, dark (I am NOT used to this dark-at-4:30 crap...), and we had NO food in the house. Like, I-feel-like-a-TOTAL-slacker kind of no-food-in-the-house. Ugh.

But desperation is the mother of creativity, right?

Right.

Wide open the pantry, fridge and freezer doors were flung, followed by some shuffling and grunting, and out came:

  • 3 hot Italian sausages
  • 1 28-oz. can of whole, peeled tomatoes
  • 1/2 a zucchini
  • 6 baby bella mushrooms
  • 4 large carrots
  • 1/2 a yellow onion
  • 1 large potato
  • 6 cups of homemade beef stock (check out how to make your own here!)

Right then Chef Reiton walked into the kitchen. "Italian wedding soup?" he asked. 

BINGO.

You will not believe the tastiness created by throwing these ingredients together. Not to mention, it was super easy and quick. I had it done from pulling out the ingredients to sitting down to dinner in an hour, tops. 

Don't forget: you are allowed to play. Change up the veggies to use what you have. Add pasta, if you insist (you will want to thin out the stock with some additional water, if you do). And if you want to jazz it up to another level, grate some fresh Parmesan into your bowl as a topper. 

Grain-free, gluten-free Italian wedding soup recipe

Oh, dear. Wedding or no, get ready for your diners to ask for a second bowlful!

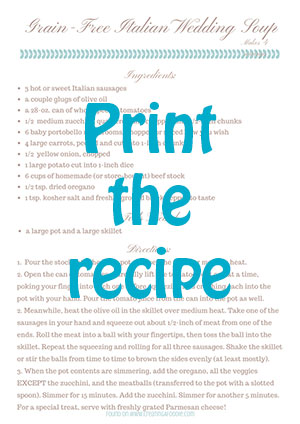
Click the recipe card below to download or print! And remember, when you've been a total slacker, don't lose faith! Just get creative!

Printable recipe card for Gluten-Free Italian Wedding Soup

Wednesday, September 7, 2016

Playing Around with Paletas: A Peach-Basil Popsicle Recipe

What a summer this has been! For those of you who visit often, you've gathered that I've been a bit out of my usual loop these past few months. I would make excuses, but I can't because I've had so much fun this summer that my excuses would be a farce. I've missed writing, but I certainly have not missed my family and friends. It's been a summer to make up some seriously lost time, and I've had a blast.

One of my favorite events this summer was having Michael come visit twice! I love cooking for him again when he is back, and this second summer visit from him prompted me to buy something that I have been wanting to buy in a long, LONG time: namely, a popsicle mold. 

I know, I know... How old am I? (cough) Do I have small children? (NO.) 

It's just...every time the heat of summer rolls around and I see photographs of frosty, melty, fruity paletas (i.e. Spanish for "popsicles," kind-of), I have this longing to pureé a bunch of fruit and make some myself.

The only problem? I have never been able to find a popsicle mold that suits my tastes, and I've been SUPER picky about what I want in one. It must:
  • be easy to clean
  • be BPA-free
  • use popsicle sticks that can get accidentally tossed/lost and not ruin the entire set
  • be warp-free
  • be easy to freeze without making a huge mess of my freezer
  • be the classic popsicle shape
Some of you are probably wondering how on earth I ever found my husband if my laundry list for a POPSICLE MOLD is this stringent.

Well. Regardless of what you may think of my picky nature, I FOUND ONE. I paid a small fortune for it, true. But I believe it is going to last me just short of forever. Check it out:

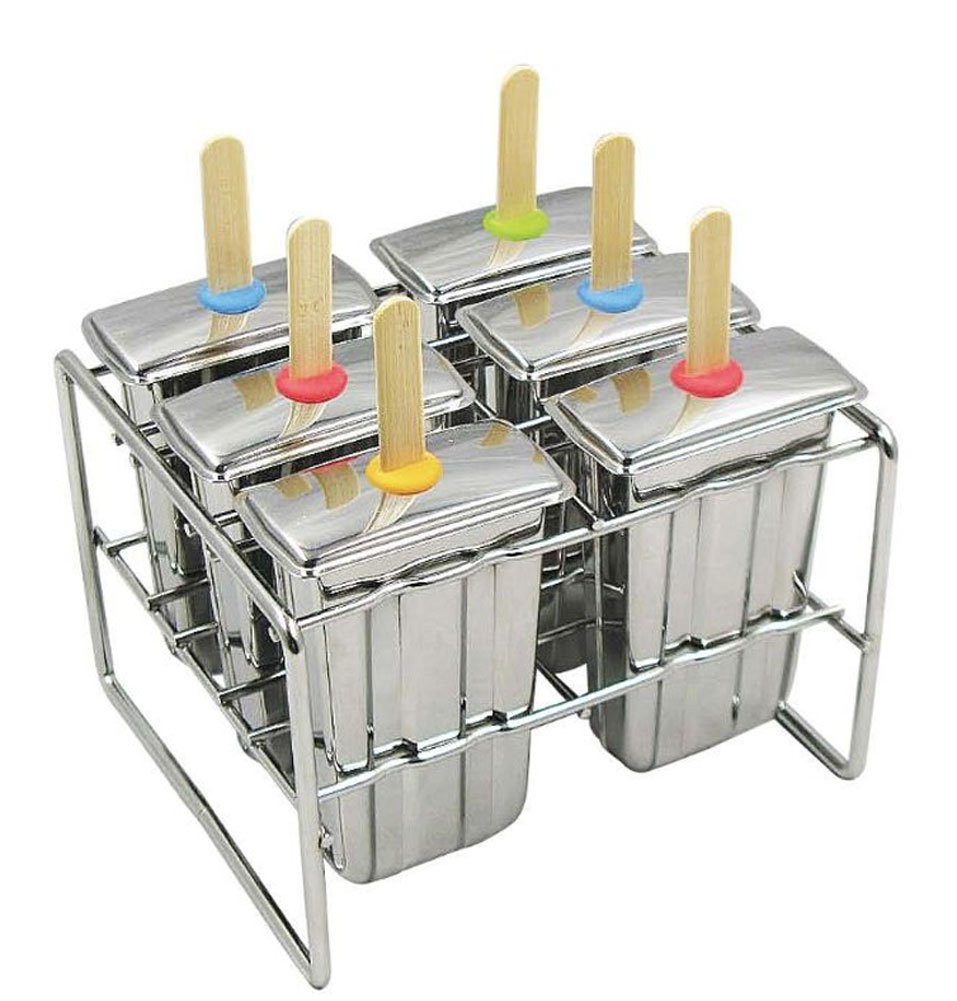
Onyx Stainless Steel Popsicle Mold Set

It's the Onyx Stainless Steel Popsicle Mold from Amazon. It currently costs about $40, but DUDE. Look at it! It's STAINLESS STEEL. It comes with its own super-stable holder. The little silicon rings in the lids hold the (included!!!) bamboo sticks perfectly in place. No crooked popsicles/too-short handles/wimpy plastic here! I am seriously in love. A mom designed it because she couldn't find the perfect popsicle mold, either. Figures. GO, MOMS!

SO. I ordered the popsicle mold, got it in the mail a few days before Michael got into town the second time, and whipped up a couple trial recipes that I concocted after reading around on the internet. NO, they were not recipes for adult-flavored popsicles. I made them from mostly fruit with yogurt or herbs and a little bit of sugar. That's it. Not even water (I hate icy ice-pops...). The blueberry-yogurt one pictured below that Chef Reiton is not sure of (and the one farther down with Marley longingly gazing on) still needs some work, but here's a quick recipe to use up those late summer peaches and basil that are still hanging on—a recipe for peach-basil paletas that got the family approval!

Playing Around with Paletas: A Popsicle Recipe

Peach-Basil Paletas (makes 6 pops or 2 cups of pureé):

Peel 4 medium ripe peaches with a paring knife and cut them into chunks. Place the peach chunks into a small pot and simmer them with 1/4 cup sugar for 10 minutes, stirring occasionally. Remove the pot from the heat, then add 8 fresh basil leaves. Pour the mixture into a blender (or use an immersion blender) and blend until smooth. Pour the mixture into a glass measuring cup (for easy pouring) and pour into the molds evenly. Let cool to room temperature. Freeze overnight.

Let me know if you try them out or do something different! I'm thinking about trying a strawberry-basil one next...

Playing Around with Paletas: A Popsicle Recipe

Thursday, June 30, 2016

How to Make Homemade Croutons

I will be the first to declare you a big, fat liar if you say this has never happened to you: you buy (or bake!) a delicious loaf of Italian/French/rye/whatever bread to top off your yummy homemade dinner—only to be left with a hunk of quickly staling bread the next day...

If you are like me, the thought of throwing it away makes you partially wither inside. Bread, considering it is basically flour and water, is SO HARD to throw away. Those memories of last night's dinner, when it was warm and soft...

And now? Huh. You could make French toast, but it's the middle of the week, and who has time for that except on weekends? You could freeze it, but frozen bread always gets weird.

Soooooo.... What do you do?

Make homemade croutons, baby! It takes five minutes to prep while the oven is warming, and in 45 minutes you can have toasty, crispity, delicious croutons for FREE. Who wants croutons out of a box when you can have these???

How to make homemade croutons from stale bread

I know, right???

And they are ridiculously easy to make. Here's how I do it, BUT (everyone say it with me) you can do it however the hell you want. It's not going to make a life-changing difference. Swears.

Ingredients:

  • hunk or slices of bread of any sort
  • olive oil
  • kosher salt
  • dried herbs, fresh ground black pepper, spices (optional)

Tools You Will Need:
  • a large-ish bowl, a large cookie sheet, a serrated (the one with teeth) knife, a cutting board, a metal spatula

Steps to Make:

1.  Preheat your oven to 275° F.

2.  As your oven is heating up, cut your bread into slices. I do mine about an inch thick. If you like smaller croutons, slice thinner. Then take each piece, lay it flat, and slice lengthwise and then across so that you now have bread cubes. Try to make them all relatively the same size.

3.  Dump the bread cubes in the bowl. Pour several really good glugs of olive oil into the bowl over the bread cubes. Sprinkle on the kosher salt and any additional flavors you want to add, then get in there with your hands and toss, toss, toss! You really want to make sure that all the cubes are really well-coated.

(NOTE: The amount of oil used is going to depend on the amount of bread cubes you have and how much you personally want to coat your cubes. I like to really coat mine well. I find the flavor to be better if the cubes have a good soaking of oil. You may feel differently. Try it out and see what you think. No matter what you do, they are going to taste great.)

4.  Pour the cubes out onto the baking sheet, and spread them out into an even layer with some space between them. Pop them in the oven and set the timer for 20 minutes (for smaller croutons, set it for 10). When the timer goes off, give them a toss with the metal spatula to flip them over. Shake them back into an even layer, then toast them for another 20 minutes. Larger croutons are probably going to be done at this point. If you are doing smaller croutons in 10-minute intervals, you are probably going to want to do three (3) 10-minute intervals. Just test them with a good ol' bite-test to see if they are as crispy as you desire.

Let them cool on the baking sheet on a wire rack, then seal them up in a Ziploc bag with the air squeezed out. They will remain nice and crunchy for quite awhile...

Hope you enjoy them! Store-bought ones don't even compare...

Monday, June 27, 2016

Ginger-Lime Shrimp (and a Lesson in "Deveining")

There are so many things I love about living on the ocean, but I have to say that one of the best things is the insanely fresh seafood that I can get at a seafood shop that is on the way home from picking up Captain Reiton at the airport.

The first time I went into this restaurant/shop—Belle Isle Seafood—I (somehow? There are only signs EVERYWHERE) didn't notice that they only take cash. When I went to pay with my CREDIT CARD, the girl very graciously explained that she was unable to accept it as a form of payment—this being after a five minute conversation about how much I loved living here after being in the Midwest for so long, and blah blah blah....

So, being embarrassed but being me, I made fun of myself and then asked her if she could just keep my salmon in the case and I would run back later with cash to pick it up. To this she responded (and I quote):
"Oh, no, just take it with you. You can just pay later."

Am I serious??? Yes, I'm serious.  This is the kind of town I live in. It's small. People trust you, or they will kick your ass. And I love it.

So. As I was saying: I also love the seafood, so the other night I bought a pound of fresh shrimp at Belle Isle to sauté up for dinner.  Being fresh, the shrimp weren't processed like they are when you buy them frozen or from the seafood case at the grocery store. That meant they simply had their heads cut off, and that was it. They still had their little legs. Their full, unsplit shells. Their little poopy intestine down the center of their back...

So I shelled them. Ripped off their little legs. And then—I discovered the BEST way to "devein" the shrimp!!! 

(Why is it called "deveining," by the way? It's an intestine, NOT a vein. Are they afraid to call it "de-pooping" a shrimp? Because that is what you are doing, really...)

Now, here's the problem that I've always had about shrimp that I have bought frozen that have been deveined: in the processing of the shrimp, they are practically butterflied. They are sliced open the whole way down their spine so that they flay open when they cook.

I don't want shrimp that look like butterflies on my plate. I want shrimp that look like shrimp on my plate, damn it. Appearance is very much a big deal to me when it comes to cooking, and I have always found it so unattractive to be eating shrimp that look like they've been attacked by the SNL Samurai.

SO. As I was finishing peeling and de-legging my shrimp, I wondered if I really had to slice a shrimp the entire way down it's spine to devein it...

I took a paring knife, inserted the tip blade-up into the middle of the shrimp "neck," so to speak, and sliced upwards, making about a quarter-inch long cut.  Now I could see the poop tract laying right there...

I reached in with my fingertips, grabbed the end of the "vein," and very gently but firmly pulled...

VOILA!!! It slid out! The whole thing! I had an entire shrimp in my left hand and an intestine dangling from my right! No flaying necessary!

Now I had perfectly whole, beautiful shrimp, ready to be marinated and sautéed for dinner. 

And speaking of dinner, wowzers, have I got a shrimp dish that will knock your socks off. I very slightly adapted it from Melissa Joulwan's cookbook, Well Fed. If you are looking for flavorful but easy and fast, this is it. 

If you are in a super rush, make the marinade first before you deal with your shrimp, then toss your shrimp into the marinade bowl as you clean them up. Then, as your shrimp are marinating for 20 minutes or so, you can get the rest of your sides together. Shrimp only take a few minutes to cook completely, so depending on your sides, you could have dinner on the table in about 45 minutes, from start to chow-time.

As I've pointed out with so many recipes lately, use the quantities and ingredients you have. You do NOT need to follow ingredients and measurements here exactly. It will still taste good, I promise. But here's what I used:

Ingredients for 2-3 people:
  • 1 lb. of fresh shrimp, shelled completely and "deveined" (I also give them a rinse)
  • juice from 2 juicy limes (smooth skin, heavy, feel squishy)
  • fresh ginger root, peeled and finely grated on a zester or minced up, about 1 1/2-in. worth
  • a jalapeño, seeded and minced, or a tsp. of crushed red pepper flakes
  • 3 peeled garlic cloves, finely grated on a zester or minced
  • about a quarter cup of minced cilantro
  • 1/2 tsp. kosher salt
  • 1/4 tsp. freshly ground pepper
  • 2 Tblsp. olive oil

Steps to Make:

1.  Combine the lime juice, ginger root, jalapeño or flakes, garlic, cilantro, salt and pepper in a medium bowl and whisk together with a fork. Drizzle in the olive oil and whisk rapidly to blend with the juice mixture. This is your marinade.

2.  Add the shrimp to the marinade and toss really, really well. Cover the bowl with plastic wrap and stick in the fridge for 20-30 minutes but nor really any more than 45 minutes. The lime juice will cook the shrimp. Really.

3. When your sides for dinner are almost done, heat up a large skillet on the stove on medium-high. When it is nice and hot, dump the entire contents of the bowl into the skillet. Shake the skillet to create a single even layer of shrimp. Cook for about two minutes. You will see the shrimp turning pink and starting to curl. Stir the shrimp to blend them with the sauce and to flip them onto their other side (you might need to help some of them a little). Shake the pan to make your even layer again, and cook for another 2 minutes or so.

4. Platter the shrimp and garnish with some cilantro fronds or torn cilantro leaves.


That's it! Super fast. Super easy. Super delicious! You could also skewer the shrimp and grill them, too... YUM.

Word of advice: just don't overcook them. Fresh shrimp are so tender. I had no idea. If you cook them too long, they will get rubbery and weird. Don't panic about the short cooking time. If the shrimp is all pink and curling, it's DONE.

And I promise to make something shrimpy this week and video the whole de-pooping for you...

*UPDATE: I made the video! Click here to read a more descriptive post on how to devein shrimp and to watch the video

Saturday, May 7, 2016

The Beet Salad Recipe of Your Dreams

I don't know about you, but when dealing with vegetables, rarely does the word 'gorgeous' come to mind. Vegetables tend to look a bit—well, not the most attractive. Stand in the produce section, and take a look around. Fruit definitely wins out in the looks category. Veggies tend to remind you of gawky, bad-skinned, knob-kneed teenagers with consistently bad hair-days.

That is, until you look inside.

Suddenly, some veggies become positively striking. Like the beet I couldn't help but share in my old post Talk About Random.  Take a look at that beauty!

Maybe their gorgeousness is part of the reason why I've become addicted, but beets have suddenly turned into my go-to veggie for an easy lunch salad. Chef Reiton hates beets, no matter how hard he tries to like them, so my only way of eating them is when he isn't here. Lunchtime has become perfect for that.

"So—a beet salad???you say (I can see that lip tweaking...).

Believe me, yes, and it's delish and incredibly easy. That is, after you roast the beets. Which is also easy. I'll even show you how tomorrow because I'm going to roast some tonight (please note: TONIGHT is key in my easy roasting and peeling method).

Alright, so back to the salad. In Real Simple's November 2015 issue there was an article on easy side dishes to create for the holidays. Modestly introducing their beet salad recipe was a small notation that their beet salad is so good, the RS crew make it all the time for their gatherings.  Intrigued, I made it for our Christmas dinner, and the entire family gave a resounding 'YES!' to it's deliciousness—despite it being made with beets.

Since then I have tweaked the recipe to fit with ingredients that I tend to have at home and that I can quickly toss together for lunch. Almost all of the ingredient amounts are to what I'm in the mood for that day. So, here you go: a beet salad that is remarkably good for you, gorgeous, and incredibly delicious.

beet salad with ricotta salata, parsley and toasted pecans

Ingredients:

  • 1 roasted beet, cooled, skinned and cut into wedges
  • a small (1-in. x 1 in.-ish) hunk of ricotta salata, a firm ricotta cheese, sold in wedges in the "nice cheese" section
  • a small pinch of the tops of some fresh Italian, flat-leaf parsley sprigs, roughly chopped 
  • chopped pecans, toasted (toss in a small skillet over medium heat until they smell nutty)
  • kosher salt and freshly ground black pepper
  • olive oil
  • red wine vinegar

Directions:
  1. Place beet wedges on a plate or in a bowl.
  2. Crumble ricotta salata over the beet wedges.
  3. Sprinkle with chopped parsley.
  4. Sprinkle with chopped, toasted pecans.
  5. Drizzle with olive oil and red wine vinegar.
  6. Sprinkle with salt and pepper.
  7. EAT!
If you want to print the recipe, click "Print this recipe" below for a download and/or a print option.

beet salad printable recipe card

Come back tomorrow for a quick how-to video on roasting and peeling beets–something I used to hate doing because the damn peel never came off easily. No more! I'll show you how.

Until then, here's to those of us who may be knob-kneed with lots of bad hair-days but strive to be beautiful on the inside! Yeah, beets!

Tuesday, February 9, 2016

Put Some Blueberries On It!: Learning to Make Green Salads with Fruit

I have always been a fan of blueberries, ever since I was a kid.  Even after I threw up blueberry pancakes in the back of our Volkswagon Beetle when I was four years old, my love for those little suckers didn't fade.  When we moved to Pennsylvania and settled into a home right smack in some woods full of blueberry bushes, I thought I had died and gone to heaven.  It might have taken an hour to fill a measly cup with those tiny berries, but I didn't care.  I had blueberries in my backyard.

As an adult, they are still my go-to berry. I use the dried wild ones in my scones. Frozen blueberries  get tossed into my random smoothie.  And I buy a package every week to top off my plain Greek yogurt.

But you want to know what I've gotten really into lately?

Blueberries go great on salad!

You got it! Salads. SO yummy.  Their little bursts of sweet, and sometimes tart, flavor add such wonderful contrast to the pungent flavors of shallots or red onion and a sprinkle of gorgonzola or feta cheese.  And the juice they release blends wonderfully with a simple olive oil and vinegar dressing.  Simply drizzle your salad with olive oil first and toss the greens to coat them, then sprinkle on a bit of good balsamic vinegar, a pinch of kosher salt, and a few grinds of fresh cracked black pepper.  Toss again, and you've got an absolutely delicious salad that is super healthy, thanks to blueberry's super antioxidant powers.  

Give it a shot and let me know what you think! Have another weird salad topping of choice? Send us a comment and let us all know!

Sunday, February 7, 2016

Defrosting Your Fridge: Ideas for What to Do with That Food!

Happy belated New Year, all! I can't believe we are well into 2016 already. Where does the time go?
I haven't written a word to you all for over a month! It appears that the holidays were busy and then some! It feels good to be back.  In between all the traveling and company, I've been slowly hashing out my New Year's resolution to create a daily routine (as routine as a pilot's wife can get). Getting back to you all will be part of my writing goal (but I've got some other projects in the works, so I'm going to need you to share).

One of my other New Year's goals is to get better at experimenting in the kitchen.  There are so many foods that I buy at the store that I can make at home (yogurt, ricotta, kombucha, etc.  Notice the fermentation theme, here).  I've just been lazy and haven't taken the time to read up on it and to try it. 

Well, Fate decided to lend a hand and throw us a broken fridge to help me get that ball rolling...

A few weeks ago, Chef Reiton and I noticed that we were getting random pools of water appearing from beneath our fridge.  After a bit of inspection and research, we learned that the little hose in the back of the fridge that allows the defrost water to drain can get clogged, causing the water to leak out onto the floor and into the bottom of the freezer drawer (we wondered where that huge sheet of ice was coming from...). Thanks to Google and those who share their knowledge on home refrigerator repair, we discovered how to solve the problem ourselves instead of having to call our friendly but expensive Whirlpool repairman.  

The down side? We had to defrost the fridge.  

Crap. 

Thankfully, 1) the winter storm that hit Boston on Friday was bigger than was expected, so the 7 inches of snow piled on our back deck could serve nicely as a natural cooler.  2) We tend to shop twice a week for food, so we didn't shop for the second half; the dinners just became compilations of random scavenged foods as we tried to use up what was in the fridge and freezer, just in case repairs didn't go as quickly or smoothly as we wanted.

Well, despite our interesting meal combos, we were still left with:
  • a bunch of cheese (we have a good-cheese fetish, admittedly)
  • lots of pickled items in jars
  • butter
  • half-n-half
  • a frozen leg of lamb
  • a few random vegetables
  • some chicken wings and a carcass
The cheese, jars, and lamb leg got stuck out in the snow in a plastic storage tub.  But those veggies and the chicken?

Well, my New Year's resolution of experimenting started halloo-ing from the back of my brain, and so I pulled out a wonderful little book, The Essential Book of Fermentation by Jeff Cox, given to me for my birthday by our dear friends, Joe (now my boss—I'm officially a copy editor!) and Marie.  

What was I going to ferment? That gorgeous purple cabbage that had been sitting all lonely and forlorn in my fridge, that's what.  In five minutes flat, that baby was slivered into shreds and sprinkled with sea salt and caraway seeds:

the start of sauerkraut

All I had to do was completely man-handle that pile of shreds for 10 minutes, scrunching and crushing and squeezing and mixing, until I got it to be a juicy, purple, tender mess:


I covered the surface with some plastic wrap, put a plate facedown on top so that all the cabbage was covered up, then I pressed the plate down hard, pushing all the shreds down underneath their own purple juices.  Now the cabbage was ready to ferment, slowly developing into that amazingly health food: sauerkraut.  If you've never had it homemade, you are missing out.  It is entirely different from the sweet, vinegary kind you get at the store.  And homemade fermented sauerkraut contains bacteria GALORE that will make your gut incredibly happy.  Like, really insanely happy.  In fact, a lot of nutritionists say that eating sauerkraut every day does wonders for your body.  Some food for thought...

As for the other vegetables and chicken parts that sat on the counter—you regular readers guessed it...

CHICKEN STOCK.

making chicken stock

Chicken wings and a carcass and a bit of leftover roasted chicken got dumped in the Crock-Pot and covered with a quartered onion, old celery, leftover herbs, a hunk of carrot, sliced up shrivel-y ginger root and turmeric root, a wrinkled serrano chile pepper, and the frozen scraps left from making spiralized zucchini noodles.  I filled the pot with water, put it on high until it all came to a boil, then turned it down to low.  That was yesterday afternoon, and she's still going strong.  I topped it off with a bit more water this morning, and I'll probably let it go until tomorrow afternoon.  The more nutrients I can suck out of those bones, the better. And if you could just smell my house right now... Man.

I'm happy to say that the fridge fixing went ridiculously smoothly.  It took me longer to take advantage of the empty fridge and give it a good scrub down than it did for the repair.  Here she stands, all clean and shiny, ready and waiting for that homemade sauerkraut and chicken stock.

defrosting fridge

The only question is, what do I experiment on making next???

Wednesday, December 9, 2015

Moroccan Spiced Nuts: A Recipe

As anyone who comes to my house for dinner knows, when it comes to appetizers, I am a huge fan of the cheese plate.  To me, there is nothing more stimulating to my appetite than a couple nice cheeses, a beautiful seasonal fruit or some nice salty olives (only if I can get good ones that do not come from a jar!), and a toasty bowl of spiced nuts.

I've toyed with a number of spiced nut recipes over the years, and I believe I've finally come up with a recipe that I am very happy with, evidenced by the fact that I, my dog, and my uncle Fred could not stop eating them.  These nuts aren't spicy as in "Dear God, these are hot!" They are spicy as in "Mmmm... these flavors make my mouth happy."

I know the spices are rather unusual, but don't freak out by their weirdness.  Give them a try, and you will see what I mean by your mouth being happy.  (I bet you dinner that you wouldn't be able to guess all of them if I didn't tell you!)

Speaking of telling, let's get you a photo and the recipe:

Moroccan spiced nuts recipe

Makes almost 2 cups

Special tools needed: parchment paper

Ingredients: 
  • 1 1/2 cups mixed nuts, raw or already roasted
  • 1/4 cup unsalted raw pumpkin seeds (sometimes called "pepitas")
  • 2 oz. real maple syrup (for God's sake, do NOT use the fake stuff here! Make that EVER!)
  • 1 Tblsp. olive oil
  • 1/2 tsp. ground cumin
  • 1/2 tsp. hot paprika (I used Hungarian)
  • 1/2 tsp. ground turmeric
  • heaping 1/2 tsp. kosher salt

Directions:

1.  Preheat the oven to 350°.  Lay out a large sheet of parchment paper for cooling.

2.  Dump everything in a medium bowl and toss toss toss with a wooden spoon (wooden spoons grab and move saucy things better, in my humble opinion). Make sure all the nuts are coated really well.  If you have to wait for the oven to finish heating up before Step 3, retoss everything before you pour the nuts onto the baking sheet.

3.  Pour the mixture out onto a baking sheet, and spread the nuts out into an even layer.  Pour any goo in the bottom of the bowl on top of the nuts.

4.  Put the pan in the oven for 10 minutes, then take out the pan, shut the oven door, and toss everything with a flat spatula to recoat the nuts.  Spread it into an even layer again, then roast for another 10 minutes.  Toss and spread again.  Roast for a final 5 minutes (unless things are looking pretty toasty. Then stop.).

5.  Scrape the nuts onto the sheet of parchment paper.  Spread them out into a single layer again, and let everything cool to at least warm.  If you are having trouble with the nuts sticking to your spoon or spatula as you move them, wet the spatula, then move the nuts.  Don't worry about the nuts sticking together too much.  After they cool you can break them apart.

6.  Serve your spiced nuts immediately, or cool them completely and store in an airtight container.

That's it! They take about 5 minutes to whip together and 25 minutes to roast (during which you can sit back and wait for that heavenly toasted, nutty aroma to start filling your house).

To serve, pair up with a couple ripe pears ready to slice and some Sartori cheese (you can find some at most any big grocery, and any flavor is OMG). You'll have a cheese plate made in heaven.

Print up the recipe by clicking the image below, and let me know in the comments what you think!

Nuts to you!


Tuesday, November 10, 2015

Fall-ing for Scallopini: A Recipe for Chicken with Apple, Fennel & Thyme

I just got back from a visit to PA, right in time for the final "hurrah" of fall splendor.  The leaves on the drive down were just glorious.  My parents were having an Indian summer. The sun was shining almost every day.  The air smelled of dirt and decaying leaves.   It was exactly what I have always remembered autumn to be.

If only the visit were under better circumstances.  I drove down to be with my aunt Annie who had suddenly gotten quite ill.  She is home now, thank God; we are all very grateful.  But for a few days, things were quite scary.

My other aunt, Judy, came over for dinner one of those nights.  We were planning on going to the hospital right after we ate, so I wanted to make something quick and easy.  I decided on scallopini for ease, and in keeping with the beautiful fall weather, I chose to top it with apple, fennel, and thyme.

Aunt Judy loved it, so I decided to post the recipe for her.  This is another meal that you can really do whatever you want. Scallopini is any type of meat (although usually chicken or veal), thinly cut, and then sautéed.  You can top it off with whatever you choose, or just make a pan sauce like I taught you to make a few posts ago.  Or do both! It's all up to you.

Give it a try and let me know what you think.  Or create a different topper and share. We all would love to get some new ideas!

Chicken Scallopini with Apple, Fennel and Thyme


Serves 4

Special tools needed: large skillet, medium skillet, pie plate or cake pan, serving platter, foil

Ingredients: 
  • 4 small boneless, skinless chicken breasts, each one sliced crosswise into two 1/4-in. thick pieces (if large, cut them into 3 slices); pound to tenderize between two sheets of plastic wrap, if you have the time
  • 1 large apple-y apple that holds its shape when cooked (I used a Fuji), diced into 1/4-in. cubes
  • several sprigs worth of fresh thyme leaves
  • 1 small fennel/anise bulb, the hard root end cut off and tossed, the white part sliced very thinly (Tip: save the green part to use when you make stock)
  • 1/2 cup flour in a pie plate or cake pan (use almond flour to make it gluten-free)
  • kosher salt and freshly ground black pepper
  • 2 Tblsp-ish olive oil
  • 2 Tblsp. butter
  • 1 Tblsp. butter
  • 1/2 cup water or dry white wine

Directions:

1.  Salt and pepper both sides of each piece of chicken.  Turn the oven on to 200° for warming purposes.

2.  In the large skillet, heat the olive oil until it is hot and shimmery.  While it is heating, dump the flour into a pie plate or cake pan and dredge (that just means lightly coat by dragging) the first two chicken pieces (called cutlets) in the flour, making sure that both sides are coated.  Gently shake off any excess flour, then lay the chicken cutlets in the skillet and brown both sides of the meat, about 2 minutes per side.  I always watch for when the chicken becomes opaque halfway up the side; that's when I flip it.

3.  Move the two cooked cutlets to a plate and cover the plate with foil to hold the moisture in; put the plate in the oven to keep warm.  Repeat the process with the rest of the chicken, adding oil to the pan if you need to.

4.  When you are halfway done with the chicken cutlets (or you can do this step after the chicken is done), melt the 2 tablespoons of butter in the medium skillet over medium heat.  Add the apples and fennel, sprinkle on a little salt and pepper, and sauté until both are starting to soften, about 5 minutes.  Add the thyme leaves and continue sautéing until the apples and fennel are golden, about another 5 minutes.

5.  Reheat the large skillet with all the browned bits in the bottom, then add about 1/2 cup of water or dry white wine to the skillet.  Simmer and scrape up all the yummy brown crud on the bottom of the pan, stirring to allow those bits to melt into a sauce.  When the water/wine has evaporated until only half is left, turn the stove off and stir in the tablespoon of butter until it has completely melted and slightly thickened the sauce.

6.  Arrange the chicken cutlets on a platter, pile the apples and fennel on top, then drizzle everything with the pan sauce. Serve!

Feel free to print the recipe by clicking on the image below.  (That is going to be project #2, once I'm done setting up the recipe index: creating printable recipes! If you find something you want a recipe for, let me know, and I'll create one for you.)

Happy November!


Thursday, October 22, 2015

Learning to Make Your Own (Gluten-Free!) Stock

After watching the leaves out here on the East Coast go through a wardrobe change that I have never witnessed before (and I cannot believe I am going to be able to witness it year after year), I am officially getting ready to hunker down for winter.  With the flip flops put away, the toasty knee socks pulled up, and the fireplace popping comes the cold weather longings of soups and stews and all things warm and slow.  And that means replenishing the stock stockpile.

No, I just didn't stutter (although I do do that on occasion.  Wait.  No, seriously.  I just didn't do it again to be funny...).  Stock is the incredibly practical and insanely delicious kitchen staple made from—wait for it... SCRAPS.

Mmmmmmm.... Sounds delish, right? Let's take all our nasty peels and bones and pieces of veggie that we just trimmed off because we don't want to eat it and turn it all into food!

Well, that's not quite true.  You do take all your nasty peels and bones and trimmed veggie bits, but you simmer them for a really long time to extract all of their flavors, then discard them when you are finished.

For example, this is what I found in my fridge one morning last week: 
  • half a rotisserie chicken
  • a bag of kale that I hadn't liked the texture of (not trimmed well)
  • 3 old, rubbery carrots with their tops
  • 2 old onion halves with the skin and roots still attached
  • half a lemon
  • some mushrooms that were all leathery but still smelled okay...
I cut the chicken meat off of the bones to use for lunch, then took the carcass and all of those random items and squished them into my Crock-Pot.  I poured water into the pot until it was filled to the brim, then covered it with the lid, turned it on to Low, and let it go aaaaaaaaaaaaaaall day, aaaaaaaaaaaaaaall night, and almost all of the next day.

If I wanted to, I could have let it go much, MUCH longer.  I've let stocks go for days.  Like, almost a week.  I just keep adding water until the stock is almost smelling burnt.  In this case, I needed the stock for a meal I was making that night, so I just strained it through a colander into a big Pyrex measuring cup, and this is what I got: 8 cups of amber brown chicken stock.   

gluten-free stock

None of this pale yellow wussy crap you buy at the store that tastes like—um—NOTHING and costs at least $2.00 a quart.  This stuff? It's basically FREE since you were going to be wasteful and throw that shit out, anyway.  And NOW look what you've made!

gluten-free stock

Just wait until you taste it! Your grandma would be proud.  Really.

For shits and giggles, let's look to see what's left in the colander after I strained all that gorgeousness away:
scraps used to make gluten-free stock

Now THAT you can throw away!

If you don't use all your stock in one recipe, you can freeze it in smaller containers or you can can it (no stuttering).  Just remember (as Chef Reiton had to remind me once), this is a product made from meat, so you want to pressure can it to make sure that any residual bacteria is dead dead dead (although the chances of there being any after 24+ hours of simmering are very slim.  But still.  Better safe than hugging a toilet bowl.).

You can also use any kind of bones you want.  Sometimes I buy those creepy soup bones at the grocery store that you know are cow legs and use those to make beef stock.  I have used leftover rib bones from rib night and made pork stock.  You can use all veggies if you want and no meat.  Again, remember the true rules of a real kitchen: DO WHATEVER THE HELL YOU WANT.  Your food is yours to play with, test out, and sometimes never be able to duplicate again.  You are the boss.

So.  Bring that Crock-Pot up from the basement.  Go dig through the fridge.  Dump whatever you find in there into the pot and add some water.  Then come back tomorrow and comment to me how awesome you and your stock are.


Monday, October 19, 2015

Pan Sauces Forever: Learning the Magic of Scraping Up the Brown Bits

Have you ever eaten something and wondered how on earth it came to be considered a food?

Like beer.  Someone boiled or soaked grain in a bunch of water, but then, upon straining out the grain, left the sugary water out for so long that it fermented and got all funky. 

Then someone decided to go and drink it.  

GOD BLESS HIM.

I kind-of imagine the same thing happening with preparing meat.  Some foodie peasant daredevil was roasting his chicken/beef/pork/whatever over the fire, and, upon plating his meat, poured some water into the pan to let it soak while he was eating—and then decided to pour that water on his meat instead.

The miraculous birth of pan sauces!

I love making pan sauces.  They can be made simply with water, or they can be trumped up to all hell with wine, herbs, 'shrooms, you name it.  There is an infinite number of ways to make it, but they all have one delicious goal: to take your meat from boring to brilliant in about 30 seconds flat.

Here are some chicken cutlets I made the other night when I was bach-ing it and just wanted something super simple to make along with my roasted veggies: 

chicken cutlets with pan sauce and herbs

See those yummy juices dripping off the meat? Yeah?

I made them.

They didn't exist when I took the chicken out of the skillet.  The skillet was completely dry.  HOT and dry.

Unfortunately and most likely, so would be my chicken.

So here is why I love pan sauces so so so much.  You know what I did? 
  1. I took my skillet over to the sink.
  2. I put the pan under the faucet and turned the water on for about 2 seconds.
  3. I put the skillet back on the burner.  
  4. As the water rapidly simmered off, I madly scraped with a metal spatula at all the yummy, crusty crud that had browned and crisped itself to the bottom of the pan, stirring all the bits into the simmering water to dissolve.  
  5. When the amount of liquid in the pan boiled down to look like the amount I needed, I turned off the heat, scooped up a big blob of butter (I keep softened butter by the stove; you should, too), and plopped that into the sauce, whisking it in until it had melted.

And then I poured that deliciousness all over my chicken.  

Now.  That is a very basic pan sauce.  It is delightfully delicious, made with two ingredients that I KNOW you have in your kitchen, and it is damn fast to make.  You will love it.

If you want to get even more fancy schmancy, but not any more difficult (I swear!), try browning some sliced or chopped mushrooms or shallots or garlic in the pan before you add the water.  Or instead of using water, use broth or wine.  Or use a mix of both! There is no right or wrong.  Just do what you feel like or have on hand.

But no matter what additions you make or what you use as your liquid, always whisk in a plop of butter after you turn off the heat.  It thickens the sauce up a bit and just adds a nice richness to the flavor.

To top it all off—literally—try sprinkling on some fresh herbs after you pour on the sauce.  I used cilantro in the pic above because I had seasoned my chicken with some cumin and cayenne.  (If you aren't sure if an herb will go well with your seasonings, tear open a leaf and then sniff it together with your spices.  If it smells good together, it will taste good together.)

And that is that, my friend.  

PSF!

(Pan Sauces Forever)

Tuesday, October 6, 2015

How to Compose Yourself (and Your Salad)!: A Composed Salad Recipe with Baby Arugula, Red Pear and Shallot

I used to laugh at that term—a composed salad—when I was a kid.  Personification would kick in, and all I could think of was a salad sitting up straight and tall, eyes downcast, hands in her lap, waiting with great grace for her turn to be eaten.

Salads are not my favorite thing to make.  I like to eat them, but I struggle with being too impatient to put one together at the end of meal prep; I just want to eat.

Thank God for those little boxes of organic lettuces and leaves.  I know they are more expensive, but 1) they are organic, 2) I don't have to rinse any damn leaves, and 3) I don't have to chop any damn leaves.  The only thing I'm left to do is cut up some tomato and cucumber, and I can call it a day.

And the-e-e-e-en there's my husband.  Salad creation is his specialty.  He reminds me of Jonathan in the old '80s movie, Splash, who gets fired for being too artistic with his pizza-making.  That's Chef Reiton.  His salads are gorgeous.  And he looks so relaxed making them.  I bang away at the cutting board to hurry up and get it done, and he stands and meditavely slices and minces and slivers and chops.  It makes me jealous.

So the other night I determined: I was going to make a killer salad.  Not the tossed green salads I always make.  No.  I was going to make a composed salad.  A little work of art on a salad plate.

I took three ingredients:

  • a red pear with the flower blossom end sliced off and discarded
  • baby arugula
  • a small shallot, peeled, with the root end trimmed

With my mandoline on the thinnest setting, I sliced the red pear crosswise into circles until I started to hit the seeds (about half the pear).  Next I sliced the shallot into circles.

Now came the composing: 
  1. I lay the pear slices in a ring on the salad plate, overlapping the edges a bit.
  2. I placed a nice little mound of baby arugula in the center of the ring.
  3. I sprinkled the little shaved rings of shallot on top of the arugula mound. 
That was it.  To dress it I sprinkled it with a little bit of olive oil, a little bit of balsamic vinegar, a few grinds of fresh black pepper, and a teensy bit of kosher salt.

The result? GOR-GEOUS!!!!

And it took, like, 2 minutes to make! AND it was delicious! 

a composed salad with red pear, arugula and shallots

I think I may have found my new favorite thing to create! Folks, get ready for some serious salad composure! 

Sunday, October 4, 2015

Figs with Bleu Cheese and Pecans: A Fancy Schmancy but Easy Peasy Appetizer Recipe

It's fig season, people!!! Woohoooo!

Regardless of this article my brother sent me recently from Knowledge Nuts, I love fresh figs.  Second only to a warm, heavy peach dripping with juice, figs are probably my favorite fruit.  They are exquisite, if you've never had one.  Exotic.  Sensual. Bite into one and you will understand why the Renaissance painters used them in their paintings to allude to sex.

And they were $3.99 at the grocery store the other day! Imagine! $3.99 for nine plump little parcels of heaven.

I snatched up a package and a wedge of good bleu cheese, then came home and created a little appetizer to nibble in front of the fire with Chef Reiton while our chicken finished its roasting:

appetizer of figs with bleu cheese and pecans

They're pretty, aren't they? If you want an appetizer to impress that takes a whole 10 minutes to prepare from start to finish, try these out.  Here's what you've got to do (adjust quantities to suit your party size.  I used 4 whole figs for the 2 of us):

Ingredients:

  • fresh figs, halved through the stem so you've got a little "handle" to pick them up with
  • good bleu cheese
  • pecan halves

To prepare:


Heat your oven to 400° OR you can toast these if you have a toaster oven.

Lay the figs on a foil or parchment-lined cookie sheet.  I used the little pan that fits in our toaster oven.

With a butter knife and your finger, place a tiny plop of bleu cheese on top of each fig half.  You don't need much; bleu cheese is very pungent.  The size of two really big peas is a good amount.

Gently press a pecan half on top of the bleu cheese on each fig.

Roast or toast your figs for about 4 minutes.  The nuts will be toasty and the cheese bubbly.

Let them cool a minute, then plate and serve warm.

Give them a try and let me know what you think! I think you might be surprised by the wonderful mix of flavors and textures.  Soft figs with crunchy pecans.  Sweet and toasty and salty and earthy.  Delightful!

appetizer of blue cheese and pecans

Related Posts Plugin for WordPress, Blogger...

Visit Me on Pinterest!