Oh, dear readers. So much to write about but so little time. This summer has been flying by. It's been a hot one, too, which doesn't seem to jibe. Doesn't heat usually seem to make things drag? Well, not here. Between doing lots of work (I published my second book! Go grab a copy of Reading Toward Success on Amazon!), doing a good bit of travel, and having lots of guests, I feel like I've barely been able to keep up—in a good way. Chef Reiton and I love to entertain, which goes hand-in-hand with having lots of guests. Whether it's for one friend, two friends or 30 friends, we've been cooking up a storm this summer.
One of the things that I've gotten really into making is potato chips. I found a recipe in one of my Alton Brown cookbooks, I believe, and I made them on a whim one night. After our friend Mario's "Dear God!" exclamation after his first bite, I haven't been able to stop making them.
The first time I made them, I cut them with a standard vegetable peeler, per Alton's instructions. These chips were delightfully thin, but they were a pain-in-the-butt to cut. Careful, even pressure needs to be applied to get a whole slice of potato and not a wonky sliver, and for those who know me and my hand-eye coordination, that didn't work so well.
The next time I made them, I hand-sliced them. Using a beautifully sharp chef's knife, this worked out just fine. Except the anal side of me was upset at the lack of perfect uniformity in slice-thickness.
I finally came to a decision: it was time to visit Amazon.
For a long time, I have been wanting to replace my mandoline. No, I do not play a stringed instrument. I'm speaking of a kitchen tool that makes insanely thin slices of just about anything you want. The Norpro version that I have just hasn't held up. The blade has become dull, which means the mandoline has become dangerous to operate, and, frankly, I don't want to be losing any parts of my fingers or hand, no matter how tiny a slice. Bon Appetit magazine has highly recommended the Benriner Old Version Vegetable Slicer, and so that was the one I bought.
Baby, is that thing awesome! When I took my first swipe, the slicing was so smoothly done I had to check to make sure that it had actually sliced (unlike my Norpro that gave my veggie a tug every time I swiped downward. Yikes!). And for about the same price as a Norpro—AND the ability to change blades—I'm never going back.
Another thing I'm not going back on? Duck fat.
Yes, my friends—duck fat. After having a couple jars for a stupidly long time and "being afraid to use them" (MAJOR eye-roll here...), we let our friend, Chef Wilkinson, use them when he came over and made us a French meal the other night that included pomme frites: French fries fried in duck fat.
Potatoes fried in duck fat, once tasted, will change yet another aspect of your kitchen life. Trust me. The taste is full and deep, unlike vegetable fats. It's not a cheap fat, but it is an insanely delicious and healthy one that can be reused over and over again. Just strain it after it cools down and store it in the fridge.
So. Now for another test: I sliced my exquisitely even potato chips using my beautiful Benriner mandoline, gave the slices a good 20-minute soak in some hot water, rinsed them, and patted them dry. Meanwhile I heated about 3 cups of duck fat in a medium saucepan to 355°F. Once the fat was hot, I slipped four or five slices of potato into the fat one at a time, held them under the surface with a spider strainer and flipped them occasionally. When they were a lovely golden brown, I pulled them out, immediately sprinkled them with kosher salt, and drained them in a paper-towel lined bowl.
How did those duck-fat potato chips turn out?
Perfect.
Showing posts with label American. Show all posts
Saturday, August 11, 2018
Thursday, March 15, 2018
Paleo Plantain French Fries
When you are limited on where your starches come from in a paleo diet, you get creative.
NO, they don't taste exactly like a potato french fry. Of course they don't. They are made from a plantain, not a potato, so don't sit and whine that they aren't the same. They aren't gonna be the same, whiner.
But I'd rather have a salty, crispy-tender plantain fry to munch on than NONE at all.
And I'll leave off the six pounds I've lost in the past two weeks, too.
Thank you, meat and veggies.
Want to make them? We used three plantains for two of us.
Ingredients:
Enjoy!
Ladies and Gentleman, the plantain french fry!
NO, they don't taste exactly like a potato french fry. Of course they don't. They are made from a plantain, not a potato, so don't sit and whine that they aren't the same. They aren't gonna be the same, whiner.
But I'd rather have a salty, crispy-tender plantain fry to munch on than NONE at all.
And I'll leave off the six pounds I've lost in the past two weeks, too.
Thank you, meat and veggies.
Want to make them? We used three plantains for two of us.
Ingredients:
- green plantains with no yellowing
- coconut oil
- kosher salt
Special Tools:
- a bowl or colander
- paper towel
- paring knife
- skimmer or slotted metal spatula
Directions:
- Place the paper towel in the bowl or colander. It will absorb some of the oil from the fries.
- Using a paring knife, cut off the tops and bottoms of the plantains. Score through the skin along the natural ridges of the plantain. Slide your thumb under the end of one of the strips and pop the skin up. Slide your thumb up the plantain to remove the strip. Peel all of the plantains completely.
- Start heating the coconut oil in a small saucepan over medium heat. You want a depth that will more than coat the french fry, about 1/2 an inch. (And don't worry about waste. You can reuse this oil to make more fries another time.)
- Meanwhile, cut a plantain in half crosswise. Now cut the halves in half lengthwise. Cut the four pieces in half lengthwise again. Turn those pieces on their sides and cut them in half. You may have a few pieces that need turning and cutting in half one more time, depending on the size of your plantains. You should have square-ish fries. Repeat for all of the plantains.
- Look back to the oil. You want it hot but not smoking. Test it by tossing in a scrap of plantain. If it immediately bubbles rapidly, it's ready.
- Carefully drop in a small handful of fries. Stir gently to move the fries around a bit so they don't stick together. Fry until the plantains are a nice golden brown, stirring occasionally. Remove them from the oil with the skimmer or spatula, tapping the skimmer on the side of the saucepan to allow excess oil to drip back into the saucepan. Dump the fries into the paper towel-lined bowl and immediately sprinkle with kosher salt.
- Repeat until all the fries are done. If you want to keep the fries warm in the oven, you can do so, but I liked snacking while I fried...
Enjoy!
Thursday, February 1, 2018
A Grain Bowl Recipe for Skeptics
If you have paid attention to anything food-related this past year, you will know that one of the most popular, healthy, hippie-ish dishes to hit the scene is
No, it's not your grandmother's bowl of oatmeal, Cream of Wheat or farina. It is a savory dish: a concoction of fiber-full, vitamin-packed ingredients that seem to have absolutely nothing to do with each other that are all piled on top of a base layer of cooked grain—in a bowl.
I don't know about you, but to me that sounds like either an incredibly boring meal or an incredibly healthy-to-the-point-I-don't-want-to-eat-it meal. Was I born in the '70s? Yes. Did my neighbor grow pot in his backyard and eat—right in front of our boggling eyes—the slippery, slimy seaweed that we brought home from the beach? Yes. Did we eat his wife's beans and rice and love it? Yes.
But a grain bowl???
Sigh. It just seems like it's trying too TOO hard to be part of the club, you know?
But the fuss! The number of restaurants popping up and serving these damn things! I mean, seriously.
That means...yup. You loyal readers know me. I decided I needed to give it a try. (I still do have a good three pounds of Italy to come off. And it's already FEBRUARY!!! My male readers will have no idea why I just said that about February. Ladies, you know what I'm saying...)
SO. I decided to start simple. And who did I go to as my guide? My ever-faithful, besties-in-the-kitchen, Bon Appetit mag. (I'm telling you, folks. If you want to learn to cook, subscribe to this magazine. If I could figure out how to get their ad on this blog, that would be the ONE ad I would actually add so you could just click and subscribe. The folks who write it are fun. They are real. They aren't afraid to admit they are still learning in the kitchen, too. They are like US! Woohoo! So, until I can figure out how to get their ad on my blog, here's the link to GO SUBSCRIBE TO BON APPETIT MAGAZINE!)
The picture they put in the magazine that totally tempted me and made me give in can be found on Bon Appetit's website here. I used page 52 of my oh-so-special, January subscriber-only issue of Bon Appetit to guide me and gathered up my bowl ingredients:
The Grain Bowl.
No, it's not your grandmother's bowl of oatmeal, Cream of Wheat or farina. It is a savory dish: a concoction of fiber-full, vitamin-packed ingredients that seem to have absolutely nothing to do with each other that are all piled on top of a base layer of cooked grain—in a bowl.
I don't know about you, but to me that sounds like either an incredibly boring meal or an incredibly healthy-to-the-point-I-don't-want-to-eat-it meal. Was I born in the '70s? Yes. Did my neighbor grow pot in his backyard and eat—right in front of our boggling eyes—the slippery, slimy seaweed that we brought home from the beach? Yes. Did we eat his wife's beans and rice and love it? Yes.
But a grain bowl???
Sigh. It just seems like it's trying too TOO hard to be part of the club, you know?
But the fuss! The number of restaurants popping up and serving these damn things! I mean, seriously.
That means...yup. You loyal readers know me. I decided I needed to give it a try. (I still do have a good three pounds of Italy to come off. And it's already FEBRUARY!!! My male readers will have no idea why I just said that about February. Ladies, you know what I'm saying...)
SO. I decided to start simple. And who did I go to as my guide? My ever-faithful, besties-in-the-kitchen, Bon Appetit mag. (I'm telling you, folks. If you want to learn to cook, subscribe to this magazine. If I could figure out how to get their ad on this blog, that would be the ONE ad I would actually add so you could just click and subscribe. The folks who write it are fun. They are real. They aren't afraid to admit they are still learning in the kitchen, too. They are like US! Woohoo! So, until I can figure out how to get their ad on my blog, here's the link to GO SUBSCRIBE TO BON APPETIT MAGAZINE!)
The picture they put in the magazine that totally tempted me and made me give in can be found on Bon Appetit's website here. I used page 52 of my oh-so-special, January subscriber-only issue of Bon Appetit to guide me and gathered up my bowl ingredients:
- pearled barley (it's what I had leftover from beef and barley soup)
- bunch of curly kale (one with smaller, more tender stalks)
- 2 small sweet potatoes
- half a brick of halloumi cheese (a Greek melting cheese that has a really nice salty flavor)
- slivered almonds
- sunflower seeds
- coriander seeds
- and mint leaves.
I put the barley on to boil in salted water for 45 minutes, then got to prepping the rest of the ingredients so they were ready to layer on after the barley was cooked, drained and cooled.
- The sweet potatoes were scrubbed, dried, cut into 1-inch cubes, tossed with olive oil, salt, pepper and a little paprika (I like hot but regular, ol' sweet is good) and roasted for 30 minutes at 400° F in my toaster oven.
- The curly kale leaves were cut from the stems (toss the stems), sliced crosswise then lengthwise, rinsed, dried and dumped in a bowl. I sprinkled them with a bit of salt and cider vinegar, then massaged them gently for about 30 seconds to start breaking down their tough fibers. The vinegar would do the rest while I moved on to my next ingredient.
- The slivered almonds, sunflower seeds and coriander seeds were tossed on medium heat in a tiny bit of olive oil until they were golden brown and the coriander seeds started popping (about 1 minute), then drained on a paper towel and sprinkled with salt and pepper.
- The mint leaves were rinsed, dried, and torn from their stems (stems tossed).
- Now it was time for the dressing: In a small jar, I shook together 6 oz. olive oil, the juice of 1 lemon, 1 tsp. Dijon mustard, 1/2 tsp. honey, salt and pepper. This was more than enough dressing, but extra can be used on salad later.
- At this point the barley was ready: it had a nice chew to it. It was drained then scattered on a towel-lined baking sheet to dry (I have an abundance of flour sack towels which I use for purposes such as this, not just for drying my hands. I go through a dozen in about three days. Just don't wash them with fabric softener!).
- While the barley cooled, I fried the halloumi: I heated up a little bit of olive oil in a small cast-iron skillet (enough to just coat the bottom of the pan), browned both sides of the cheese, then sliced it.
Assembling all the parts into a bowl took all of one minute: the barley lined the bottom of a pasta bowl and was topped with a pile of kale greens, a scattering of roasted sweet potatoes, a few slices of fried cheese and a sprinkling of toasted seeds and mint leaves. It all was drizzled with the lemon-Dijon dressing, and voila!
My own, personalized grain bowl!
I think I had had a bit of wine at this point or I was really excited about my creation because I didn't realize until the next morning that I had gotten REALLY close on this pic. But, oh well. Because after I took my first bite of my first grain bowl EVER, I wanted to get that close and stay that close.
Does that mean it was delicious?
Yes.
A party in my mouth?
Yes!
A marching band of foods that combined into a perfect explosion of flavor and texture symmetry?
YES!!!
I think you know what I'm going to say to the "Will I make this again?" question. And you know what the beauty of this meal is? The parts can all be made or prepped ahead and simply reheated or quickly cooked as needed. A weeknight dinner that will make you happy in, OH! So many ways!
So, hippies! Rejoice! You converted a total skeptic, and I will declare it loudly to the world:
I LOVE GRAIN BOWLS!!!
But Dwight, wherever you are: the raw seaweed?
Hell, NO.
Ready to give the grain bowl a try? Leave a comment and let us know what you did! Go crazy! Use what you have and what you like! You'll give us some more ideas of things to try!
Wednesday, August 30, 2017
Learning to Cook Like Grandma: Blanching and Peeling Peaches
Can someone please do me a favor?
The next time I poopoo some "old-fashioned," "time-consuming" technique that our grandmas and their grandmas have done for centuries...
TELL ME I DON'T KNOW WHAT THE HELL I'M TALKING ABOUT.
Like, seriously. Geez Louise.
Backstory: my stepson is coming to visit. I want to make him his favorite dessert of all time: fresh peach pie. This entails peeling and cutting up eight big, fat peaches.
In the past, I've "known better" because "the-newfangled-way-has-to-be-better," so I've peeled the peaches with one of these (called a "vegetable peeler"):
(No, I don't know why it is on a chain, either.)
Peeling peaches "my way" resulted in:
The next time I poopoo some "old-fashioned," "time-consuming" technique that our grandmas and their grandmas have done for centuries...
TELL ME I DON'T KNOW WHAT THE HELL I'M TALKING ABOUT.
Like, seriously. Geez Louise.
Backstory: my stepson is coming to visit. I want to make him his favorite dessert of all time: fresh peach pie. This entails peeling and cutting up eight big, fat peaches.
In the past, I've "known better" because "the-newfangled-way-has-to-be-better," so I've peeled the peaches with one of these (called a "vegetable peeler"):
(No, I don't know why it is on a chain, either.)
Peeling peaches "my way" resulted in:
- mangled peaches
- peaches being shot across the counter or into the sink after slipping from my grip
- a dramatic loss of perfectly good peach flesh that did not end up in the pie (or anywhere else delicious and purposeful)
Clearly, my way is better than Grandma's, right???
Sigh. I'm such an arrogant ass.
Thank God for waves of "you-know, maybe-I-WILL-try-that-blanching-thing-that-all-the-old-recipes-tell-you-to-do..."
Folks, this is what you get when you blanch and ice peaches before peeling them:
I KNOW, RIGHT???? The skin peeled off in sheets like paper! No loss of deliciousness! And it would have taken me the SAME amount of time to mangle the peaches with a vegetable peeler than it did to blanch and peel them.
What did I do? Well, by gum, I'll tell you, even though I'm no grandma!
- Boil a small pot full of water that is deep enough to cover the largest peach.
- While you are waiting for the water to boil, take a paring knife (in the picture above) and carefully score a big 'X' in the bottom of each peach (opposite the stem side).
- Now get a big bowl of ice water.
- When the water is boiling, gently drop in a peach. Slowly count to 30 as you gently move it around to evenly boil all sides. Remove the peach and drop it in the ice water.
- Drop another peach in the boiling water. Count to 30. Remove the peach and drop it in the ice water. Remove the previously iced peach and put it on a plate/cutting board.
- Repeat until all the peaches are blanched.
- Pick up the first peach you blanched. Take the tip of your knife blade and slide it under the peach skin where it comes to one of the points on the 'X.' Place your thumb on top of the skin (so the skin is sandwiched between the knife blade and your thumb) and gently pull downward. Ta-daaaaa!!!! Repeat all the way around the peach.
- Repeat with all the peaches.
Oh my word, my world was changed. My arrogance was duly spanked, yes. And it did smart a bit...
But now there will be PIE.
Tuesday, August 22, 2017
Open-Faced Tomato Sandwich on Griddled Sourdough Bread
The high point of my summer is finally here: my tomatoes are starting to come in in earnest. And you know how I CAN'T STOP eating them???
Alright, everybody, follow me:
- Get yourself a slice of good, hearty bread. I like using Pigs Can Fly Sourdough.
- Place 2 Tblsp. of good butter in a small skillet and melt over medium heat until it just starts to bubble and sizzle.
- Place the slice of bread in the pool of melted butter, kind-of mopping up the butter as you do so. Move the bread to the center of the skillet and just let it sit for about 3-4 minutes.
- Flip the bread over, mopping up any browned butter still in the skillet, and let it sit for another 2-3 minutes.
- Remove your griddled bread from the pan and place it on a plate.
- Slice a thick slice (or two) of beefsteak tomato and lay it on the toast.
- Sprinkle the tomato with a bit of kosher salt and freshly ground black pepper.
- EAT.
Right???? OMG.
And you are welcome.
Thursday, February 2, 2017
Fast, Fake-o Caesar Salad Dressing
If you've read my blog over the years, you know that I am in chef-love with two people: John Besh (our honeymoon of foodies) and Mark Bittman. Either one of them I would fly five thousand miles to cook with and welcome into my kitchen any time. I imagine that sharing a kitchen with these guys would be relaxed, full of laughs and, yes, a major learning experience. But a good one.
Just this past week I made (yet again) Besh's chicken and sausage gumbo from his latest cookbook, Besh Big Easy. Even Marley, our dog, loves it. And Bittman? Bittman is the most popular reference book in our house. We crack open (and have given away) How to Cook Everything more times than I can count.
One of our go-to recipes of Bittman's is his Caesar salad. It's the real deal, with anchovies and lemon, coddled egg and big, fat croutons. The problem: it does take, like, 10 minutes of forethought to make it (coddling the egg, not to mention the croutons), and the other night, I didn't have an extra 10 minutes. I needed to throw everything in a jar, shake it up, and be done. Company was coming.
So I cheated—big time. Yes, I used romaine lettuce and lots of finely grated (with a pinhole grater) Parmesan cheese, but no croutons. And the dressing? This is what I threw together:
Just this past week I made (yet again) Besh's chicken and sausage gumbo from his latest cookbook, Besh Big Easy. Even Marley, our dog, loves it. And Bittman? Bittman is the most popular reference book in our house. We crack open (and have given away) How to Cook Everything more times than I can count.
One of our go-to recipes of Bittman's is his Caesar salad. It's the real deal, with anchovies and lemon, coddled egg and big, fat croutons. The problem: it does take, like, 10 minutes of forethought to make it (coddling the egg, not to mention the croutons), and the other night, I didn't have an extra 10 minutes. I needed to throw everything in a jar, shake it up, and be done. Company was coming.
So I cheated—big time. Yes, I used romaine lettuce and lots of finely grated (with a pinhole grater) Parmesan cheese, but no croutons. And the dressing? This is what I threw together:
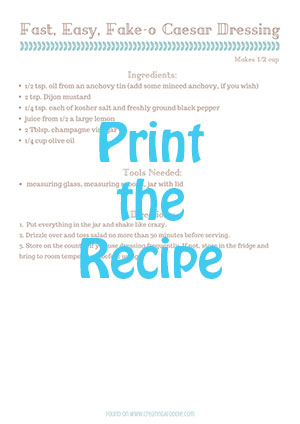
- 1/2 tsp. oil from an anchovy tin (if I had time, I would have minced up an anchovy, but I didn't)
- 2 tsp. Dijon mustard
- 1/4 tsp. each of kosher salt and freshly ground black pepper
- juice from 1/2 a large lemon
- 2 Tblsp. champagne vinegar
- 1/4 cup olive oil
I shook that like crazy in a jar, and voila! Fake-o and fast Caesar dressing—liked so much by my guest that I was asked for the recipe, so here you are!
Things I think I would try next time, continuing in super-fast, cheater fashion: add a bit of garlic powder to get a bit of that garlicky flavor in there. And maybe a couple drops of Worcestershire sauce to add a little depth. Bittman puts that in his Caesar dressing, and I think that's why.
Speaking of salad dressings, if you want to nix another item from your shopping list because 1) it's full of crap and 2) it's a total waste of money, make it salad dressing. Spend the money, instead, on a variety of different vinegars (balsamic, red wine, white wine, champagne, rice wine, apple cider) and some Californian olive oil (don't buy Italian unless from a trusted source; you aren't guaranteed to be actually getting what you think you are buying) and make your own at home. Dressings are generally about 3 parts oil to 1 part acid plus a little bit of an emulsifier, like Dijon mustard, egg, honey, mayo...then seasonings. Even drizzling your salad with olive oil, tossing, then drizzling with a little vinegar, and tossing again is shockingly good. My Grandma Paola taught me that.
And something else I have learned to do that really makes a difference with salad: salt it, don't just pepper it. I actually take a pinch of kosher salt and give my salad a decent sprinkle before I toss it. It's amazing how it really brings out the flavors of the dressing and whatever you've got in the salad. Give it a try. I think you'll like it.
So! Screw bottled salad dressing! Print the recipe below, and the next pizza or lasagna night you have where you find yourself suddenly scrambling for a green salad, chop up some romaine, grate or shave on some Parmesan cheese and throw this dressing together for a last-minute Caesar; I think you will find it's a pleaser!
Monday, January 30, 2017
Grain-free, Sugar-free Banana Blueberry Muffins
I just went to make these muffins this morning and almost fell over when I realized I had never blogged about them! Gee-zoo! Sorry about that!
Those of you who don't have any food allergies or food restrictions will probably shy away from this recipe, I know. But there are a lot of you out there who have gone more than just gluten-free. You can't or won't eat a number of things besides gluten: grain of any kind, sugar, legumes, dairy. And finding good recipes that aren't just a complete mockery of the phrase "baked good" can be really hard.
While Chef Reiton and I are not diehard "primal" eaters (we won't force you to eat like us when you come over for dinner or ask us over), we do our best to limit grain and legumes as much as possible in our diets. We've both just felt so much better cutting them out, and so we take the "healthy-ish" route, for us, and leave grains for a treat when we really want pizza or pasta. That all being said, I came up with this recipe for blueberry muffins a couple years ago when I was really figuring out how to be happy in the kitchen while cutting out all my baking (which I still miss, but I've found cooking in general just makes me happy).
These are about as close to a real muffin as I could get while still keeping it grain- and sugar-free. A lot of the primal and paleo muffin (or baked anything) recipes I've tried turn out really eggy and squishy. While these are moist and still have egg, they have a lot less egg than some, and they hold up better than the rest. They have that crumb you are looking for in a muffin, you know? They are a lot less sweet, too, being sweetened only by the banana, coconut flour and blueberries. Give them a try and let me know what you think.
If you want to change it up, swap out the blueberries for 1/4 cup of chopped pecans, or, if you don't care so much about a bit of sugar, swap in some bittersweet chocolate chips...
Tools Needed: muffin tin, muffin liners (parchment are best, but you may have to order them), spatula, small scoop, cooling rack
2 large, extremely ripe (black) bananas (the fermentation actually increases the flavor)
6 Tblsp. unsalted butter, melted
1/4 c. whole milk
1 egg
1 1/2 tsp. vanilla
2 Tblsp. plain whole yogurt
Dry ingredients:
6 Tblsp. unsalted butter, melted
1/4 c. whole milk
1 egg
1 1/2 tsp. vanilla
2 Tblsp. plain whole yogurt
Dry ingredients:
1/2 c. almond flour
1/4 c. potato starch, unmodified
1/4 c. coconut flour
1/4 c. tapioca flour
1 tsp. baking soda
1/2 tsp. kosher salt
1/2 c. wild frozen blueberries (smaller) OR 1/2 c. dried wild blueberries (I love Trader Joe's, but these will add some sugar)
1/4 c. potato starch, unmodified
1/4 c. coconut flour
1/4 c. tapioca flour
1 tsp. baking soda
1/2 tsp. kosher salt
1/2 c. wild frozen blueberries (smaller) OR 1/2 c. dried wild blueberries (I love Trader Joe's, but these will add some sugar)
Directions:
- Preheat the oven to 350° F. Line 10 muffin tins with liners.
- Blend all the wet ingredients well in a mixer (or by hand), slowly drizzling in the melted butter so that it doesn't harden up in the cold ingredients.
- In a separate bowl, whisk the dry ingredients together. Be sure to break up lumps and blend the flours well.
- With the mixer on low, gradually add the dry ingredients to the wet. Stop the mixer and scrape down the sides of the bowl, then turn it back on for a few seconds to mix in those last bits of flour. Scrape down the paddle and bowl, then add the wild blueberries. Fold in by hand with a spatula until evenly dispersed in the batter.
- Scoop heaping spoonfuls of batter into the liners with a small ice cream scoop. Pat the batter down with the spatula to level it out some. Bake for 25 minutes or until a toothpick comes out clean and dry.
- Immediately remove the muffins from the tin (I use a small fork to wedge them out without burning my fingers) and cool them completely on a wire rack.
Don't forget you can click below to print the recipe! Happy baking!
Wednesday, November 16, 2016
When a Potato Isn't a Potato: The Best Mashed "Fauxtatoes" Recipe for a Paleo (or Diabetic) Thanksgiving
Many of you out there have heard of the Paleo diet, a way of eating that eliminates foods that are "new" in the agricultural evolutionary scheme of things which supposedly freak out our bodies and make a lot of weird, unhealthy crap-ola happen: potentially things like lupus, Crohn's, rheumatoid arthritis, cancer... It's been getting a lot of research, and while both sides vehemently argue its validity, I have to personally say that I have felt much, MUCH better by drastically cutting back on two of the big "no-nos" of the Paleo menu: grains of any sort and dried legumes (that includes peanuts).
Also included on some Paleo-ers "do-not-eat" list are white potatoes. I believe the argument is that the glycemic index of a white potato is quite high. With that being said, I still eat white potatoes; I just eat them a LOT less often. What I do instead is what a lot of Paleo-ers (and a lot of diabetics!) do: I make "fauxtatoes."
What the hell, you ask?
I know. It's hokey. But here's what it is: it's cauliflower, generally steamed and then puréed to a smooth consistency to resemble mashed potatoes.
I've been making it for several years now, and I like it. I do. But I've always been a bit annoyed with one thing (which if you've tried it, you probably know what I'm about to say): the "fauxtatoes" always come out looking a bit watery and loose. They don't have that oomph that mashed potatoes do. And I WANT that oomph. I like when they plop onto my plate, not ooze.
SO. Last night I was making fauxtatoes to accompany some chicken scallopini and sautéed Swiss chard when it suddenly hit me: why don't I try drying out my cauliflower before I purée it???
DUH.
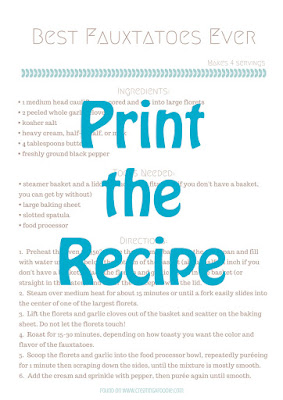
So, here's what I did: I placed my cauliflower florets (a medium-sized head, cored and cut into large florets) plus two peeled garlic cloves into a steamer basket, sprinkled them with a bit of kosher salt, and steamed them for about 15 minutes (or until I could easily slide a fork into the center of the largest piece).
I then spread out the florets on a baking sheet, making sure to have room around each piece so that they weren't steaming each other. I sprinkled them again with a little bit of kosher salt.
I roasted the florets in a 350° oven for 30 minutes without tossing them until they were golden on the tops and nicely browned on the bottoms.
Then I scooped the florets and the garlic cloves into my food processor, dropped in half a stick of butter (true Paleo-ers would not use any dairy), ground in some freshly ground black pepper, and puréed for about a minute. I scraped down the sides and puréed for another minute. I kept repeating this until the mixture was almost completely smooth. I then added a tablespoon-ish splash of cream and puréed until the fauxtatoes were perfectly smooth.
Here's a glamour shot with lots of Irish butter:
When we sat down to dinner, I asked Chef Reiton if he noticed anything different. The first thing out of his mouth: "The consistency! These are like potatoes!"
YAHOOOOO! My experiment worked! But we still brainstormed things we will try next time. What if I didn't roast the florets so long? The browning definitely affected the color of the fauxtatoes, not to mention the taste. While the taste was good, we were interested in seeing what it would be like to roast them just long enough to drive off that excess water, maybe when the tops were just beginning to become brown in spots.
We also thought about eliminating the garlic. Or maybe adding a bit of sour cream instead of cream? How about some herbs? So many things to try! All will taste good, I know, but it will be fun to experiment.
SO. If you've got some diabetics coming to Thanksgiving dinner, or some Paleo eaters, give these fauxtatoes a try. They may just be the best non-potato potato you've been dreaming of! Print the recipe below, and, please, feel free to share what you think in the comments!
Happy Thanksgiving, all!
Friday, February 12, 2016
A Valentine Treat: Baked Alaska
When I go home for Christmas, I become a bit of a kitchen hog—as in, I totally take over. Thank God my siblings and parents get my obsession. You know how when you really love something you want to share it with everyone? (Hello, DUH, Rachael...you write a FOOD BLOG.)
Well, I think I've rubbed off a bit on my brother, Arthur. He is quickly becoming the King of Desserts in our family. Want to know how to make a gourmet s'more? Macarons? Lemon meringue pie? Ask him. He'll try anything if he's got the tools. I personally think he should go to a baking school and open up the best damn bakery in Berkeley... While we were home together, he made the best lava cake I have ever eaten in my entire life. I tried to replicate it when I got home and failed. I think I cut the recipe in half and forgot to do something in relation to that. Anyway. His lava cakes? OMG.
One dessert he had recently made with his friend, Luna, was Baked Alaska, and he was dying to make it for us. Nobody was about to say 'no,' so one night he whipped together a batch and recruited me to help. I had never even eaten it before, so I was pretty excited to see what this famous dessert was all about. And, wow, was I shocked at how simple it was! It is made with just three things: pound or sponge cake and ice cream (both of which we bought) and meringue (egg whites beaten with sugar and a wee bit of cream of tartar).
Here are some photos to show a bit of the process. I think it is simple enough that some of you might want to try it for your sweetums (or your own awesome self!) for Valentine's Day.
First, the pound cake is cut into rounds using a biscuit cutter (or a water glass, if you don't have a cutter) and laid out onto a sheet pan:
And if you make some, post some pics in the comments below! I would love to see what you did!
Well, I think I've rubbed off a bit on my brother, Arthur. He is quickly becoming the King of Desserts in our family. Want to know how to make a gourmet s'more? Macarons? Lemon meringue pie? Ask him. He'll try anything if he's got the tools. I personally think he should go to a baking school and open up the best damn bakery in Berkeley... While we were home together, he made the best lava cake I have ever eaten in my entire life. I tried to replicate it when I got home and failed. I think I cut the recipe in half and forgot to do something in relation to that. Anyway. His lava cakes? OMG.
One dessert he had recently made with his friend, Luna, was Baked Alaska, and he was dying to make it for us. Nobody was about to say 'no,' so one night he whipped together a batch and recruited me to help. I had never even eaten it before, so I was pretty excited to see what this famous dessert was all about. And, wow, was I shocked at how simple it was! It is made with just three things: pound or sponge cake and ice cream (both of which we bought) and meringue (egg whites beaten with sugar and a wee bit of cream of tartar).
Here are some photos to show a bit of the process. I think it is simple enough that some of you might want to try it for your sweetums (or your own awesome self!) for Valentine's Day.
First, the pound cake is cut into rounds using a biscuit cutter (or a water glass, if you don't have a cutter) and laid out onto a sheet pan:
Next, the ice cream is packed into a standard muffin tin lined with foil and refrozen. (I think you could probably pack the tin without the foil and just flip the ice cream mounds out onto a cookie sheet after laying a hot towel across the bottom to loosen them.) When the ice cream was hardened, he removed the ice cream discs, placed them on top of the pound cake rounds, then topped each mound of ice cream with another piece of pound cake:
These stacks then got stuck in the freezer again. While they were freezing, he made the meringue (I believe it was an Italian meringue, which comes out more marshmallow-y and yummy than the kind of meringue you make for a lemon meringue pie. Sarah over at CraftyBaking shares some good info about meringue here):
(Please forgive my mother's horrid mixer. I almost took my KitchenAid with me and then didn't because it weighs a ton. I then got mad at myself that I didn't... No offense, Mom. ;) I think the meringue would have come out stiffer if we had had my KA. A tip from me to you, dear reader: a KitchenAid mixer is SO WORTH EVERY PENNY. There is nothing like it, I promise you. I just have the basic Artisan model. I don't know what I ever did without it. Check out Reviews.com's post on how KitchenAid stands up to other mixers, as well as their post on how the different KitchenAid models stand up to each other. I think you will find the information incredibly detailed and useful.)
Anyway. After the meringue was finished, Arthur and I had fun (clearly) coating the frozen cake and ice cream stacks with big, swoopy plops.
If I remember correctly, Arthur froze these again until after dinner. He then broiled the whole sheet on high for a couple minutes to toast the meringue. Here's what they looked like as he was plating them:
A gorgeous mess, yes? Again, I think they would have held their shape better if we had used a better mixer and gotten that meringue a little bit stiffer. But you should have tasted them. Holy cow! We even froze the leftovers and ate them the next night, and they still were delish!
So—THAT is Baked Alaska! It's pretty damn easy! I had no idea. And impressive. It takes some time, but nothing is difficult.
I'm sorry I don't have a recipe, but if I come across a good one, I'll come back and post it here. Unless Arthur shoots me his...
And if you make some, post some pics in the comments below! I would love to see what you did!
Sunday, December 6, 2015
The Ruby Slipper Cafe — New Orleans, LA — A Restaurant Recommendation
It's a frosty morning here in Mass. I'm sitting here thinking of the weekend I just spent in New Orleans on the way to my cousin's wedding. Christmas wreaths and garland hung on every lamp post along Canal Street—and I was wearing flip flops and a short-sleeved shirt. I have to say, I didn't quite like it. Part of that holiday-ish feeling comes from wanting to curl up in your house with the people (and animals) you love beside a roaring fire, not the air conditioner.
But when I ignored the Christmas decorations, I felt wonderful as I wandered those old city streets. I hadn't been back to NOLA since our foodie honeymoon (read about Day One here, then read forward by clicking "Newer Post" at the bottom of each post for a rehash of the whole five days.) Boy, was it good to be back! We found a few more fantastic restaurants in our quick trip, all of which I cannot wait to visit again.
One of the restaurants we stumbled across is a cafe on Magazine Street called The Ruby Slipper Cafe. It opened its doors post Katrina and has quickly become a local chain because it is so flipping good. They called themselves "The Ruby Slipper" because the owners found that "there's no place like home." I love it. And the home vibe is truly a part of this place. You don't feel like a customer; you feel like you have known every employee for years, and they are just welcoming you back home for a bite to eat.
Okay, maybe not a bite to eat. How about a pile to eat? Huge quantities. And while we are on the topic of "home," everything is homemade. From scratch. Like, really. If they don't do it themselves, they get small local bakeries, farms, coffee roasters, etc. to do it for them. You can smell it. You can taste it. It is gosh darn DELICIOUS.
Chef Reiton got the Chicken St. Charles, a form of eggs Benedict: crispy fried chicken breasts on top of buttermilk biscuits and topped with poached eggs and Ruby's cream sauce.
I got the Migas, a bed of crispy tortilla strips piled with scrambled eggs, chorizo, tomato, cilantro, onion, and cheese, served aside a spicy sour cream and sliced avocado.
A special thank you goes to our server, Ronald. Wonderful service. Best smile ever. Here he is after pouring me yet another cup of the best coffee I have ever had (seriously. We bought a bag.):
But when I ignored the Christmas decorations, I felt wonderful as I wandered those old city streets. I hadn't been back to NOLA since our foodie honeymoon (read about Day One here, then read forward by clicking "Newer Post" at the bottom of each post for a rehash of the whole five days.) Boy, was it good to be back! We found a few more fantastic restaurants in our quick trip, all of which I cannot wait to visit again.
One of the restaurants we stumbled across is a cafe on Magazine Street called The Ruby Slipper Cafe. It opened its doors post Katrina and has quickly become a local chain because it is so flipping good. They called themselves "The Ruby Slipper" because the owners found that "there's no place like home." I love it. And the home vibe is truly a part of this place. You don't feel like a customer; you feel like you have known every employee for years, and they are just welcoming you back home for a bite to eat.
Chef Reiton got the Chicken St. Charles, a form of eggs Benedict: crispy fried chicken breasts on top of buttermilk biscuits and topped with poached eggs and Ruby's cream sauce.
I got the Migas, a bed of crispy tortilla strips piled with scrambled eggs, chorizo, tomato, cilantro, onion, and cheese, served aside a spicy sour cream and sliced avocado.
Crazy good. I may have a hard time even wanting to try other restaurants for breakfast the next time we visit.
(As if that would be a bad thing...)
Monday, November 16, 2015
Using Offal Isn't So Awful...Really: Learning to Use Turkey Guts
This past weekend, Chef Reiton and I had the kids home for our "Thanksgiving" since we won't get to see either of them on the actual holiday. We spent Friday night experiencing the "T," wandering the North End, and trying out Carmelina's amazing pasta and Modern Pastry's fresh cannoli:
As I stood over what looked to me like witches' brew, steam began to rise up out of the pot and bubbles started blurping on the surface. I took a stir or two when suddenly... DEAR GOD.
It smelled like Thanksgiving.
Oh, for all you believers in a no-giblet/organs/offal Thanksgiving dinner, you must believe me. That smell that we associate with Thanksgiving, that amazing aroma that our grandmothers' kitchens always had for the holidays that we just haven't been able to replicate and we never knew why?
Offal is why.
It is the ingredient that releases that intensely dark meaty fragrance into the air—and into your gravy. I silently praised my husband for once again unknowingly teaching me a lesson about the adventures of food...and then found myself stirring the pot ridiculously more times than was probably necessary.
As the simmering time drew to its close, I read on to my next steps in the gravy making: strain the broth, cool the gizzards...
then chop them up and save them to add to the gravy LATER???
HELL, NO!!!
YUM to both.
Saturday was to be "Thanksgiving," so while the rest went winter coat shopping, I stayed home to work on a classic Thanksgiving dinner. Little did I know what I would discover in my solitary moments in the kitchen that afternoon.
Right before he left, Chef Reiton pulled out the Cook's Illustrated cookbook The Best New Recipe and said, "Let's make this gravy for our dinner tonight."
"Yeah, sure!" I agreed, quickly noting that he was leaving the book open to a particular page and then turning back to what I was doing. And then he left.
I finished setting out pots and pans and got ready to stoke the fires, then turned to read the recipe.
The recipe that was titled: "Giblet Pan Gravy."
GIBLET. As in guts. Innards. Organs. Gizzards. Offal.
Never in my life had I touched giblets, much less cooked with them. I quickly scanned the recipe to see if I could somehow skip the giblet part. But alas—it is hard to skip the main ingredient that the recipe is named for.
I read on in further detail. What the recipe largely wanted me to do was to make a stock from the giblets. And the neck. And the tail. Which I had to CUT OFF. Oh, Lord, could this get any worse?
But, really, I thought, trying to calm myself down, a stock isn't so bad. I didn't have to cut anything up. All I had to do was brown up the whole lot of parts in their entirety and then add some herbs and broth and water and let it all go. I could do that...
So I did.
It smelled like Thanksgiving.
Oh, for all you believers in a no-giblet/organs/offal Thanksgiving dinner, you must believe me. That smell that we associate with Thanksgiving, that amazing aroma that our grandmothers' kitchens always had for the holidays that we just haven't been able to replicate and we never knew why?
Offal is why.
It is the ingredient that releases that intensely dark meaty fragrance into the air—and into your gravy. I silently praised my husband for once again unknowingly teaching me a lesson about the adventures of food...and then found myself stirring the pot ridiculously more times than was probably necessary.
As the simmering time drew to its close, I read on to my next steps in the gravy making: strain the broth, cool the gizzards...
then chop them up and save them to add to the gravy LATER???
HELL, NO!!!
Wednesday, November 11, 2015
A French Apple Tart Recipe for My American Veterans
Happy Veterans Day, family, friends, and strangers alike! Thank you, THANK YOU for your service to this great country of ours. Let us all be sure to pause today to think on both the emotional and physical sacrifices that millions have made to provide a homeland of peace for all of us.
In honor of our selfless men and women of service, I thought I would share with you the apple tart that I made for my parents a few days ago (how on earth did apples become associated with American pride?). It's a tarte tatin, really, not an apple pie—an apple tart made by caramelizing apples in sugar and butter and then plopping a pie crust on top and baking it. This is my I-kind-of-remember-how-this-goes version. I tend to do that a lot when I travel and cook. So this may not be the official French way of preparing it. But it was still pretty damn good.
You are going to want to make the pie crust first. While it is chilling in the fridge, you can peel and cut up the apples and get the caramel and caramelization going. So, first, here's the recipe for the dough:
Dough Ingredients and Directions:
1. In a food processor, combine only 3/4 cups all-purpose flour, salt, and the sugar, then pulse together with a few 1-second pulses to blend. Drop in the cold butter, cut into 1/4-in. slices, and process for about 10 seconds. The mixture will look like curds the size of cottage cheese. Scrape down the sides and the bottom and redistribute the mixture evenly around the bowl. Sprinkle the remaining flour over the top, then pulse about 5 or 6 more times. The dough will come together into a ball, and then redistribute itself around the bowl. Dump the mixture into a medium bowl.
2. Mix together the vodka and ice water. Sprinkle the dough with the mixture, then take a rubber spatula and start smashing, folding, and flattening the vodka-water into the dough, pressing the spatula down into the dough to help mix in the liquid. It's going to look like it's not going to do anything at first; just give it time and keep flipping, smashing, folding, and pressing; it will get there. The dough is going to resemble Playdough when you are done. (If it looks too dry, sprinkle in the tiniest amount of ice water--like 1/2 tsp. at a time).
In honor of our selfless men and women of service, I thought I would share with you the apple tart that I made for my parents a few days ago (how on earth did apples become associated with American pride?). It's a tarte tatin, really, not an apple pie—an apple tart made by caramelizing apples in sugar and butter and then plopping a pie crust on top and baking it. This is my I-kind-of-remember-how-this-goes version. I tend to do that a lot when I travel and cook. So this may not be the official French way of preparing it. But it was still pretty damn good.
You are going to want to make the pie crust first. While it is chilling in the fridge, you can peel and cut up the apples and get the caramel and caramelization going. So, first, here's the recipe for the dough:
Dough Ingredients and Directions:
- 1 1/4 cups (6 1/4 oz.) all-purpose flour
- 1/2 tsp. salt
- 1 Tblsp. sugar
- 10 Tblsps. unsalted butter (1 1/4 sticks)
- 3 Tblsp. ice cold vodka
- 1 Tblsp. ice water
2. Mix together the vodka and ice water. Sprinkle the dough with the mixture, then take a rubber spatula and start smashing, folding, and flattening the vodka-water into the dough, pressing the spatula down into the dough to help mix in the liquid. It's going to look like it's not going to do anything at first; just give it time and keep flipping, smashing, folding, and pressing; it will get there. The dough is going to resemble Playdough when you are done. (If it looks too dry, sprinkle in the tiniest amount of ice water--like 1/2 tsp. at a time).
3. Gather the dough into a ball, then dump it onto a square of plastic wrap. Lay another piece of plastic on top, then flatten the ball into a 4-inch disc. Wrap it tightly in plastic wrap and lay it in the fridge for at least 45 minutes.
Now, preheat the oven to 375°.
For the apples and caramel:
3. Roll out the dough on a floured surface to be just barely bigger than the skillet. Wrap the dough around the rolling pin to make it easier to move (use a metal spatula or bench scraper if necessary to get it up off the counter), then unroll the dough on top of the apples. Tuck the edges of the dough down into the caramel sauce.
For the apples and caramel:
- 3 medium to large apples, peeled, cored, and cut into 8 wedges (I use one of these to make it easy, then I just trim away any of the tough core bits left)
- 1/2 cup (1 stick or 8 tablespoons) unsalted butter
- 1/2 cup brown sugar, packed
- 1/2 cup white sugar
- ground cinnamon
- a couple pinches of kosher salt
1. To a 10 to 12-inch skillet with relatively straight sides, add both the sugars and the butter. Place on a burner and turn the heat on to medium to medium-low, depending on your burner. Stir constantly with a wooden spoon until the sugar and butter have melted and are completely combined. This takes awhile, but be patient; you don't want the butter separating. Let the caramel slowly bubble for a couple minutes as you continue stirring.
2. Place the apple slices on top of the caramel, nestling them into the sugar mixture, making two concentric rings. Sprinkle with two pinches of kosher salt and a heavy dose of ground cinnamon. Let the mixture bubble for a couple minutes together while you roll out the dough.
4. Place the skillet in the oven and bake for 35-40 minutes, depending on your oven. You want a nicely browned crust.
5. Let the tart cool in the skillet on a wire rack. If you flip it too soon, the caramel will still be too warm and will run off the tart. When it is cool and you are ready to dive in, take a small rubber spatula, wet it, then run it around the edge of the skillet, loosening the crust and caramel. Now take your plate or platter, lay it upside down over the top of the skillet, hold the pan and plate together like you would a sandwich, and then—FLIP!
See? Ridiculously simple. If you are terrified of pie crust or are in a terrible rush, buy a pack of Pillsbury, for heaven's sake. But this dessert is just TOO easy to not make. And yummyyyyyyyyy.
Have a wonderful holiday, all!
Wednesday, September 30, 2015
The Power of Pot Roast: The Recipe That Needs No Recipe
So I've decided: if there were to be a king of the slow cooking world, it would be Pot Roast.
Pot Roast comes from humble beginnings, and so he understands the ways of those who don't have much. He was born, after all, in the home of a peasant. True, his fame is known world over (with varying degrees of acceptance), but despite his frequent appearance in magazines and television, he has remained true to his roots and the belief that simple and slow is best.
Yesterday, Pot Roast ruled in my kitchen.
Before I headed out to run errands all day, out came my trusty old Crock-Pot and in went the following:
I placed all my ingredients in layers in the Crock-Pot (tomatoes on the bottom to burst first and create a pool of juice), then sprinkled it all with kosher salt, freshly ground pepper, and a bit of Italian seasoning (and a random quarter of a lemon I had leftover from last night's Sidecars), turned the C-P on to low, and walked out of the house for the rest of the day.
Now. Here's what I love about Pot Roast. The next time I make this? The meat will be a totally different cut. I might not even sear it because I don't have the time. I might decide to add in some mushrooms. Or use real potatoes in the pot instead of making a bed of fauxtatoes. Or nix the tomatoes and use more garlic instead. Or use a bunch of fresh herbs instead of the dried mix. I might even skip the Crock-Pot and decide to dump everything in a Dutch oven and put it in my oven instead at 250°.
POT ROAST DOESN'T CARE. Whatever you feel like throwing in there, throw in there! Use the cooking method you like the most (or have available). The miracle of pot roast is that it all promises to taste goooooooooood no matter what you use or how you do it. Just remember: low heat, a bit of salt, and a long period of time are powers in the kitchen that can't be denied.
Hail to the king!
Pot Roast comes from humble beginnings, and so he understands the ways of those who don't have much. He was born, after all, in the home of a peasant. True, his fame is known world over (with varying degrees of acceptance), but despite his frequent appearance in magazines and television, he has remained true to his roots and the belief that simple and slow is best.
Yesterday, Pot Roast ruled in my kitchen.
Before I headed out to run errands all day, out came my trusty old Crock-Pot and in went the following:
- random beef cuts (I will blog about that later...) to feed 2 people, seared on both sides with a bit of olive oil and kosher salt
- 2 giant carrots from the farmers market, halved lengthwise and chunked
- 1/2 a large yellow onion, sliced
- 2 garlic cloves, smashed
- about 15 small cherry tomatoes
I placed all my ingredients in layers in the Crock-Pot (tomatoes on the bottom to burst first and create a pool of juice), then sprinkled it all with kosher salt, freshly ground pepper, and a bit of Italian seasoning (and a random quarter of a lemon I had leftover from last night's Sidecars), turned the C-P on to low, and walked out of the house for the rest of the day.
When I walked back in the door after picking up Captain Reiton from the airport, I took several deep whiffs of deliciousness before making a quick batch of "fauxtatoes."
To do this, I cut large florets from half a head of cauliflower, placed them in a pot filled with about 1 inch of water, added a garlic clove and some kosher salt, then covered the pot and set it on the stove over medium-high heat to steam for about 10 minutes. When I could easily stab through the largest floret with a knife, I strained the florets and garlic clove and dumped it all in the food processor with half a stick of butter and some salt and pepper and pureed away until everything was super smooth. These "fauxtatoes" (they taste better than potatoes, I swear) became the bed for King Pot Roast.
(I didn't have any parsley to garnish. Sorry.)
Now. Here's what I love about Pot Roast. The next time I make this? The meat will be a totally different cut. I might not even sear it because I don't have the time. I might decide to add in some mushrooms. Or use real potatoes in the pot instead of making a bed of fauxtatoes. Or nix the tomatoes and use more garlic instead. Or use a bunch of fresh herbs instead of the dried mix. I might even skip the Crock-Pot and decide to dump everything in a Dutch oven and put it in my oven instead at 250°.
POT ROAST DOESN'T CARE. Whatever you feel like throwing in there, throw in there! Use the cooking method you like the most (or have available). The miracle of pot roast is that it all promises to taste goooooooooood no matter what you use or how you do it. Just remember: low heat, a bit of salt, and a long period of time are powers in the kitchen that can't be denied.
Hail to the king!
Labels:
American
,
beef
,
crockpot
,
dairy-free
,
gluten-free
,
grain-free
,
paleo
,
primal
,
quick
,
recipe
,
vegetables
Thursday, August 13, 2015
The Anatomy of a Patty Melt—and Its Recipe
It hit hard.
Really hard.
It started so innocently. I was putzing around the kitchen, doing this, doing that, when I opened up the fridge and saw a package of raw hamburger sitting there, staring at me—hamburger meant for, well, hamburgers. I closed the fridge door, and suddenly I saw in my mind's eye:
Heat that skillet over medium heat until it is hot but not blazing. While it is heating, shape your hamburger into a large rectangle that is the shape of your bread but slightly larger (meat shrinks as it cooks, and you want the cooked patty to be the size of your bread). Salt and pepper both sides of the patty, then cook it in the skillet until brown and crusty on both sides. (I did about 1/3 lb., and mine took about 4 minutes per side. Keep an eye on yours. Different amounts of meat and different stoves make for different cooking times.)
Remove the patty from the skillet and drain it on a paper towel-lined plate. Pour off the meat fat, wipe out (scrub, if necessary) the skillet, then reheat it on the stove until hot. Add a tablespoon of butter to the skillet and push it around to thoroughly and heavily coat the bottom of the skillet, focusing on the center where the bread will be placed. You want a good pool of butter for that bread to fry in.
Add a slice of bread to the skillet, sopping up the melted butter with the bread before placing it in the center of the skillet. Lay one slice of cheese on top of the bread, then top the cheese with the beef patty. Give the sandwich about 2 minutes to brown, then, using a metal spatula, start peeking under the bottom slice of bread periodically. You want a nice golden crust to your sandwich, not a burnt one (and all that butter can burn quickly, if you aren't careful).
Once your bottom crust is golden, momentarily remove the half-sandwich from the skillet with the spatula and add another tablespoon of butter to the skillet. Do the same swirling technique as before, then place your second piece of bread in the butter pool, sopping as before. Lay down your second slice of cheese, then carefully flip the first half of the sandwich on top.
Lay the piece of parchment over the top crusty piece of bread and press down HARD with the metal spatula. Do this frequently for a few minutes, smashing the whole pile down and making the melty cheese glue all the sandwich parts together into a deliciously compressed mess.
When the bottom crust is browned how you like it, cut the patty melt in half diagonally and plate it. Squirt a crap-ton of ketchup onto your plate, and get ready to dip and bite away.
Really hard.
It started so innocently. I was putzing around the kitchen, doing this, doing that, when I opened up the fridge and saw a package of raw hamburger sitting there, staring at me—hamburger meant for, well, hamburgers. I closed the fridge door, and suddenly I saw in my mind's eye:
A patty melt... Ohhhhhh, a patty melt!!!
I desperately tried to shake the image from my mind. Your guts don't like grain, I told myself. Just—eat the meat.
Nope.
I went for a run.
The craving followed.
You don't really have anything else in the fridge to cook, anyway, my craving reminded me.
Oh, good grief.
And I caved.
To assuage my guilt, I hereby give you the four components that make up the patty melt of my dreams. Now you, too, can taste and see...
You will need:
- raw hamburger (however much poundage you want to eat is up to you)
- 2 slices of melty cheese (I love Muenster)
- 2 soft, thick slices of white bread
- lots of butter
The only other requirements? A skillet, a metal spatula, a small piece of parchment, and ketchup, for serving.
Heat that skillet over medium heat until it is hot but not blazing. While it is heating, shape your hamburger into a large rectangle that is the shape of your bread but slightly larger (meat shrinks as it cooks, and you want the cooked patty to be the size of your bread). Salt and pepper both sides of the patty, then cook it in the skillet until brown and crusty on both sides. (I did about 1/3 lb., and mine took about 4 minutes per side. Keep an eye on yours. Different amounts of meat and different stoves make for different cooking times.)
Remove the patty from the skillet and drain it on a paper towel-lined plate. Pour off the meat fat, wipe out (scrub, if necessary) the skillet, then reheat it on the stove until hot. Add a tablespoon of butter to the skillet and push it around to thoroughly and heavily coat the bottom of the skillet, focusing on the center where the bread will be placed. You want a good pool of butter for that bread to fry in.
Add a slice of bread to the skillet, sopping up the melted butter with the bread before placing it in the center of the skillet. Lay one slice of cheese on top of the bread, then top the cheese with the beef patty. Give the sandwich about 2 minutes to brown, then, using a metal spatula, start peeking under the bottom slice of bread periodically. You want a nice golden crust to your sandwich, not a burnt one (and all that butter can burn quickly, if you aren't careful).
Once your bottom crust is golden, momentarily remove the half-sandwich from the skillet with the spatula and add another tablespoon of butter to the skillet. Do the same swirling technique as before, then place your second piece of bread in the butter pool, sopping as before. Lay down your second slice of cheese, then carefully flip the first half of the sandwich on top.
Lay the piece of parchment over the top crusty piece of bread and press down HARD with the metal spatula. Do this frequently for a few minutes, smashing the whole pile down and making the melty cheese glue all the sandwich parts together into a deliciously compressed mess.
When the bottom crust is browned how you like it, cut the patty melt in half diagonally and plate it. Squirt a crap-ton of ketchup onto your plate, and get ready to dip and bite away.
Tuesday, July 28, 2015
1,000 Chicken Salads: Yet Another (Summery!) Chicken Salad Recipe
Chicken salad recipes are like... well, you can look up the proverbial quote of Simone Elkeles to get my comparison. To keep the title of this blog kosher, let's just leave it at: everybody's got one.
So I know that the recipe I am sharing with you tonight is not going to necessarily be a recipe that you've been gagging for, nor is it one that you will find yourself passing on to your children's children.
But I will tell you this: it is good. It is different. It is summery. You should try it.
Here are the ingredients before they were blended with the dressing:
Enjoy!
So I know that the recipe I am sharing with you tonight is not going to necessarily be a recipe that you've been gagging for, nor is it one that you will find yourself passing on to your children's children.
But I will tell you this: it is good. It is different. It is summery. You should try it.
Here are the ingredients before they were blended with the dressing:
The chicken was leftover from my spatchcocking last night, as any good chicken salad chicken is (leftover, not necessarily spatchcocked...). And I ate the salad plain. No bread. You get the real taste of it that way (and you aren't eating any grain).
Here's the recipe for 2 servings:
You will need: a medium bowl; a small bowl; a small whisk; a fork
Put the salad ingredients into the medium bowl:
- 2 chicken thighs, meat diced
- 2 chicken legs, meat diced
- 1/2 chicken breast, meat diced
- cut into 1/4-in. cubes:
- 1/2 small cucumber, seeded
- 1 large radish
- 1 green onion, sliced thinly
- 3 large basil leaves, slivered
- 1/4 cup blueberries
- 1/4-in. piece of jalapeno, minced
Put the dressing ingredients into the small bowl:
- juice of half a lemon
- 2 Tblsp. sour cream
- dash of nutmeg
- kosher salt and fresh ground pepper to taste
Whisk the dressing ingredients until completely blended. Pour over the salad ingredients and toss until everything is coated evenly. Chill if making ahead, then plate, garnish with baby basil leaves and blueberries, and serve.
Labels:
American
,
chicken
,
grain-free
,
herbs
,
quick
,
recipe
,
salad
,
vegetables
Subscribe to:
Posts
(
Atom
)