Wednesday, December 9, 2015

Moroccan Spiced Nuts: A Recipe

As anyone who comes to my house for dinner knows, when it comes to appetizers, I am a huge fan of the cheese plate.  To me, there is nothing more stimulating to my appetite than a couple nice cheeses, a beautiful seasonal fruit or some nice salty olives (only if I can get good ones that do not come from a jar!), and a toasty bowl of spiced nuts.

I've toyed with a number of spiced nut recipes over the years, and I believe I've finally come up with a recipe that I am very happy with, evidenced by the fact that I, my dog, and my uncle Fred could not stop eating them.  These nuts aren't spicy as in "Dear God, these are hot!" They are spicy as in "Mmmm... these flavors make my mouth happy."

I know the spices are rather unusual, but don't freak out by their weirdness.  Give them a try, and you will see what I mean by your mouth being happy.  (I bet you dinner that you wouldn't be able to guess all of them if I didn't tell you!)

Speaking of telling, let's get you a photo and the recipe:

Moroccan spiced nuts recipe

Makes almost 2 cups

Special tools needed: parchment paper

Ingredients: 
  • 1 1/2 cups mixed nuts, raw or already roasted
  • 1/4 cup unsalted raw pumpkin seeds (sometimes called "pepitas")
  • 2 oz. real maple syrup (for God's sake, do NOT use the fake stuff here! Make that EVER!)
  • 1 Tblsp. olive oil
  • 1/2 tsp. ground cumin
  • 1/2 tsp. hot paprika (I used Hungarian)
  • 1/2 tsp. ground turmeric
  • heaping 1/2 tsp. kosher salt

Directions:

1.  Preheat the oven to 350°.  Lay out a large sheet of parchment paper for cooling.

2.  Dump everything in a medium bowl and toss toss toss with a wooden spoon (wooden spoons grab and move saucy things better, in my humble opinion). Make sure all the nuts are coated really well.  If you have to wait for the oven to finish heating up before Step 3, retoss everything before you pour the nuts onto the baking sheet.

3.  Pour the mixture out onto a baking sheet, and spread the nuts out into an even layer.  Pour any goo in the bottom of the bowl on top of the nuts.

4.  Put the pan in the oven for 10 minutes, then take out the pan, shut the oven door, and toss everything with a flat spatula to recoat the nuts.  Spread it into an even layer again, then roast for another 10 minutes.  Toss and spread again.  Roast for a final 5 minutes (unless things are looking pretty toasty. Then stop.).

5.  Scrape the nuts onto the sheet of parchment paper.  Spread them out into a single layer again, and let everything cool to at least warm.  If you are having trouble with the nuts sticking to your spoon or spatula as you move them, wet the spatula, then move the nuts.  Don't worry about the nuts sticking together too much.  After they cool you can break them apart.

6.  Serve your spiced nuts immediately, or cool them completely and store in an airtight container.

That's it! They take about 5 minutes to whip together and 25 minutes to roast (during which you can sit back and wait for that heavenly toasted, nutty aroma to start filling your house).

To serve, pair up with a couple ripe pears ready to slice and some Sartori cheese (you can find some at most any big grocery, and any flavor is OMG). You'll have a cheese plate made in heaven.

Print up the recipe by clicking the image below, and let me know in the comments what you think!

Nuts to you!


Sunday, December 6, 2015

The Ruby Slipper Cafe — New Orleans, LA — A Restaurant Recommendation

It's a frosty morning here in Mass.  I'm sitting here thinking of the weekend I just spent in New Orleans on the way to my cousin's wedding.  Christmas wreaths and garland hung on every lamp post along Canal Street—and I was wearing flip flops and a short-sleeved shirt.  I have to say, I didn't quite like it.  Part of that holiday-ish feeling comes from wanting to curl up in your house with the people (and animals) you love beside a roaring fire, not the air conditioner.

But when I ignored the Christmas decorations, I felt wonderful as I wandered those old city streets.  I hadn't been back to NOLA since our foodie honeymoon (read about Day One here, then read forward by clicking "Newer Post" at the bottom of each post for a rehash of the whole five days.) Boy, was it good to be back! We found a few more fantastic restaurants in our quick trip, all of which I cannot wait to visit again.
One of the restaurants we stumbled across is a cafe on Magazine Street called The Ruby Slipper Cafe.  It opened its doors post Katrina and has quickly become a local chain because it is so flipping good.  They called themselves "The Ruby Slipper" because the owners found that "there's no place like home."  I love it.  And the home vibe is truly a part of this place.  You don't feel like a customer; you feel like you have  known every employee for years, and they are just welcoming you back home for a bite to eat.

Okay, maybe not a bite to eat.  How about a pile to eat? Huge quantities.  And while we are on the topic of "home," everything is homemade.  From scratch.  Like, really.  If they don't do it themselves, they get small local bakeries, farms, coffee roasters, etc. to do it for them.  You can smell it.  You can taste it.  It is gosh darn DELICIOUS.

Chef Reiton got the Chicken St. Charles, a form of eggs Benedict: crispy fried chicken breasts on top of buttermilk biscuits and topped with poached eggs and Ruby's cream sauce.

Chicken St. Charles at The Ruby Slipper Cafe, New Orleans, LA

I got the Migas, a bed of crispy tortilla strips piled with scrambled eggs, chorizo, tomato, cilantro, onion, and cheese, served aside a spicy sour cream and sliced avocado.

migas at The Ruby Slipper Cafe, New Orleans, LA

A special thank you goes to our server, Ronald.  Wonderful service.  Best smile ever.  Here he is after pouring me yet another cup of the best coffee I have ever had (seriously.  We bought a bag.):

Ronald of the Ruby Slipper Cafe, New Orleans, LA

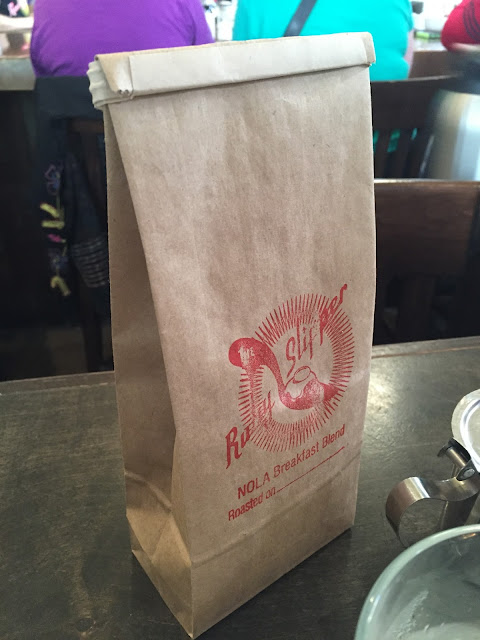
The AMAZING coffee at The Ruby Slipper Cafe, New Orleans, LA

Crazy good.  I may have a hard time even wanting to try other restaurants for breakfast the next time we visit.  

(As if that would be a bad thing...)

Monday, November 16, 2015

Using Offal Isn't So Awful...Really: Learning to Use Turkey Guts

This past weekend, Chef Reiton and I had the kids home for our "Thanksgiving" since we won't get to see either of them on the actual holiday.  We spent Friday night experiencing the "T," wandering the North End, and trying out Carmelina's amazing pasta and Modern Pastry's fresh cannoli:


YUM to both.  

Saturday was to be "Thanksgiving," so while the rest went winter coat shopping, I stayed home to work on a classic Thanksgiving dinner.  Little did I know what I would discover in my solitary moments in the kitchen that afternoon.

Right before he left, Chef Reiton pulled out the Cook's Illustrated cookbook The Best New Recipe and said, "Let's make this gravy for our dinner tonight."

"Yeah, sure!" I agreed, quickly noting that he was leaving the book open to a particular page and then turning back to what I was doing.  And then he left.

I finished setting out pots and pans and got ready to stoke the fires, then turned to read the recipe.

The recipe that was titled: "Giblet Pan Gravy."

GIBLET.  As in guts.  Innards.  Organs.  Gizzards.  Offal.

Never in my life had I touched giblets, much less cooked with them.  I quickly scanned the recipe to see if I could somehow skip the giblet part.  But alas—it is hard to skip the main ingredient that the recipe is named for.  

I read on in further detail.  What the recipe largely wanted me to do was to make a stock from the giblets.  And the neck.  And the tail.  Which I had to CUT OFF.  Oh, Lord, could this get any worse?

But, really, I thought, trying to calm myself down, a stock isn't so bad. I didn't have to cut anything up.  All I had to do was brown up the whole lot of parts in their entirety and then add some herbs and broth and water and let it all go.  I could do that...

So I did.

Turkey giblet stock for Thanksgiving dinner

As I stood over what looked to me like witches' brew, steam began to rise up out of the pot and bubbles started blurping on the surface.  I took a stir or two when suddenly... DEAR GOD.

It smelled like Thanksgiving.

Oh, for all you believers in a no-giblet/organs/offal Thanksgiving dinner, you must believe me.  That smell that we associate with Thanksgiving, that amazing aroma that our grandmothers' kitchens always had for the holidays that we just haven't been able to replicate and we never knew why?

Offal is why

It is the ingredient that releases that intensely dark meaty fragrance into the air—and into your gravy.  I silently praised my husband for once again unknowingly teaching me a lesson about the adventures of food...and then found myself stirring the pot ridiculously more times than was probably necessary.

As the simmering time drew to its close, I read on to my next steps in the gravy making: strain the broth, cool the gizzards...

then chop them up and save them to add to the gravy LATER???

HELL, NO!!!

Wednesday, November 11, 2015

A French Apple Tart Recipe for My American Veterans

Happy Veterans Day, family, friends, and strangers alike! Thank you, THANK YOU for your service to this great country of ours. Let us all be sure to pause today to think on both the emotional and physical sacrifices that millions have made to provide a homeland of peace for all of us.

In honor of our selfless men and women of service, I thought I would share with you the apple tart that I made for my parents a few days ago (how on earth did apples become associated with American pride?). It's a tarte tatin, really, not an apple pie—an apple tart made by caramelizing apples in sugar and butter and then plopping a pie crust on top and baking it. This is my I-kind-of-remember-how-this-goes version. I tend to do that a lot when I travel and cook. So this may not be the official French way of preparing it. But it was still pretty damn good.

You are going to want to make the pie crust first. While it is chilling in the fridge, you can peel and cut up the apples and get the caramel and caramelization going. So, first, here's the recipe for the dough:

Dough Ingredients and Directions:
  • 1 1/4 cups (6 1/4 oz.) all-purpose flour
  • 1/2 tsp. salt
  • 1 Tblsp. sugar
  • 10 Tblsps. unsalted butter (1 1/4 sticks)
  • 3 Tblsp. ice cold vodka
  • 1 Tblsp. ice water

1.  In a food processor, combine only 3/4 cups all-purpose flour, salt, and the sugar, then pulse together with a few 1-second pulses to blend. Drop in the cold butter, cut into 1/4-in. slices, and process for about 10 seconds. The mixture will look like curds the size of cottage cheese. Scrape down the sides and the bottom and redistribute the mixture evenly around the bowl. Sprinkle the remaining flour over the top, then pulse about 5 or 6 more times. The dough will come together into a ball, and then redistribute itself around the bowl. Dump the mixture into a medium bowl.

2.  Mix together the vodka and ice water. Sprinkle the dough with the mixture, then take a rubber spatula and start smashing, folding, and flattening the vodka-water into the dough, pressing the spatula down into the dough to help mix in the liquid. It's going to look like it's not going to do anything at first; just give it time and keep flipping, smashing, folding, and pressing; it will get there. The dough is going to resemble Playdough when you are done. (If it looks too dry, sprinkle in the tiniest amount of ice water--like 1/2 tsp. at a time).

3.  Gather the dough into a ball, then dump it onto a square of plastic wrap. Lay another piece of plastic on top, then flatten the ball into a 4-inch disc. Wrap it tightly in plastic wrap and lay it in the fridge for at least 45 minutes.

Now, preheat the oven to 375°.

For the apples and caramel: 
  • 3 medium to large apples, peeled, cored, and cut into 8 wedges (I use one of these to make it easy, then I just trim away any of the tough core bits left)
  • 1/2 cup (1 stick or 8 tablespoons) unsalted butter
  • 1/2 cup brown sugar, packed
  • 1/2 cup white sugar
  • ground cinnamon
  • a couple pinches of kosher salt
1.  To a 10 to 12-inch skillet with relatively straight sides, add both the sugars and the butter.  Place on a burner and turn the heat on to medium to medium-low, depending on your burner.  Stir constantly with a wooden spoon until the sugar and butter have melted and are completely combined.  This takes awhile, but be patient; you don't want the butter separating.  Let the caramel slowly bubble for a couple minutes as you continue stirring.

2.  Place the apple slices on top of the caramel, nestling them into the sugar mixture, making two concentric rings.  Sprinkle with two pinches of kosher salt and a heavy dose of ground cinnamon.  Let the mixture bubble for a couple minutes together while you roll out the dough.

caramel apple tarte tatin

best pie dough ever!


3.  Roll out the dough on a floured surface to be just barely bigger than the skillet.  Wrap the dough around the rolling pin to make it easier to move (use a metal spatula or bench scraper if necessary to get it up off the counter), then unroll the dough on top of the apples.  Tuck the edges of the dough down into the caramel sauce.

4.  Place the skillet in the oven and bake for 35-40 minutes, depending on your oven.  You want a nicely browned crust.

golden brown crust

5.  Let the tart cool in the skillet on a wire rack.  If you flip it too soon, the caramel will still be too warm and will run off the tart.  When it is cool and you are ready to dive in, take a small rubber spatula, wet it, then run it around the edge of the skillet, loosening the crust and caramel.  Now take your plate or platter, lay it upside down over the top of the skillet, hold the pan and plate together like you would a sandwich, and then—FLIP!

tarte tatin

See? Ridiculously simple.  If you are terrified of pie crust or are in a terrible rush, buy a pack of Pillsbury, for heaven's sake.  But this dessert is just TOO easy to not make.  And yummyyyyyyyyy.

tarte tatin with vanilla ice cream

Have a wonderful holiday, all!


Tuesday, November 10, 2015

Fall-ing for Scallopini: A Recipe for Chicken with Apple, Fennel & Thyme

I just got back from a visit to PA, right in time for the final "hurrah" of fall splendor.  The leaves on the drive down were just glorious.  My parents were having an Indian summer. The sun was shining almost every day.  The air smelled of dirt and decaying leaves.   It was exactly what I have always remembered autumn to be.

If only the visit were under better circumstances.  I drove down to be with my aunt Annie who had suddenly gotten quite ill.  She is home now, thank God; we are all very grateful.  But for a few days, things were quite scary.

My other aunt, Judy, came over for dinner one of those nights.  We were planning on going to the hospital right after we ate, so I wanted to make something quick and easy.  I decided on scallopini for ease, and in keeping with the beautiful fall weather, I chose to top it with apple, fennel, and thyme.

Aunt Judy loved it, so I decided to post the recipe for her.  This is another meal that you can really do whatever you want. Scallopini is any type of meat (although usually chicken or veal), thinly cut, and then sautéed.  You can top it off with whatever you choose, or just make a pan sauce like I taught you to make a few posts ago.  Or do both! It's all up to you.

Give it a try and let me know what you think.  Or create a different topper and share. We all would love to get some new ideas!

Chicken Scallopini with Apple, Fennel and Thyme


Serves 4

Special tools needed: large skillet, medium skillet, pie plate or cake pan, serving platter, foil

Ingredients: 
  • 4 small boneless, skinless chicken breasts, each one sliced crosswise into two 1/4-in. thick pieces (if large, cut them into 3 slices); pound to tenderize between two sheets of plastic wrap, if you have the time
  • 1 large apple-y apple that holds its shape when cooked (I used a Fuji), diced into 1/4-in. cubes
  • several sprigs worth of fresh thyme leaves
  • 1 small fennel/anise bulb, the hard root end cut off and tossed, the white part sliced very thinly (Tip: save the green part to use when you make stock)
  • 1/2 cup flour in a pie plate or cake pan (use almond flour to make it gluten-free)
  • kosher salt and freshly ground black pepper
  • 2 Tblsp-ish olive oil
  • 2 Tblsp. butter
  • 1 Tblsp. butter
  • 1/2 cup water or dry white wine

Directions:

1.  Salt and pepper both sides of each piece of chicken.  Turn the oven on to 200° for warming purposes.

2.  In the large skillet, heat the olive oil until it is hot and shimmery.  While it is heating, dump the flour into a pie plate or cake pan and dredge (that just means lightly coat by dragging) the first two chicken pieces (called cutlets) in the flour, making sure that both sides are coated.  Gently shake off any excess flour, then lay the chicken cutlets in the skillet and brown both sides of the meat, about 2 minutes per side.  I always watch for when the chicken becomes opaque halfway up the side; that's when I flip it.

3.  Move the two cooked cutlets to a plate and cover the plate with foil to hold the moisture in; put the plate in the oven to keep warm.  Repeat the process with the rest of the chicken, adding oil to the pan if you need to.

4.  When you are halfway done with the chicken cutlets (or you can do this step after the chicken is done), melt the 2 tablespoons of butter in the medium skillet over medium heat.  Add the apples and fennel, sprinkle on a little salt and pepper, and sauté until both are starting to soften, about 5 minutes.  Add the thyme leaves and continue sautéing until the apples and fennel are golden, about another 5 minutes.

5.  Reheat the large skillet with all the browned bits in the bottom, then add about 1/2 cup of water or dry white wine to the skillet.  Simmer and scrape up all the yummy brown crud on the bottom of the pan, stirring to allow those bits to melt into a sauce.  When the water/wine has evaporated until only half is left, turn the stove off and stir in the tablespoon of butter until it has completely melted and slightly thickened the sauce.

6.  Arrange the chicken cutlets on a platter, pile the apples and fennel on top, then drizzle everything with the pan sauce. Serve!

Feel free to print the recipe by clicking on the image below.  (That is going to be project #2, once I'm done setting up the recipe index: creating printable recipes! If you find something you want a recipe for, let me know, and I'll create one for you.)

Happy November!


Monday, October 26, 2015

My Latest Project: A Recipe Index

When I started writing this blog six years ago, I had no idea what the hell I was doing.

Okay, wait.  Let me rephrase that: As I am writing this blog today, I have no idea what the hell I am doing. I write because I love to and because I want to share my thoughts and love, but when it comes to making a really cool blog, I feel pretty clueless.  I fumble my way through it a lot, to be honest.

Regardless, I want all of you to have an enjoyable experience while hanging out with me online, so I've always been open for suggestions and ideas on how to make our time together better.  A lot of you have told me (for years) that I need to have a recipe section.  And I LOVED the idea.  I just didn't know how to go about adding one that was attractive, organized, and not going to be impossible to keep up with.

Well, after lots and lots of research and futzing around, I think I have finally figured out how to create a recipe index that I like, so I'm taking the big leap and starting the process.  It will be a work in progress for quite some time, but I hope you will bear with me as I plod along.  I will be starting with the most recent recipe posts first and working backwards—just an FYI.

To get to it, click on the "Recipe & Inspiration Index" tab underneath my blog title.  That will open up the different categories of foods I've written about.  Select what you are interested in, and then choose which food post you want to read.

That's it! Let me (and Marley) know what you think.  I am VERY open to suggestions!


Thursday, October 22, 2015

Learning to Make Your Own (Gluten-Free!) Stock

After watching the leaves out here on the East Coast go through a wardrobe change that I have never witnessed before (and I cannot believe I am going to be able to witness it year after year), I am officially getting ready to hunker down for winter.  With the flip flops put away, the toasty knee socks pulled up, and the fireplace popping comes the cold weather longings of soups and stews and all things warm and slow.  And that means replenishing the stock stockpile.

No, I just didn't stutter (although I do do that on occasion.  Wait.  No, seriously.  I just didn't do it again to be funny...).  Stock is the incredibly practical and insanely delicious kitchen staple made from—wait for it... SCRAPS.

Mmmmmmm.... Sounds delish, right? Let's take all our nasty peels and bones and pieces of veggie that we just trimmed off because we don't want to eat it and turn it all into food!

Well, that's not quite true.  You do take all your nasty peels and bones and trimmed veggie bits, but you simmer them for a really long time to extract all of their flavors, then discard them when you are finished.

For example, this is what I found in my fridge one morning last week: 
  • half a rotisserie chicken
  • a bag of kale that I hadn't liked the texture of (not trimmed well)
  • 3 old, rubbery carrots with their tops
  • 2 old onion halves with the skin and roots still attached
  • half a lemon
  • some mushrooms that were all leathery but still smelled okay...
I cut the chicken meat off of the bones to use for lunch, then took the carcass and all of those random items and squished them into my Crock-Pot.  I poured water into the pot until it was filled to the brim, then covered it with the lid, turned it on to Low, and let it go aaaaaaaaaaaaaaall day, aaaaaaaaaaaaaaall night, and almost all of the next day.

If I wanted to, I could have let it go much, MUCH longer.  I've let stocks go for days.  Like, almost a week.  I just keep adding water until the stock is almost smelling burnt.  In this case, I needed the stock for a meal I was making that night, so I just strained it through a colander into a big Pyrex measuring cup, and this is what I got: 8 cups of amber brown chicken stock.   

gluten-free stock

None of this pale yellow wussy crap you buy at the store that tastes like—um—NOTHING and costs at least $2.00 a quart.  This stuff? It's basically FREE since you were going to be wasteful and throw that shit out, anyway.  And NOW look what you've made!

gluten-free stock

Just wait until you taste it! Your grandma would be proud.  Really.

For shits and giggles, let's look to see what's left in the colander after I strained all that gorgeousness away:
scraps used to make gluten-free stock

Now THAT you can throw away!

If you don't use all your stock in one recipe, you can freeze it in smaller containers or you can can it (no stuttering).  Just remember (as Chef Reiton had to remind me once), this is a product made from meat, so you want to pressure can it to make sure that any residual bacteria is dead dead dead (although the chances of there being any after 24+ hours of simmering are very slim.  But still.  Better safe than hugging a toilet bowl.).

You can also use any kind of bones you want.  Sometimes I buy those creepy soup bones at the grocery store that you know are cow legs and use those to make beef stock.  I have used leftover rib bones from rib night and made pork stock.  You can use all veggies if you want and no meat.  Again, remember the true rules of a real kitchen: DO WHATEVER THE HELL YOU WANT.  Your food is yours to play with, test out, and sometimes never be able to duplicate again.  You are the boss.

So.  Bring that Crock-Pot up from the basement.  Go dig through the fridge.  Dump whatever you find in there into the pot and add some water.  Then come back tomorrow and comment to me how awesome you and your stock are.


Monday, October 19, 2015

Pan Sauces Forever: Learning the Magic of Scraping Up the Brown Bits

Have you ever eaten something and wondered how on earth it came to be considered a food?

Like beer.  Someone boiled or soaked grain in a bunch of water, but then, upon straining out the grain, left the sugary water out for so long that it fermented and got all funky. 

Then someone decided to go and drink it.  

GOD BLESS HIM.

I kind-of imagine the same thing happening with preparing meat.  Some foodie peasant daredevil was roasting his chicken/beef/pork/whatever over the fire, and, upon plating his meat, poured some water into the pan to let it soak while he was eating—and then decided to pour that water on his meat instead.

The miraculous birth of pan sauces!

I love making pan sauces.  They can be made simply with water, or they can be trumped up to all hell with wine, herbs, 'shrooms, you name it.  There is an infinite number of ways to make it, but they all have one delicious goal: to take your meat from boring to brilliant in about 30 seconds flat.

Here are some chicken cutlets I made the other night when I was bach-ing it and just wanted something super simple to make along with my roasted veggies: 

chicken cutlets with pan sauce and herbs

See those yummy juices dripping off the meat? Yeah?

I made them.

They didn't exist when I took the chicken out of the skillet.  The skillet was completely dry.  HOT and dry.

Unfortunately and most likely, so would be my chicken.

So here is why I love pan sauces so so so much.  You know what I did? 
  1. I took my skillet over to the sink.
  2. I put the pan under the faucet and turned the water on for about 2 seconds.
  3. I put the skillet back on the burner.  
  4. As the water rapidly simmered off, I madly scraped with a metal spatula at all the yummy, crusty crud that had browned and crisped itself to the bottom of the pan, stirring all the bits into the simmering water to dissolve.  
  5. When the amount of liquid in the pan boiled down to look like the amount I needed, I turned off the heat, scooped up a big blob of butter (I keep softened butter by the stove; you should, too), and plopped that into the sauce, whisking it in until it had melted.

And then I poured that deliciousness all over my chicken.  

Now.  That is a very basic pan sauce.  It is delightfully delicious, made with two ingredients that I KNOW you have in your kitchen, and it is damn fast to make.  You will love it.

If you want to get even more fancy schmancy, but not any more difficult (I swear!), try browning some sliced or chopped mushrooms or shallots or garlic in the pan before you add the water.  Or instead of using water, use broth or wine.  Or use a mix of both! There is no right or wrong.  Just do what you feel like or have on hand.

But no matter what additions you make or what you use as your liquid, always whisk in a plop of butter after you turn off the heat.  It thickens the sauce up a bit and just adds a nice richness to the flavor.

To top it all off—literally—try sprinkling on some fresh herbs after you pour on the sauce.  I used cilantro in the pic above because I had seasoned my chicken with some cumin and cayenne.  (If you aren't sure if an herb will go well with your seasonings, tear open a leaf and then sniff it together with your spices.  If it smells good together, it will taste good together.)

And that is that, my friend.  

PSF!

(Pan Sauces Forever)

Tuesday, October 13, 2015

Clarified Butter: The Truth of Ghee Matter

I know I've blogged about ghee before in Thank Ghee for Reading, but I just finished making another batch this very minute, and I thought I'd post again to encourage some ghee making out there.

Ghee is a cooking fat made from heating unsalted butter reeeeeeeeeeeeally slowly and NOT TOUCHING IT.  While the butter is melting, the butterfat (the clear stuff) separates from the milk solids (the stuff that looks like tiny cheese curds).  If you stop the process after the milk solids separate from the fat, the leftover yellow oil is clarified butter.  It's the stuff that you seafood lovers love to dunk your lobster and crab into.

If you keep the process going, however, the water in the butter will begin to evaporate off (you will hear and see it simmering off, sputtering and popping away), and the milk solids will begin to brown and settle to the bottom of the pot, leaving a clear brownish oil that is ghee.  This cooking fat is  highly heat tolerant as well as rich in flavor, but it also wonderfully rid of the things that make some of our bellies not feel so great (the milk stuff such as casein and lactose).

To strain the ghee from the solids, simply pour the liquid in the pot through a cheesecloth-lined sieve into a bowl, then let the oil cool. Voila! You've got your ghee!

ghee

The quantity of ghee you get will depend on the quality of the butter you use.  European butters with a higher butterfat content will yield more ghee than the cheaper butters that contain a bit more water. They are more expensive, but they are worth it—not just for the amount of ghee produced but also for the flavor.  This is an area where cheap ass me doesn't skimp.

Once your ghee has cooled, you can store it in a jar on the counter or in the fridge.  It will become harder in the fridge, but it will last longer (about 12 months vs. 6 months on the counter).  If you are like me, it doesn't last 6 weeks much less 6 months, but you do what works for you.

For more info about ghee, check out What's Cooking, America's page all about it.

And give a shout if you make a batch! I'd love to hear your thoughts and how you are using it!

Monday, October 12, 2015

Pepper Delirious: A Cocktail?

I don't know that there is any other cocktail in the world that has a name that actually makes me not want to drink it other than the Pepper Delirious.  (Okay, maybe Sex on the Beach.  That poor cocktail's name is just too inane to even consider seriously drinking, although, YES, I had it once.  The cocktail, I mean.)

First off, the name "Pepper Delirious" sounds like it is referencing something—and it sounds like I should KNOW what it is referencing—but I don't.  So I feel stupid every time I say it.

Secondly, pepper? In a cocktail??? Ewww.  Who wants bell pepper in their cocktail? I mean, I love veggies.  But putting veggies (with the exception of a cucumber) in your cocktail is like putting meat in your cocktail (hello, Añejo MANhattan).  It just sounds totally wrong.

Until you actually taste a Pepper Delirious.  Veggies or not, I have come to love this drink and would not hesitate in serving you one, no matter how much you objected, if you were to grace my presence some evening.  It is refreshing.  It is daringly different.  It is delicious.

The drink was created by Ryan Magarian (also the developer of the Añejo MANhattan).  He is part creator in Aviation American Gin, a gin that I would love to drink but have never had the opportunity to try.  Regardless of the fact that he is a bartender and obvious mixologist, I have adapted this recipe slightly to suit my own tastes.  His original recipe can be found in one of my most perused cocktail books by Robert Hess, The Essential Bartender's Guide (which I see now is out of print.  That is a damn crying shame.  Wow.  Mud Puddle Books—somebody! Bring this book back into print!)

ANYWAY.  (Let me put my soapbox away...)  In case you are a daring soul like my husband who made me this drink in the first place, I am putting my adaptation of the recipe below; it's a little less minty and a little less sweet than Ryan created, but that's just how I like things.

So, here you go:

Muddle in the bottom of a shaker:

  • 2 thin yellow BELL pepper rings (not sweet pepper--it doesn't taste the same. We tried it.)
  • half a package of organic mint (about 10 grams--Ryan's recipe calls for 40 grams; that's TWO packages! And you thought I was crazy!)
  • 2 oz. gin
  • 3/4 oz. freshly squeeze lemon juice (NO BOTTLED JUICE)
  • 1/2 oz. simple syrup (equal parts sugar and water, dissolved)
When everything is nicely smooshed and broken down, add ice and shake like hell for 30 seconds.

Hess doesn't say to, but I double-strain this cocktail, pouring the drink into your frosty glass through this type of doodad.  It helps keep most of the chunks out (and your teeth clean as you are drinking). 

Garnish with a mint sprig (Hess says to also use a pepper ring garnish, but I don't want that slapping me in the face as I drink).

Below is a photo of my version, attempted with sweet peppers instead of bell (but again, don't do it.  They just don't add the necessary zing or color.):

a Pepper Delirious cocktail

Let me know if you have the gumption to try it, and tell me what you think.  Regardless of the name and those veggies, I am pretty sure you will be wonderfully surprised.

Friday, October 9, 2015

Handheld Citrus Juicers — A Kitchen Gadget Recommendation

It's coming on to Friday night, and my Captain is HOME!

That means it is almost time for some serious cocktails and a round or two of cribbage in front of the fire after a dinner of some leftover lasagna (I made it again, but it was better the last time.  Note to self: sweet peppers and bacon don't work too well in lasagna... Oh, well.  If you don't try, you don't know, right?).

Given all those factors (Friday night/husband time/I'm hungry), I decided that I would do a quick post—but an important one.  I want to show you all a picture of my artistic (i.e. chaotic) tool drawer in order to show you the cocktail tools I love the most: my citrus juicers.

lemon juicer, orange juicer, lime juicer

I know you've all seen these in the stores.  If you don't have one (even if you don't drink cocktails)—GET ONE.  At least the lemon one.  Lemon juice is a vital part of a kitchen.  And this handy little squeezer will help you eke out every last little drop to make your lemonade, or your lemon meringue pie, or your lemon bars, or your lemon-y whatever.

AND you can even use it to juice limes.  I know! The limes out there are gettin' pretty large, if you haven't noticed of late.  So large, in fact, that they tend to not fit in the damn lime juicer. So there! Kill two birds with one tool!

Go on! Go on out and buy yourself a lemon juicer, and then call me and I'll walk you through your first Sidecar creation... You will be SO happy you bought that little guy.

Tuesday, October 6, 2015

How to Compose Yourself (and Your Salad)!: A Composed Salad Recipe with Baby Arugula, Red Pear and Shallot

I used to laugh at that term—a composed salad—when I was a kid.  Personification would kick in, and all I could think of was a salad sitting up straight and tall, eyes downcast, hands in her lap, waiting with great grace for her turn to be eaten.

Salads are not my favorite thing to make.  I like to eat them, but I struggle with being too impatient to put one together at the end of meal prep; I just want to eat.

Thank God for those little boxes of organic lettuces and leaves.  I know they are more expensive, but 1) they are organic, 2) I don't have to rinse any damn leaves, and 3) I don't have to chop any damn leaves.  The only thing I'm left to do is cut up some tomato and cucumber, and I can call it a day.

And the-e-e-e-en there's my husband.  Salad creation is his specialty.  He reminds me of Jonathan in the old '80s movie, Splash, who gets fired for being too artistic with his pizza-making.  That's Chef Reiton.  His salads are gorgeous.  And he looks so relaxed making them.  I bang away at the cutting board to hurry up and get it done, and he stands and meditavely slices and minces and slivers and chops.  It makes me jealous.

So the other night I determined: I was going to make a killer salad.  Not the tossed green salads I always make.  No.  I was going to make a composed salad.  A little work of art on a salad plate.

I took three ingredients:

  • a red pear with the flower blossom end sliced off and discarded
  • baby arugula
  • a small shallot, peeled, with the root end trimmed

With my mandoline on the thinnest setting, I sliced the red pear crosswise into circles until I started to hit the seeds (about half the pear).  Next I sliced the shallot into circles.

Now came the composing: 
  1. I lay the pear slices in a ring on the salad plate, overlapping the edges a bit.
  2. I placed a nice little mound of baby arugula in the center of the ring.
  3. I sprinkled the little shaved rings of shallot on top of the arugula mound. 
That was it.  To dress it I sprinkled it with a little bit of olive oil, a little bit of balsamic vinegar, a few grinds of fresh black pepper, and a teensy bit of kosher salt.

The result? GOR-GEOUS!!!!

And it took, like, 2 minutes to make! AND it was delicious! 

a composed salad with red pear, arugula and shallots

I think I may have found my new favorite thing to create! Folks, get ready for some serious salad composure! 

Sunday, October 4, 2015

Figs with Bleu Cheese and Pecans: A Fancy Schmancy but Easy Peasy Appetizer Recipe

It's fig season, people!!! Woohoooo!

Regardless of this article my brother sent me recently from Knowledge Nuts, I love fresh figs.  Second only to a warm, heavy peach dripping with juice, figs are probably my favorite fruit.  They are exquisite, if you've never had one.  Exotic.  Sensual. Bite into one and you will understand why the Renaissance painters used them in their paintings to allude to sex.

And they were $3.99 at the grocery store the other day! Imagine! $3.99 for nine plump little parcels of heaven.

I snatched up a package and a wedge of good bleu cheese, then came home and created a little appetizer to nibble in front of the fire with Chef Reiton while our chicken finished its roasting:

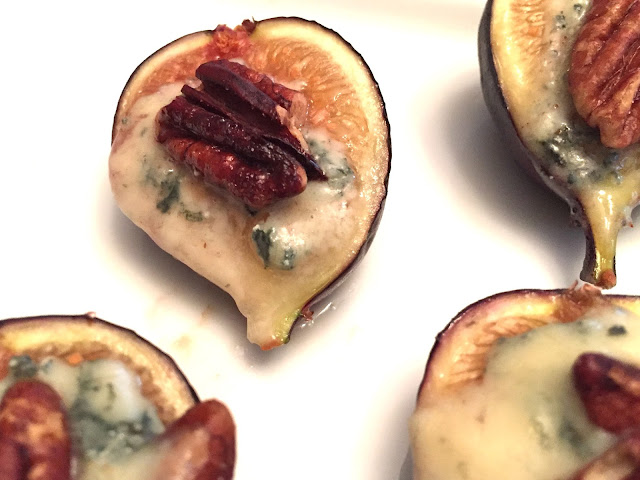
appetizer of figs with bleu cheese and pecans

They're pretty, aren't they? If you want an appetizer to impress that takes a whole 10 minutes to prepare from start to finish, try these out.  Here's what you've got to do (adjust quantities to suit your party size.  I used 4 whole figs for the 2 of us):

Ingredients:

  • fresh figs, halved through the stem so you've got a little "handle" to pick them up with
  • good bleu cheese
  • pecan halves

To prepare:


Heat your oven to 400° OR you can toast these if you have a toaster oven.

Lay the figs on a foil or parchment-lined cookie sheet.  I used the little pan that fits in our toaster oven.

With a butter knife and your finger, place a tiny plop of bleu cheese on top of each fig half.  You don't need much; bleu cheese is very pungent.  The size of two really big peas is a good amount.

Gently press a pecan half on top of the bleu cheese on each fig.

Roast or toast your figs for about 4 minutes.  The nuts will be toasty and the cheese bubbly.

Let them cool a minute, then plate and serve warm.

Give them a try and let me know what you think! I think you might be surprised by the wonderful mix of flavors and textures.  Soft figs with crunchy pecans.  Sweet and toasty and salty and earthy.  Delightful!

appetizer of blue cheese and pecans

Friday, October 2, 2015

Brandied Peaches and Cream at Midnight: Learning the Magic of Maceration (with Liquor)

I have a new Italian grandma.

Her name is Paula, and she lives next door.  I had the absolute pleasure of hanging out with her and her daughter, Annette, and their family this past weekend.  Derrick and I were taking out the trash (with wine glasses in hand—I know...), when they called over the fence and said to bring our wine glasses and come on over to sit by the fire!

Am I ever glad we said 'yes.'  First off, I could have only dreamed that we would have next door neighbors as nice as they.  I mean, they are the kind of people that are just genuine, you know? Nobody will ever be able to replace our Trevinos, but Paula and Annette and Justin and James look like they are certainly going to give them a run for their money.

Secondly,—well, let's just get back to Paula.  She absolutely warmed my heart.  I think I could sit and talk to her for hours.  In the 15 minutes that we were alone together conversing, I felt like I got a glimpse into an extraordinary life lived by a woman with a strength that most of us could only hope to have.  I can't wait to get to know her better.  And to cook with her...  I hear her arancini are to die for.

There are many more reasons I'm glad we said 'yes' to the fire invitation, but the one that relates the most to why I'm writing you all is because that night Paula handed me a bag of peaches picked from a very special tree in their backyard.  Yes, HOMEGROWN peaches.  Holy tamole! She told me that they were a little hard, yet, and to give them a few days...

Well, I did, and yesterday I decided that they were ready to be eaten.  TODAY.  Chef Reiton had a Chicago trip that would have him leaving just before dinner and not coming home until close to midnight, so we decided to do like we did when were dating and have a midnight dinner.  We made a big batch of chili to simmer for hours on the stove while he would be working, and while he was gone, I hatched a secret peachy dessert plan and took Paula's peaches and made this:

chopped peaces in brandy with whipped ricotta cheese and Greek yogurt

There they are, waiting in the fridge.  I'm calling my little dessert creation brandied peaches and cream, but there's not a drop of cream in there.  The "cream" is really whole milk ricotta cheese and Greek yogurt whisked together until the mixture is silky smooth (no sugar added).  The peaches I cut up really small then macerated them for a couple hours with a drizzle of organic honey, a sprinkle of nutmeg, a teensy pinch of salt, and a splash of brandy.  Then I just layered everything in little juice glasses and topped each of them with a sprig o' mint.

brandied peaches and cream

Chef Reiton and I really liked the results.  The "cream" mixture was nice and smooth and creamy.  The peaches were just peachy! But there are a few things we decided would make it even better:
  1. Use a little more Greek yogurt and a little less ricotta to get a bit more tang.  So maybe instead of doing equal parts of 1:1, maybe do 2:1.  And I could have added a couple drops of vanilla for some flavor.
  2. I plated these after only a couple hours of maceration.  Allowing the fruit to macerate for a much longer time and plating them closer to serving time would make the fruit taste that much better and keep the yummy brandied juices more evenly distributed throughout the dish as you are eating it, instead of having them settle to the bottom and only getting the best at the last...
  3. This dessert would work with lots of fruits.  I've got some raspberries in the fridge right now.  Those would be awesome.  Strawberries? Heck, yeah.  Blueberries.  Blackberries.  Plums.  Oh, man... Change the spice sprinkle to suit the fruit, and you are good to go!
  4. Another cheese to try? Mascarpone.  That's got the silk and tang going for it already.  Blend the mascarpone and yogurt in equal parts? Hmm...
Give it a try! And if you don't have brandy or honey to macerate the fruit in, try using some brown sugar to get a bit of that caramel-y flavor involved.  Yummy!

And now I am off to continue getting this little house set-up.  I want Paula to come over...

Thursday, October 1, 2015

Dear Butchers of America... An Open Letter Regarding the Labeling of Meat

Dear Butchers of America,

I am writing with a question that has perplexed me for quite some time now.  It is regarding beef cuts, so I am hoping that you can help me.

I am a home cook; I've not been formally trained in any way in identifying parts of meat.  And while I like to experiment with recipe creation, I generally use recipes from my cookbooks and warped and spattered Bon Appetit magazines to cook my meals.  

When I am reading recipes to create my shopping lists, I see cuts of meat listed such as "flank steak," "brisket," "rib roast," etc.  But when I get to the grocery store, I see labels like this:


"Boneless Beef Chuck Steak Grillers???" What the HELL are those??? 

Chuck, okay—I get that part.  But "chuck steak grillers???" Do you guys, just for shits and giggles, sit in the back and come up with made-up beef part names to confuse us home cooks? You know we are looking for "2-3 lb. chuck roast."  Do you guys put hidden cameras in the cases so you can laugh hysterically at our confused, perplexed faces as we pour over the meat selections and wonder what the hell half of them are?

And it seems that this is further affected by national region.  Out here in Boston, everyone talks about "steak tips."  Never heard of them before in my life, but apparently "marinated steak tips" are just the shit.  But when I ask anyone what exact cut of beef they are, no one seems to know! It's just "beef."

My dear butchers, I have a request to make: how about a universal chart that all U.S. butchers use to label their meat, so no matter what state I travel to, no matter what store I shop in, all meat is labeled with real beef cut names that match up with my recipes.  If you want to have some fun because your job hacking up animals has gotten to be too much, maybe make a "mystery meat" case? Put the hidden cameras there?

That would be AWESOME.

Thank you so much for your concern and assistance,

Rachael

Wednesday, September 30, 2015

The Power of Pot Roast: The Recipe That Needs No Recipe

So I've decided: if there were to be a king of the slow cooking world, it would be Pot Roast.

Pot Roast comes from humble beginnings, and so he understands the ways of those who don't have much.  He was born, after all, in the home of a peasant.  True, his fame is known world over (with varying degrees of acceptance), but despite his frequent appearance in magazines and television, he has remained true to his roots and the belief that simple and slow is best.

Yesterday, Pot Roast ruled in my kitchen.

Before I headed out to run errands all day, out came my trusty old Crock-Pot and in went the following:

the ingredients for pot roast

  • random beef cuts (I will blog about that later...) to feed 2 people, seared on both sides with a bit of olive oil and kosher salt
  • 2 giant carrots from the farmers market, halved lengthwise and chunked
  • 1/2 a large yellow onion, sliced
  • 2 garlic cloves, smashed
  • about 15 small cherry tomatoes

I placed all my ingredients in layers in the Crock-Pot (tomatoes on the bottom to burst first and create a pool of juice), then sprinkled it all with kosher salt, freshly ground pepper, and a bit of Italian seasoning (and a random quarter of a lemon I had leftover from last night's Sidecars), turned the C-P on to low, and walked out of the house for the rest of the day.

ingredients for pot roast layered in the Crock Pot

When I walked back in the door after picking up Captain Reiton from the airport, I took several deep whiffs of deliciousness before making a quick batch of "fauxtatoes."  

To do this, I cut large florets from half a head of cauliflower, placed them in a pot filled with about 1 inch of water, added a garlic clove and some kosher salt, then covered the pot and set it on the stove over medium-high heat to steam for about 10 minutes.  When I could easily stab through the largest floret with a knife, I strained the florets and garlic clove and dumped it all in the food processor with half a stick of butter and some salt and pepper and pureed away until everything was super smooth.  These "fauxtatoes" (they taste better than potatoes, I swear) became the bed for King Pot Roast.  

pot roast on pureed caulifulower

(I didn't have any parsley to garnish.  Sorry.)

Now.  Here's what I love about Pot Roast.  The next time I make this? The meat will be a totally different cut.  I might not even sear it because I don't have the time.  I might decide to add in some mushrooms.  Or use real potatoes in the pot instead of making a bed of fauxtatoes.  Or nix the tomatoes and use more garlic instead.  Or use a bunch of fresh herbs instead of the dried mix.  I might even skip the Crock-Pot and decide to dump everything in a Dutch oven and put it in my oven instead at 250°.

POT ROAST DOESN'T CARE.  Whatever you feel like throwing in there, throw in there! Use the cooking method you like the most (or have available).  The miracle of pot roast is that it all promises to taste goooooooooood no matter what you use or how you do it.  Just remember: low heat, a bit of salt, and a long period of time are powers in the kitchen that can't be denied.

Hail to the king!

Tuesday, September 29, 2015

The Delicate Delicata Squash: Learning to Prepare It in 3-2-1!

Do you remember the days when you went grocery shopping and your fresh veggie options were beets, broccoli, cauliflower, carrots, and zucchini?

Now not only do we find brussels sprouts on the stalk, kohlrabi, and kale in stores, but we have farmers markets popping up in every town, big and small, on the map, providing us with a huge variety of some rather random vegetables, some of which I've never heard of.

One of those random varieties that I have read about in my food magazines for awhile now but have never been able to find in any of my stores is the delicata squash...and lo, and behold! What does Inge give me as we were leaving her home/our short term boarding house but some delicata squash! Imagine!

So, the other night I followed her directions on how to cook it:

1) Take a fork and stab the squash, Psycho-style, repeatedly, all over:

delicata squash

2) Put the whole squash on a plate in the microwave and microwave for 5-6 minutes:

Microwave delicata squash.

3) Let the squash rest and cool for a couple minutes, then slice it in half lengthwise, scoop out the seeds with a spoon, slather on the butter, salt and pepper, and enjoy!

delicata squash with butter, salt and pepper

I have to say, I was pleasantly surprised.  Winter squashes tend to scare me a little.  They usually are so much work and require whacking with cleavers/mallets/other implements of squash destruction... It makes me nervous.

But this guy? Easy peasy to prepare! And the flavor? Wonderfully mild.  Slightly sweet and with the texture of a very fine spaghetti squash.  You could eat it with a spoon.  You can even eat the skin, unlike other hard squashes.  How's that for a winter squash that breaks all the rules?

All good reasons to call it the delicat(e)-a...  Give it a try! And let me know if you come up with any creative ways to use it...

Monday, September 28, 2015

Gluten-Free, Grain-Free Zucchini Lasagna Speaks: "Don't Judge Me. Just Eat Me."

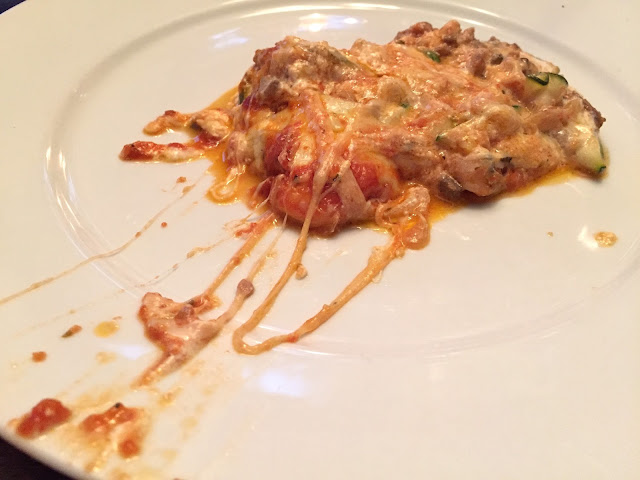
No matter how hard I try, when it comes to capturing the deliciousness of lasagna on film...it's nearly impossible.  Some of it may be my photography skills, but I think the true reason it can't be done is this: photographed melted cheese is just GROSS.  Your lasagna can be straight-out-of-the-oven, lava-hot—and it looks God awful:

zucchini lasagna plated

Let it rest for just a few minutes to set, and it looks like the rubber from an old pair of tennis shoes:

zucchini lasagna

There just seems to be no way to visually appreciate the culinary wonder that is lasagna.  

You just have to eat it.

I did some experimenting the other night with making a pasta-free lasagna.  I think it was one of the best lasagnas I have ever made.  Instead of using lasagna noodles, Chef Reiton sliced zucchinis lengthwise on the mandoline, the blade set at the thinnest setting.  Out came "noodles" that we layered raw in the pan.  (He only sliced about halfway through each zucchini to avoid any accidents with the mandoline blade.  We saved the leftover halves to use for another "pasta" meal a few days later).

I made the mistake of forgetting to salt the zucchini noodles before using them, so the lasagna came out a bit wet.  Salting zucchini after you cut or slice it helps to draw out their water (sprinkle zucchini with some kosher salt and let them sit for a good 20 minutes, then rinse and pat dry).  Other than that goof, we were very happy with the flavors.  Robust, cheesy, and a bit spicy.

Here are the items that I layered into our small lasagna pan for 2-4 people:
  • 3 small-to-medium sized zucchinis, about 1 1/2 to 2-in. in diameter, ends trimmed, then sliced LENGTHWISE on a mandoline set at the thinnest setting (salt the slices while you are sautéing up your 'shrooms and onions, then rinse and pat them dry)
  • 1/2 lb. chopped and sauteed baby bella mushrooms
  • 1 small onion, very thinly sliced on the mandoline into rings, then lightly caramelized on medium-low heat
  • 2 links of hot Italian sausage, crumbled and browned
  • whole milk ricotta cheese (forget lowfat, people! Full fat is better for you and tastes 100% better!)
  • provolone slices (not smoked)
  • mozzarella slices (not fresh)
  • homemade tomato sauce (recipe below)
  • Parmesan to grate on top

Lasagna is an as-you-like-it meal, so change the ingredients, layering tactics, and quantities to suit your own tastes.  

As for the sauce, it is quick and easy.  I figured the Italians keep things simple, so I did, too.  You ready?

Dump in the bowl of a food processor:
  • a 28-oz. can of peeled whole tomatoes (yes, Marzanos if you can do them), juice included
  • 2 peeled garlic cloves, cut into quarters
  • 1 tsp. fennel seeds
  • 1 tsp. oregano
  • 1 tsp. kosher salt
  • 1 heavy drizzle extra virgin olive oil
  • 1 heavy drizzle balsamic vinegar
  • the leaves of one large sprig of basil
Puree until everything looks smooth.  You can use the sauce straight from the bowl or simmer it to allow it to thicken and the flavors marry, if you have the time.

That's it.  Our lasagna got baked at 350° for a good half hour.  Just make sure the whole thing is bubbly, not just the edges.  

And if it looks U.G.L.Y. when you plate it? Don't judge.  Just eat.

Thursday, September 24, 2015

San Marzano Meatballs: A Recipe of Comfort

Despite our move-in day last Friday being pretty dang hot, the past few days have been fallish-ly cool.  Cool = cozy, in my brain (I admit it: I’m already getting the holiday itch), and this translates in the kitchen to cooking up some serious comfort food.  I’m dreaming of gloriously herbed and roasted meats and veggies, slowly simmered stews and soups, the occasional heaven of warm, yeasty sourdough bread or the buttery crust of pot pie.  Anything that compliments my desire to revel in the warmth and slowness of life is bound to find its way onto my dining room table.

That being said, it is only natural that Chef Reiton’s and my first home-cooked meal in our new little house fell into the comfort category. I found Marzano tomatoes for a great price at our little local grocery, so I used them to make a meal I am calling Marzano Meatballs (and, yes, everything about this town is little).

San Marzano tomato sauce with meatballs, parmesan and basil


While this meal isn’t necessarily fast in cooking time, it is very quick to get on the stove and is pretty hands-off and easy.  If you can smash, stir, and sprinkle, you’re good.  I've included the recipe below.  If you can’t find Marzano tomatoes in the canned tomato section of your grocery store (or you can but they are so fricking expensive in your area that you just can't do it), you can use any other canned whole peeled tomato—not the end of the world.  And BTW, now that we have an organized house and are back to cooking again, we are back to eating our mostly grain-free diet, so we ate these "plain."  They could be served over zucchini noodles or a pasta of your choice.

These quantities (as well as small green salads) nicely served 2 people.

Equipment needed: medium bowl, 10-in. skillet or larger (cast iron is best), slotted spatula, paper-towel lined plate, vegetable peeler

Nice, if you have it: 1 1/2-in. ice cream scoop (#40)

Ingredients:
  • 1/4 lb.-ish ground beef
  • 1/4 lb.-ish ground pork or lamb
  • 1/2 tsp. kosher salt
  • 1/2 tsp. fennel seeds
  • 1/4 tsp. freshly ground black pepper
  • 1 egg
  • 1 large garlic clove, crushed or finely minced

  • big glug of extra virgin olive oil
  • 1 28-oz. can of whole Marzano peeled tomatoes
  • half a medium yellow or sweet onion (the root end is best, to keep the pieces all together), cut into two quarters (don't cut off the roots)
  • 2 cloves of garlic, smashed and broken open with the heel of your palm
  • a big drizzle of extra virgin olive oil
  • a big drizzle of balsamic vinegar

  • a big sprig of fresh basil, medium and large leaves removed, stacked, then slivered
  • a hunk of Parmesan cheese
  • baby/torn basil leaves from the above sprig for garnish/extra flavor

Here’s what you do:

Place the meats, salt, fennel, pepper, egg, and crushed garlic into the medium bowl.  Using your hands (or a wooden spoon if you don’t like to get dirty), gently mix and knead the ingredients together until well blended.

Wash your hands.

Heat up the skillet over medium heat.  Pour in a big glug of olive oil, then let it get hot and shimmery but not smoky (about 30 seconds).  

Using the ice cream scoop or your hands, make about 10 small 1 1/2-in. meatballs, dropping them into the pan one at a time as you make them.  Roll the balls around every couple minutes and brown as many of the sides as you can.  (The meatballs do not need to cook the whole way through.  They will be simmering in tomatoes shortly and will finish cooking then.) 

When a meatball is browned all over, take it out of the skillet and place it on the paper-towel lined plate to drain.  When all the meatballs are finished, pour the hot fat from the skillet into an old glass jar or tin can, but don’t wipe out or clean the skillet.  You want to use those residual brown bits and a smidge of meaty fat to help flavor the sauce.

Put the skillet back on the stove over medium heat, then add your can of tomatoes, juice and all.  Taking the edge of your spatula, gently cut each of the tomatoes in half (watch for shooting tomato guts!), then cut each of the halves in half.

Now take the meatballs and nestle them into the tomatoes.  Sprinkle everything with a pinch or two of kosher salt.  Drizzle the olive oil and balsamic vinegar into the tomatoes.  Next toss in the two quarters of onion and two smashed garlic cloves.  Gently give everything a good mix, using the edge of your spatula to scrape up the browned bits from the bottom of the pan and mixing them into the sauce.  When everything is well coated with tomato juices, turn the heat down to medium-low, go pour yourself a glass of wine, and wait.  

meatballs simmering with San Marzano tomatoes and onions

Time is of the essence here.  The longer this simmers, the better it tastes/the more the tomatoes break down/the thicker the sauce will be/etc., etc., etc.so really enjoy that wine, set the table, and make a nice salad.  Stir everything occasionally to keep the parts all blended.  If you are in a rush, 20 minutes of simmering will suffice.  

When you are about ready to serve, sprinkle in the basil slivers and give the saucy balls one final good mix.  Scoop everything into one large bowl or individual serving bowls.  Take your hunk of Parm and your vegetable peeler and gently peel/shave Parmesan cheese into a mound on top of the whole mess.  Sprinkle everything with the baby basil leaves, and you're done.

Serve your masterpiece immediately and get ready to make some yummy noises!

Related Posts Plugin for WordPress, Blogger...

Visit Me on Pinterest!