Hello, my friends! I'm so sorry for the long silence, but I just got back from a visit to Italy where I spent three weeks just EATING. And drinking. Definitely drinking. Actually, I think I'm going through an Aperol spritz withdrawal...
But really. The trip was incredible. I've gained 6 happy pounds and a slew of new friends, who are all my next-door neighbors' family. So many of my happy memories are of sitting around their tables, eating course after course, speaking horribly bad Italian and learning that listening attentively for hours on end for any word that helps me understand what someone is saying is exhausting. But, man, is it fun!
Perhaps the biggest lesson that I learned on this trip, however, was simply to SHUT UP AND EAT. I mean it. So many times I (and I think you do this, too) tell myself that I will not like a particular food or dish, and so—ooooh, shocker—I DON'T!
At the start of this trip, I decided that I wasn't going to do that anymore. I wanted to step up my food attitude even more after my recent virginal experience with raw oysters,
so instead of negatively prepping my brain when faced with an un-experienced (yes, I made that word up) food this trip, I was going to leave my mind open upon first bite/slurp/lick/etc. and see how my taste buds responded.
And so I ate things that I never would have eaten before.
The first was flash-seared octopus that, if I had been blindfolded while eating it, I would have thought by texture and taste that I was eating a steak. Insanely delicious.
The second was horse. Yes. CAVALLO. So good I had it twice.
The last was a piping hot bowl of sheep-milk ricotta cheese with the whey, eaten by spoon with fresh bread chunks to soak up the whey. I thought I had died and gone to comfort-food heaven.
NEVER would I have eaten any of these dishes if I had followed my immediate reaction of I-won't-like-this. And, oh, what I would have missed out on!
I challenge you to try it: STOP TELLING YOURSELF YOU WON'T LIKE A FOOD.
Years ago my mother gave me a meat grinder that she found at an auction. I'm not talking a mixer attachment-kind of meat grinder. I'm talking an OLD-school meat grinder. The kind that clamps onto a table and you crank chunks of meat through it with a big, long handle.
Here...this is it:
So, for years that grinder has sat in my cabinet. Like, in the back of the cabinet. I completely forgot it existed.
Maybe it was the texture of the ground pork in the photo that jarred my brain. I mean, it looked so...meaty. It definitely did not have a smashed-meat-paste-dumped-from-a-styrofoam-tray look to it.
Anyway, regardless of how it all happened, the next thing I knew I was telling Chef Reiton that we should just grind our own pork when we make the larb recipe, and he agreed wholeheartedly. I mean, why not? We had that lonely, ill-used (as in not used) grinder just sitting there, waiting...
So, we did. We took our boneless pork chops, cut them up into chunks and put them through our old-fashioned, crank-that-handle grinder.
How's that for an action shot, huh? And look at that texture! Perfectly sized meaty bits of pork that will still have a tender bite when browned to perfection.
As I was grinding away, I was reflecting on the simple beauty of being able to see the chunks of meat going into the feed chute and knowing exactly what kind of pork I would be eating in my larb. I don't know about you, but whenever I buy ground meat at the store, I have fleeting thoughts that I don't really having any idea what pig parts went into this ground pork package in my hand... The company isn't required to say. As long as it comes from a pig, it's labeled "pork," so—I'll leave you with that thought.
And here's the BONUS big deal that I realized as I was grinding that beautiful meat: when you go to buy ground pork the next time you are at the grocery, take a look at the price of boneless pork chops or country-style ribs vs. the ground pork package. Pound per pound, the boneless pork is typically cheaper. And if you are grinding it yourself, you don't need to buy the pretty pork. You want to buy the cheaper, fattier, ugly, boneless cuts. They will make your ground meat more flavorful. Win-win for you and that ugly pork. I can tell you firsthand: the flavor of the larb with our hand-ground pork was PHENOMENAL.
So now I'm thinking of all the other meats I can grind. Cheap-o, skin-on chicken thighs for my little Middle Eastern chicken patties? WAY cheaper than ground chicken mush. And all that deliciously fatty skin that will actually add FLAVOR to the dish? Oh, heck, yeah!
And how about ground beef for my burgers? Hand me those cheap, nobody-loves-me cuts of beef, baby, and I'll grind them down to a luscious mound of beefy goodness.
All because of the new love-of-my-kitchen-life: my meat grinder.
This is going to be a quick one because...well, if you can't tell from the title of my post, I'm a bit laid up compared to my usual self. I'm only writing because, after tonight's experience, I thought maybe I should warn any of you out there who are preparing to have a hysterectomy: do NOT plan on making homemade fish stock within the first week or two of recovery.
Why?
Well, the following scenarios might give you an idea why. Imagine experiencing each one of them sequentially while sporting a 6-inch incision on your lower abdomen that has been glued shut and is surrounded by bruising the color of a yellow highlighter marker.
1.) After bringing the salted heads and skeletal remains of two large, species-less fish, two halved onions, a few sprigs of parsley, some fennel fronds and two bay leaves to a boil in a stockpot, I lift the lid to see this:
2.) Upon another stirring of the pot, I lift the lid to see a translucent ball drift to the surface, bob gently in an eddy, then lazily roll over to reveal the iridescent glow of a fish eye staring back at me.
3.) As I get ready to tuck myself into bed in the guest room on the lower level, I get a text from my husband: "It really stinks up here. I think next time we should make fish stock outside."
And now I sit here in bed with an ice pack on my belly because it hurts so much—and I'm still laughing.
So! Just a fair warning to those of you who want to have hysterectomies and then go make fish stock soon after. I caution you: Get that ice pack ready.
If you have paid attention to anything food-related this past year, you will know that one of the most popular, healthy, hippie-ish dishes to hit the scene is
The Grain Bowl.
No, it's not your grandmother's bowl of oatmeal, Cream of Wheat or farina. It is a savory dish: a concoction of fiber-full, vitamin-packed ingredients that seem to have absolutely nothing to do with each other that are all piled on top of a base layer of cooked grain—in a bowl.
I don't know about you, but to me that sounds like either an incredibly boring meal or an incredibly healthy-to-the-point-I-don't-want-to-eat-it meal. Was I born in the '70s? Yes. Did my neighbor grow pot in his backyard and eat—right in front of our boggling eyes—the slippery, slimy seaweed that we brought home from the beach? Yes. Did we eat his wife's beans and rice and love it? Yes.
But a grain bowl???
Sigh. It just seems like it's trying too TOO hard to be part of the club, you know?
But the fuss! The number of restaurants popping up and serving these damn things! I mean, seriously.
That means...yup. You loyal readers know me. I decided I needed to give it a try. (I still do have a good three pounds of Italy to come off. And it's already FEBRUARY!!! My male readers will have no idea why I just said that about February. Ladies, you know what I'm saying...)
SO. I decided to start simple. And who did I go to as my guide? My ever-faithful, besties-in-the-kitchen, Bon Appetit mag. (I'm telling you, folks. If you want to learn to cook, subscribe to this magazine. If I could figure out how to get their ad on this blog, that would be the ONE ad I would actually add so you could just click and subscribe. The folks who write it are fun. They are real. They aren't afraid to admit they are still learning in the kitchen, too. They are like US! Woohoo! So, until I can figure out how to get their ad on my blog, here's the link to GO SUBSCRIBE TO BON APPETIT MAGAZINE!)
The picture they put in the magazine that totally tempted me and made me give in can be found on Bon Appetit's website here. I used page 52 of my oh-so-special, January subscriber-only issue of Bon Appetit to guide me and gathered up my bowl ingredients:
pearled barley (it's what I had leftover from beef and barley soup)
bunch of curly kale (one with smaller, more tender stalks)
2 small sweet potatoes
half a brick of halloumi cheese (a Greek melting cheese that has a really nice salty flavor)
slivered almonds
sunflower seeds
coriander seeds
and mint leaves.
I put the barley on to boil in salted water for 45 minutes, then got to prepping the rest of the ingredients so they were ready to layer on after the barley was cooked, drained and cooled.
The sweet potatoes were scrubbed, dried, cut into 1-inch cubes, tossed with olive oil, salt, pepper and a little paprika (I like hot but regular, ol' sweet is good) and roasted for 30 minutes at 400° F in my toaster oven.
The curly kale leaves were cut from the stems (toss the stems), sliced crosswise then lengthwise, rinsed, dried and dumped in a bowl. I sprinkled them with a bit of salt and cider vinegar, then massaged them gently for about 30 seconds to start breaking down their tough fibers. The vinegar would do the rest while I moved on to my next ingredient.
The slivered almonds, sunflower seeds and coriander seeds were tossed on medium heat in a tiny bit of olive oil until they were golden brown and the coriander seeds started popping (about 1 minute), then drained on a paper towel and sprinkled with salt and pepper.
The mint leaves were rinsed, dried, and torn from their stems (stems tossed).
Now it was time for the dressing: In a small jar, I shook together 6 oz. olive oil, the juice of 1 lemon, 1 tsp. Dijon mustard, 1/2 tsp. honey, salt and pepper. This was more than enough dressing, but extra can be used on salad later.
At this point the barley was ready: it had a nice chew to it. It was drained then scattered on a towel-lined baking sheet to dry (I have an abundance of flour sack towels which I use for purposes such as this, not just for drying my hands. I go through a dozen in about three days. Just don't wash them with fabric softener!).
While the barley cooled, I fried the halloumi: I heated up a little bit of olive oil in a small cast-iron skillet (enough to just coat the bottom of the pan), browned both sides of the cheese, then sliced it.
Assembling all the parts into a bowl took all of one minute: the barley lined the bottom of a pasta bowl and was topped with a pile of kale greens, a scattering of roasted sweet potatoes, a few slices of fried cheese and a sprinkling of toasted seeds and mint leaves. It all was drizzled with the lemon-Dijon dressing, and voila!
My own, personalized grain bowl!
I think I had had a bit of wine at this point or I was really excited about my creation because I didn't realize until the next morning that I had gotten REALLY close on this pic. But, oh well. Because after I took my first bite of my first grain bowl EVER, I wanted to get that close and stay that close.
Does that mean it was delicious?
Yes.
A party in my mouth?
Yes!
A marching band of foods that combined into a perfect explosion of flavor and texture symmetry?
YES!!!
I think you know what I'm going to say to the "Will I make this again?" question. And you know what the beauty of this meal is? The parts can all be made or prepped ahead and simply reheated or quickly cooked as needed. A weeknight dinner that will make you happy in, OH! So many ways!
So, hippies! Rejoice! You converted a total skeptic, and I will declare it loudly to the world:
I LOVE GRAIN BOWLS!!!
But Dwight, wherever you are: the raw seaweed?
Hell, NO.
Ready to give the grain bowl a try? Leave a comment and let us know what you did! Go crazy! Use what you have and what you like! You'll give us some more ideas of things to try!
About a year ago I wrote a post about being smart about how you shop for produce. And while I shop for a lot of produce, there is another way that I learned to be smart about my food (and this I do religiously because it saves me so much time, money, waste and fridge space!)
What is my "brilliant" idea?
I write a weekly dinner menu and
a corresponding shopping list of ingredients.
Okay, when you think about it, it's not so brilliant. It's common sense. Going to the grocery store and standing in the middle of the aisle, thinking, "What am I going to make this week?" (which is what I used to do every week) really doesn't make any sense at all. I would end up forgetting what I was going to make for dinner later on in the week because I never had actually written down the ideas that I had had to brainstorm in the midst of the grocery store. Or I would think I had ingredients that I didn't which I then needed to go out later in the week after work to go buy. Or I would get stuck making the same damn meal over and over again. Or I would end up buying a whole lotta crappy (and I mean CRAPPY) boxed or frozen previously-prepared-and-therefore-processed-with-tons-of-sugar-sodium-and-chemicals foods that literally were hurting me from the inside out. (And, no, I'm not being paranoid. Talk to a chemical engineer about what goes into our processed foods and see what she thinks about processed foods.)
I think I'm not the only one who used to do (or still does) such a ridiculous thing on a weekly basis. I think a lot of us do that very thing because we are pressured for time.
Folks, taking half an hour to an hour to plan is going to save you the same amount of time in the grocery story as well as much, much more. I promise.
SO. Here's what I do:
On Saturday or Sunday morning, as I sit with my coffee, I interrogate Chef Reiton and peruse my foodie magazines/cookbooks to decide what I/we want to make for dinner every single night that week. I write down the meals we decide on in an organized list on my phone. Below is an example. I keep a template in Notes and then update it weekly. (If I want to save a particular week because I love the meals I made and want to save them as a reminder of what to make again, I just copy and paste the whole note into a separate Weekly Dinner Menus folder.)
As I am writing up my list, meal-by-meal, I keep a separate, running "To Get" list where I write down each of the ingredients I need for each recipe (this may require popping up and checking the fridge to make sure I really do have Worcestershire sauce).
Here is a snapshot of what I have on my "To Get" list today. Not much is on there because I only have a few random things left to get (thanks to crappy selection on earlier shopping trip and a few random things that popped up):
I try to enter the ingredients in coordinating sections to save me time running back and forth in the grocery store: produce section first, meat next, center aisle items next, then the dairy section.
Since the list is on my phone, I never forget it. And as I shop for the ingredients, I delete them from my phone.
On the occasion that something pops up (the neighbors ask us over, we do an impromptu night out, I decide we need to eat leftovers, whatever), I bump the dinner list down a day by doing a quick copy-and-paste.
Planning my menu out for the week helps HUGELY with the following:
I rarely have to go to the grocery store during the week, giving me extra time at home in the evenings.
I always have everything I need to make the dinner I want.
I save time at the grocery store because I already have an organized list of what I need, so I'm in and out as quickly as possible.
I save money and waste because I don't buy foods that I end up not using and throwing away.
I usually buy ONLY what is on the list, saving me money because...it's not on the list, so I'm not buying it—unless it is something I will use later for sure AND it is on special. This way I know that I'm still saving money in the long run.
I save my health because I don't walk down the junk food aisles and buy bad-for-my-bod processed foods that are SO tempting when I walk down those aisles list-less-ly.
I save fridge space (and my sanity). You will be amazed at how streamlined your fridge gets when you only shop for what you need!
I really, REALLY encourage you to give this a try. Not only have I learned how much time, money, etc. I've saved, but it's also done so much more for me as a cook and a lover of food:
I actually try those recipes that I've bookmarked/dog-eared/torn out of a magazine.
I broaden my tastes and try recipes using ingredients from countries that aren't American (no ingredient is hard to find anymore, folks. Shopping on the internet has existed for decades now...)
Cooking has become a fun and rewarding (I get to EAT!) way to explore and push myself to learn new techniques, ingredients, flavor pairings, etc.
If you do take this step into streamlining your schedule and amping up your cooking, leave a comment below. We'd love to hear how you've adopted this strategy and what it's done to help you!
The next time I poopoo some "old-fashioned," "time-consuming" technique that our grandmas and their grandmas have done for centuries...
TELL ME I DON'T KNOW WHAT THE HELL I'M TALKING ABOUT.
Like, seriously. Geez Louise.
Backstory: my stepson is coming to visit. I want to make him his favorite dessert of all time: fresh peach pie. This entails peeling and cutting up eight big, fat peaches.
In the past, I've "known better" because "the-newfangled-way-has-to-be-better," so I've peeled the peaches with one of these (called a "vegetable peeler"):
(No, I don't know why it is on a chain, either.)
Peeling peaches "my way" resulted in:
mangled peaches
peaches being shot across the counter or into the sink after slipping from my grip
a dramatic loss of perfectly good peach flesh that did not end up in the pie (or anywhere else delicious and purposeful)
Clearly, my way is better than Grandma's, right???
Sigh. I'm such an arrogant ass.
Thank God for waves of "you-know, maybe-I-WILL-try-that-blanching-thing-that-all-the-old-recipes-tell-you-to-do..."
Folks, this is what you get when you blanch and ice peaches before peeling them:
I KNOW, RIGHT???? The skin peeled off in sheets like paper! No loss of deliciousness! And it would have taken me the SAME amount of time to mangle the peaches with a vegetable peeler than it did to blanch and peel them.
What did I do? Well, by gum, I'll tell you, even though I'm no grandma!
Boil a small pot full of water that is deep enough to cover the largest peach.
While you are waiting for the water to boil, take a paring knife (in the picture above) and carefully score a big 'X' in the bottom of each peach (opposite the stem side).
Now get a big bowl of ice water.
When the water is boiling, gently drop in a peach. Slowly count to 30 as you gently move it around to evenly boil all sides. Remove the peach and drop it in the ice water.
Drop another peach in the boiling water. Count to 30. Remove the peach and drop it in the ice water. Remove the previously iced peach and put it on a plate/cutting board.
Repeat until all the peaches are blanched.
Pick up the first peach you blanched. Take the tip of your knife blade and slide it under the peach skin where it comes to one of the points on the 'X.' Place your thumb on top of the skin (so the skin is sandwiched between the knife blade and your thumb) and gently pull downward. Ta-daaaaa!!!! Repeat all the way around the peach.
Repeat with all the peaches.
Oh my word, my world was changed. My arrogance was duly spanked, yes. And it did smart a bit...
A sweet, delicate specimen, it grows from long and leggy stems, protected by lily pad-like leaves.
Loved by bees but hated by garden pests, I plant them amongst my veggies in my garden boxes in order to deter bugs that will destroy my tomatoes, zucchini and cucumbers.
But I have to admit: I also plant them because I like to EAT THEM.
There is nothing more beautiful on a summer dinner table than the bright splash of flowers on your cool, green salad.
And there is nothing more delicious than the peppery bite of a nasturtium flower crunching between your teeth.
Okay, well, maybe this garlicky, paprika-y, finger-sucking-good chicken we experimented with last night:
Chef Reiton and I intend to experiment further on wings, instead. (We'll get back to you.)
The next flower we intend to devour? These babies:
Squash (or zucchini) blossoms. When I can't take eating one more damn zucchini this summer, I will be plucking these gorgeous blooms then stuffing and frying them in an attempt to mimic one of the jewels of our Besh Restaurant Honeymoon. (This, too, we will keep you informed on.)
Also waiting to be eaten in my garden? Violas.
Time for a crash-course in sugaring flowers for a cake? I think so! (Aaaaaaand, I'll keep you posted on that, too.)
I woke this morning to dreams of last night's dinner—the dinner I emergency-posted last night in a fit of delirious food love. Our kitchen still held the faintest smell of smoky chipotle as I came downstairs for our morning coffee. If we had been hungry, I would have pulled out a bit of the barbacoa, heated it up in the skillet and cracked an egg on top for Chef Reiton.
But we weren't hungry at four in the morning, so instead I uploaded our dinner photos from last night and dorkily reminisced over how fantastic it was.
Our menu? It was an eclectic compilation of Latin American foods:
Puerto Rican tostones with mayo-ketchup
Mexican barbacoa served on homemade corn tortillas
Caribbean cucumber and mango chow
I definitely can't say the dishes we served were all 100% authentic, but I can say that, holy cow, I didn't want to stop eating!
This dinner, believe it or not, was actually super simple and quick. The barbacoa is made in the crockpot; the tostones fry up (twice!) in about 5 minutes total once the oil is hot; and the chow takes about 10 minutes to assemble before it chills in the fridge. The longest part is the tortilla preparation, but that—that I will get to. Save the best for last...
First, the chow. I may have already mentioned this salad-of-sorts in a previous post. I've certainly made it several times already since it was published by Bon Appétit in their April 2017 issue. The recipe is from Miss Ollie of Miss Ollie's in Oakland, CA. It has an easy-to-find list of ingredients and can be made in about ten minutes. The best part is that it can be made a few hours ahead and chilled in the fridge while you are making the rest of your dinner. I love it for its sweet but peppery mango, the heat of chiles, the coolness of cucumber, and the tang of lime. The cilantro allows you to serve it with a variety of ethnic foods that love cilantro: Thai, Mexican, Caribbean. It's simply fantastic.
Next, the tostones. Tostones are thick slices of green plantain that have been fried, flattened, fried again, then sprinkled with adobo seasoning and served with garlicky mayo-ketchup. We learned how to make these babies when we recently had our friend Chaz (JetBlue's BEST flight attendant!) over to cook a Puerto Rican dinner (yes, I will blog on that soon!).
Not only are these just flat-out fun to make (no pun intended, really!), they are absolutely delicious and healthy, with about 2 grams of dietary fiber for half a green plantain and a low glycemic index. And as for the frying, if you still think fried food is horribly unhealthy, that's because—sorry—you are doing it wrong. Food properly fried barely absorbs any fat; the water in the food immediately starts to steam when the food is dropped into the screaming hot oil, pushing water out of the food so that the fat can't soak in. Don't believe me? Read the transcript of a Good Eats episode by Alton Brown, one of my favorite food scientists, who explains it in a more entertaining way. You can also do a bit of research on this. You'll find that science is right. Thank you, science.
Now for the barbacoa. I have no idea who Queen To Y'All is, but I want to thank her for posting this recipe on Recipezaar.com years ago and making me and my friends extremely happy. It was a required party staple during my years in Chicago. Now you can find the recipe under "Chipotle Roast for Tacos and Sandwiches" on Food.com. It's awesomely simple. Dump all the ingredients into the Crockpot in the morning, set her on low, and walk away until it's time to prep the rest of dinner. It will sit and simmer happily, silently taunting you, wafting smells of cumin and spice all day long. When it's time to eat, stir it all up with a slotted spoon and put it on the table. That's it.
We are now left with the best for last...
I've never in my life eaten a fresh corn tortilla. Even the Mexican restaurants that I've visited use prepackaged. You can tell: they are rubbery, pretty darn tasteless, and absolutely perfectly round. It's actually kind-of too bad I made these (in a good way) because after eating them, I don't know that I'm ever going to be able to eat another commercially made tortilla again.
Corn tortillas may somehow look complicated (like anything does when you've never made one) but in reality are super simple to make. They are made with a fine corn flour called "masa harina" (I used Bob's Red Mill—totally gluten-free, by the way, and you can find it in most grocery stores), salt and water. I used my stand mixer to blend the ingredients into a smooth paste, then Chef Reiton formed them into little balls.
We experimented with different ways to roll them out. Chef Reiton started by rolling them on a sheet of parchment
but we decided that they tore less and came out rounder if they were flattened with my palm between two sheets of parchment and then rolled gently.
We also learned that the little balls need to be kept under a damp towel while the tortillas are being rolled out. They started to dry out rather quickly, making them break and tear when they were rolled. Because of this learning curve, I ended up actually dipping the last several balls of dough into a bowl of water twice then rekneading them to soften them back up again.
With our cast iron skillet smoking hot, we cooked up the tortillas, one minute a side, finishing with a final thirty seconds after the second flip. Later we realized we should have had two skillets going at a time. Duh. It would have gone faster.
The recipe for these tortillas came from a wonderful cookbook by Marilyn and Luis Peinado called Bienvenidos to Our Kitchen: Authentic Mexican Cooking. The book is loaded with every single authentic Mexican dish you've ever eaten plus some.
As Chef Reiton and I sat sipping our rioja at the end of the meal, we couldn't stop oohing and ahhhing over our empty plates. I do not mean this as a boast, but how could we have made probably the best Latin meal I have ever had in our North American kitchen?
The answers are simple:
We are willing to experiment making new foods.
We are willing to mess up and learn from our mistakes for the next time we try it.
We are into saving money while eating food that is usually better than a restaurant's.
Do you want to know how much our dinner for two last night cost us? Actually it's probably closer to three dinners for two, thanks to the leftovers. Let's assume that going out for an average Mexican dinner costs $60 for two people. Sound reasonable? Maybe even a little cheap if you throw a few margaritas into the bill?
Well, here's what I spent at Market Basket on the ingredients that make three full meals for two (and I'm even going to assume you don't have staples like cumin, garlic, chile powder or oil). I'll even throw in the bottle of wine we had with dinner:
2 lb. chuck roast from Walden Local Meats, my pasture-raised meat share: $20.00
can of green chiles: $.99
can of chipotle peppers: $2.69
onion: $.43
can of salsa verde (even though mine was free because I used my own): $1.29
beef consumme (used my own, again, so technically free): $1.89
garlic head: $.40
cumin: $1.59
chile powder: $1.29
adobo seasoning: $2.79
green plantain: $.33
corn oil: $3.09
masa harina: $2.99
hothouse cucumber: $.99
mango: $.99
cilantro: $.99
shallot: $.25
bottle of wine: $18.00
TOTAL: $60.99
So, for a more expensive, pasture-raised roast, a good bottle of wine and ALL the ingredients for the meal, I spent the same as the cost of a Mexican dinner out—and I'll actually get THREE dinners for two out of last night, not just the one. AND my homemade dinner was SO MUCH BETTER than the food you get at a restaurant.
And it's not ME who is awesome! It's the FOOD!!!
Sigh.
I'll calm down. But, folks...this is why I cook. And it's why you should, too. It's cheaper. It's healthier. It's waaaaaaay deliciouser. (I know.)
So. Think about what foods you love. Find the recipes. Buy the ingredients. Make the meal. Even if you "screw up," it's going to be good.
A while back I posted a recipe on Ginger-Lime Shrimp. I promised you all at the time that I would create a video showing how exactly to "devein" (or de-poop, really) the little suckers without tearing into the entire back, destroying the aesthetic quality of a beautifully curled, perfectly cooked shrimp.
Well, a year later, here I am. It's ridiculous, I know, but there were just too many times that I was peeling and deveining shrimp while Chef Reiton was still at work, and my camera is too heavy for my tripod, and... Ugh. Excuses. But good ones, I swear.
Before I show you the video, I want to descriptively run through what I do, as well as show you a few pictures, in case it is unclear in the video.
And, remember, this is how I do it. Technically, you don't even need to devein your shrimp. You can eat the whole damn thing—head, shell, guts and all—if you want. I don't want to, so the following video shows how I choose to prepare my shrimp, fresh (not frozen) and beheaded by the local fishmonger.
To begin with, you first must PEEL the shrimp (unless you are having guests peel their own at the table during a casual dinner). I generally do this by pinching the legs between my thumb and the side of my pointer finger and tugging them sideways. This usually loosens the shell, too. Then I peel off the shell surrounding the shrimp and gently tug off the tail casing. You CAN leave the tail on if you prefer a kind of "handle" on your shrimp if it's acting as a finger food.
After your shrimp are peeled, it's time to devein. When you buy shrimp, the entire head and guts portion are already cut off and discarded—except for the intestine. "Deveining" means that you are removing the intestine that runs down the back of the shrimp. You do NOT need to do anything to the dark line running along its belly: it's just a nerve. See the shrimp diagram below for clarification (thank you, shrimp-culture.blogspot.com):
Yes, you can buy deveined shrimp at the store, but this usually means the shrimp are handled by a machine which leaves a huge slice down their backs. They are typically then frozen into an unsightly mass of flayed, frost-bitten flesh. Such shrimp still taste and look just as frost-bitten and unsightly after they are prepared, and being a cook that likes to make my food not just attractive to the tongue but also to the eyes, I have learned to buy fresh shrimp and peel and devein them myself. Does it take extra time? Yes. But I'm not making shrimp every day, so I'm willing to put in the extra work when I need to. The sweet tenderness of un-frozen, un-molested shrimp is definitely worth it.
To devein, you will need a paring knife and a colander. I usually do this activity over a sink with running water to rinse the shrimp or knife as needed. You will be inserting the blade of your paring knife BLADE UP into the shrimp.
The intestine USUALLY shows as a dark "dot" in the neck of the shrimp. This is the start of the intestine. What makes it dark is the poop.
Just below and beside this dot is where you are going to insert the tip of the knife.
Only insert about 1/4-inch of the knife tip and slice up. With a little bit of fishing with the knife tip, you should reveal a section of the intestine. Using your thumb and fingertip, grasp the end of the intestine and pull firmly but gently. If you yank, you will snap the intestine and have to slice further down the back to reach the rest of it.
Let me show you with a video. It's not professional, but it will at least give you an idea of what I'm doing.
If you are even more confused than ever after watching the video, please feel free to ask me a question in the comments section below. I will do what I can to help. Or you can send us a picture of your beautiful, poop-free shrimp! Yippeeeeeee!
Last night I sat outside at the dinner table, noshing with utter abandon on this glorious baba ghanoush made straight from the grill (thank you once again, Melissa Joulwan!), when I had an epiphany:
It's summer, it's hot, and cooking outside on the grill is really the way to go. Food magically tastes twice as good cooked over smoky charcoal. But I have to be fair to Grillmaster Reiton. Standing over 600° coals in 90° weather night after night probably isn't as much fun as sitting on the deck with a chilled glass of rosé in hand (which is what I do). Sooooo (here comes the epiphany)...
Why not grill several meals' worth of stuff all at once? Use those coals once for a week of food?
It's kind-of like that cooking fad that my mom and aunt got into about ten years ago, where you would do this huge shop and cook like a mad woman for an entire day to make meals that would last you a month.
Except I love to cook. And I love to eat fresh. And, call me impractical or inefficient or what-have-you, I don't really freeze a lot of food. Maybe I'm doing it wrong, but I find that the freezer changes the texture of foods in ways that I don't like, so instead I tend to grocery shop for the week.
So if I shop for the week, why not grill for the week?
For example, my dinner menus for this week call for a number of things that I could have grilled last night and then reheated or eaten cold. Here's a snapshot of my notes for dinner this week:
(Yes, I had a dinner party Sunday!)
A more efficient grill could look something like this: before Grillmaster Reiton grilled our chicken and eggplant for last night's dinner, we could have grilled the ribs (later reheated at low heat in a foil packet in the oven), the butternut (finished cooking the mash in the oven), the steak (grilled slightly underdone and reheated it in a cast iron skillet) and the burgers (also slightly underdone and finished in a skillet).
Then Chef Reiton could also be sitting with a chilled glass of rosé, eating this silky, smoky dip with crisp, cool veggies as an appetizer, now that a decent chunk of time was added back to our summer evenings.
I think I'll give this a go and see what we think, then I'll get back to you to let you know if it's successful.
I hope it is. I mean, really, I'd rather not be drinking alone...
If you've read my blog over the years, you know that I am in chef-love with two people: John Besh (our honeymoon of foodies) and Mark Bittman. Either one of them I would fly five thousand miles to cook with and welcome into my kitchen any time. I imagine that sharing a kitchen with these guys would be relaxed, full of laughs and, yes, a major learning experience. But a good one.
Just this past week I made (yet again) Besh's chicken and sausage gumbo from his latest cookbook, Besh Big Easy. Even Marley, our dog, loves it. And Bittman? Bittman is the most popular reference book in our house. We crack open (and have given away) How to Cook Everything more times than I can count.
One of our go-to recipes of Bittman's is his Caesar salad. It's the real deal, with anchovies and lemon, coddled egg and big, fat croutons. The problem: it does take, like, 10 minutes of forethought to make it (coddling the egg, not to mention the croutons), and the other night, I didn't have an extra 10 minutes. I needed to throw everything in a jar, shake it up, and be done. Company was coming.
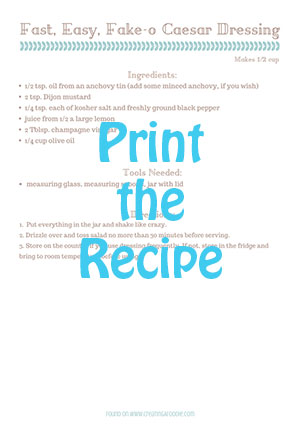
So I cheated—big time. Yes, I used romaine lettuce and lots of finely grated (with a pinhole grater) Parmesan cheese, but no croutons. And the dressing? This is what I threw together:
1/2 tsp. oil from an anchovy tin (if I had time, I would have minced up an anchovy, but I didn't)
2 tsp. Dijon mustard
1/4 tsp. each of kosher salt and freshly ground black pepper
juice from 1/2 a large lemon
2 Tblsp. champagne vinegar
1/4 cup olive oil
I shook that like crazy in a jar, and voila! Fake-o and fast Caesar dressing—liked so much by my guest that I was asked for the recipe, so here you are!
Things I think I would try next time, continuing in super-fast, cheater fashion: add a bit of garlic powder to get a bit of that garlicky flavor in there. And maybe a couple drops of Worcestershire sauce to add a little depth. Bittman puts that in his Caesar dressing, and I think that's why.
Speaking of salad dressings, if you want to nix another item from your shopping list because 1) it's full of crap and 2) it's a total waste of money, make it salad dressing. Spend the money, instead, on a variety of different vinegars (balsamic, red wine, white wine, champagne, rice wine, apple cider) and some Californian olive oil (don't buy Italian unless from a trusted source; you aren't guaranteed to be actually getting what you think you are buying) and make your own at home. Dressings are generally about 3 parts oil to 1 part acid plus a little bit of an emulsifier, like Dijon mustard, egg, honey, mayo...then seasonings. Even drizzling your salad with olive oil, tossing, then drizzling with a little vinegar, and tossing again is shockingly good. My Grandma Paola taught me that.
And something else I have learned to do that really makes a difference with salad: salt it, don't just pepper it. I actually take a pinch of kosher salt and give my salad a decent sprinkle before I toss it. It's amazing how it really brings out the flavors of the dressing and whatever you've got in the salad. Give it a try. I think you'll like it.
So! Screw bottled salad dressing! Print the recipe below, and the next pizza or lasagna night you have where you find yourself suddenly scrambling for a green salad, chop up some romaine, grate or shave on some Parmesan cheese and throw this dressing together for a last-minute Caesar; I think you will find it's a pleaser!
I was just about to write a love letter, but I realize I do that a lot, so I decided that this post is simply going to be a request/command/plea to all of you out there (especially RESTAURANTS) who are still using Martini & Rossi for your sweet vermouth:
PLEASE, STOP.
I want to introduce you to a dear friend of mine. She is a game-changer. A stop-you-in-the-middle-of-your-sentence-upon-tasting-her-for-the-first-time delight. A moment you will look back on and wonder at your cocktail life before it. She is:
She has beautiful depth of color and flavor, and, while she is a bit more expensive and elusive than your Martini & Rossi crap (I can say that; I drank it for WAY too long), I PROMISE you—she will change your Manhattan (and every other cocktail she is in) forever. When you find her, BUY HER.
And then comment here and tell us all what you used her in and how much more amazing it was...
Special thanks and love to Richard and Drew (the other R & D) for introducing me to her. Sigh.
Many of you out there have heard of the Paleo diet, a way of eating that eliminates foods that are "new" in the agricultural evolutionary scheme of things which supposedly freak out our bodies and make a lot of weird, unhealthy crap-ola happen: potentially things like lupus, Crohn's, rheumatoid arthritis, cancer... It's been getting a lot of research, and while both sides vehemently argue its validity, I have to personally say that I have felt much, MUCH better by drastically cutting back on two of the big "no-nos" of the Paleo menu: grains of any sort and dried legumes (that includes peanuts).
Also included on some Paleo-ers "do-not-eat" list are white potatoes. I believe the argument is that the glycemic index of a white potato is quite high. With that being said, I still eat white potatoes; I just eat them a LOT less often. What I do instead is what a lot of Paleo-ers (and a lot of diabetics!) do: I make "fauxtatoes."
What the hell, you ask?
I know. It's hokey. But here's what it is: it's cauliflower, generally steamed and then puréed to a smooth consistency to resemble mashed potatoes.
I've been making it for several years now, and I like it. I do. But I've always been a bit annoyed with one thing (which if you've tried it, you probably know what I'm about to say): the "fauxtatoes" always come out looking a bit watery and loose. They don't have that oomph that mashed potatoes do. And I WANT that oomph. I like when they plop onto my plate, not ooze.
SO. Last night I was making fauxtatoes to accompany some chicken scallopini and sautéed Swiss chard when it suddenly hit me: why don't I try drying out my cauliflower before I purée it???
DUH.
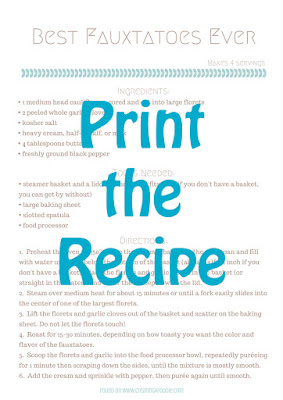
So, here's what I did: I placed my cauliflower florets (a medium-sized head, cored and cut into large florets) plus two peeled garlic cloves into a steamer basket, sprinkled them with a bit of kosher salt, and steamed them for about 15 minutes (or until I could easily slide a fork into the center of the largest piece).
I then spread out the florets on a baking sheet, making sure to have room around each piece so that they weren't steaming each other. I sprinkled them again with a little bit of kosher salt.
I roasted the florets in a 350° oven for 30 minutes without tossing them until they were golden on the tops and nicely browned on the bottoms.
Then I scooped the florets and the garlic cloves into my food processor, dropped in half a stick of butter (true Paleo-ers would not use any dairy), ground in some freshly ground black pepper, and puréed for about a minute. I scraped down the sides and puréed for another minute. I kept repeating this until the mixture was almost completely smooth. I then added a tablespoon-ish splash of cream and puréed until the fauxtatoes were perfectly smooth.
Here's a glamour shot with lots of Irish butter:
When we sat down to dinner, I asked Chef Reiton if he noticed anything different. The first thing out of his mouth: "The consistency! These are like potatoes!"
YAHOOOOO! My experiment worked! But we still brainstormed things we will try next time. What if I didn't roast the florets so long? The browning definitely affected the color of the fauxtatoes, not to mention the taste. While the taste was good, we were interested in seeing what it would be like to roast them just long enough to drive off that excess water, maybe when the tops were just beginning to become brown in spots.
We also thought about eliminating the garlic. Or maybe adding a bit of sour cream instead of cream? How about some herbs? So many things to try! All will taste good, I know, but it will be fun to experiment.
SO. If you've got some diabetics coming to Thanksgiving dinner, or some Paleo eaters, give these fauxtatoes a try. They may just be the best non-potato potato you've been dreaming of! Print the recipe below, and, please, feel free to share what you think in the comments!